Tuesday, April 23, 2024

Mushroom Embroidery

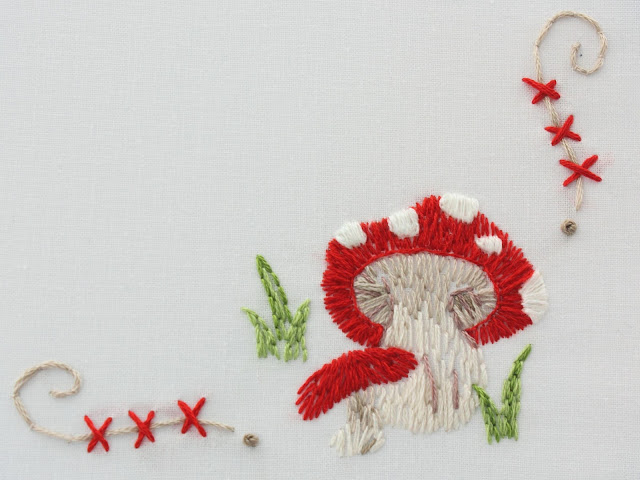
This sweet mushroom border is from  my Owl embroidery pattern set.  This was on my work-in-progress list since last November!  I worked a bit on it this week and finished it. 

The stitches I used are Long and Short Stitch for the mushrooms, Satin Stitch for the mushroom spots, Back Stitch for the grass, Cross Stitch for the red x's, Couching Stitch for the swirly lines and French Knots for the dots.

Here are the floss color numbers:


Thursday, April 11, 2024

Butterfly Garden Embroidery Projects

 I finished the stitching on another of the Butterfly Garden embroidery pattern motifs.  


You may remember that I previously shared this project from the same pattern set:


Now I have completed the other one. 

Here is the list of stitches I used.  To give the butterfly wings some dimension and variety, I used four  different stitches. Chain Stitch, Double Knot Stitch, Stem Stitch, and Straight Stitch.  The decorative parts of his wings are Running Stitch, Satin Stitch and Straight Stitch.  His antennae are Pistil Stitch:


The raspberry colored circular flowers are Spider Web Filling Stitch with French Knot centers.  The stem is Double Knot Stitch.  The rest of the raspberry colored flowers are Lazy Daisy Stitch.   The pink flowers are Straight Stitch petals and Stem Stitch Stems.


For the large green frond I used rows of Straight Stitch for the wide base and then Stem Stitch for the narrow curling top. The blue flower is Stem Stitch Stem, Fish Bone Stitch leaves and French Knot berries:

The color palette is very different.  Here are the floss colors and numbers.


Thursday, April 4, 2024

Two-Sided Plaited Spanish Stitch


This is the latest stitch I have learned on my 100 Stitches journey.  As you can see from the title, this is the Two-Sided Plaited Spanish Stitch.  This is a decorative border stitch.    

I learned this stitch from the book Embroidery Stitches by Mary Webb.  According to the instructions, this is a stitch worked from left to right in two rows.

To begin, I used a ruler to draw three guidelines - top, center and bottom.  I started on the left side of the bottom line: 

I brought the needle up through the fabric and pulled all the way through.  Next, I went back into the fabric at a slant - the book suggests using an even weave fabric so that you can count the "spaces" created by the woven fabric.  In the case of this stitch, they counted five spaces vertically and three spaces horizontally to make their slant. 

I pulled the thread all the way through and then started my next slanted stitch from the bottom row:

and continued to the end of the row:

For the top row, I made the same slanted stitches, 

making sure they met on the middle row: