Showing posts with label Insertion Stitches. Show all posts

Tuesday, March 12, 2013

100 Stitches - Knotted Insertion Stitch


Time to show the latest stitch I have learned on my 100 Stitches journey.  This lovely stitch is the Knotted Insertion Stitch:
 

This is an insertion stitch and just like the Buttonhole Insertion and Twisted Insertion Stitches,


the purpose of the stitch is to hold two pieces of fabric together:


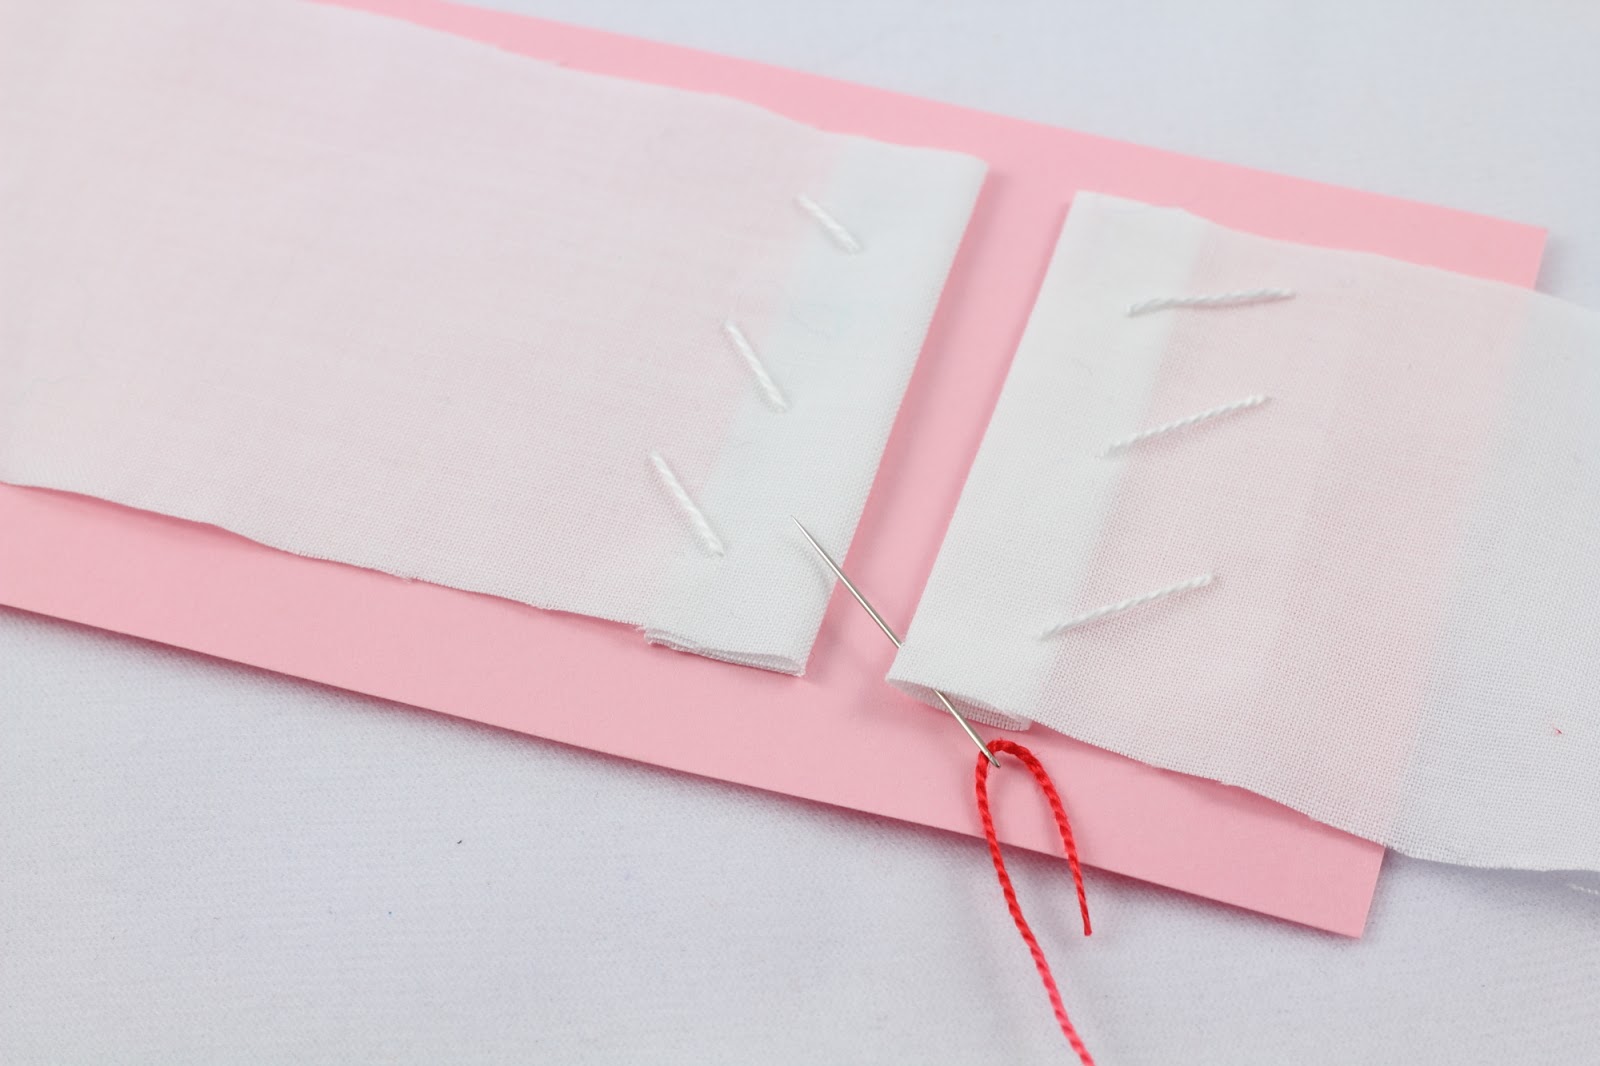
To set up this stitch, I took two pieces of fabric, and folded an edge under on each piece.  This is just for my demonstration, if I were doing this on a project, I would have hemmed each edge!   I lined the two pieces of fabric up on a piece of stiff paper:


I spaced them about 1/4" apart and then stitched the fabric to the stiff paper with some white pearl cotton floss:


To stitch the stitch, I used some different pearl cotton floss, this pretty blue - this is color variations #4025 by DMC.


I knotted the end of the floss and came through the fabric in the folded over edge.  This will hide the knot:


Then I pulled the floss all the way through:


Now according to 100 Stitches, this is just making Buttonhole Stitches on the edge of the fabric, alternating side to side and adding a second stitch over the loops.  So I set up my needle just like a Buttonhole Stitch.  I went into the fabric and came back out right on the folded edge.  I didn't go through both layers of fabric just the top layer.  I pulled the needle all the way through and passed over the working thread:


This left me with two threads - one on the top and one emerging from the fold:


Next, I brought the needle around and under the two threads:


I went under those two threads but over the working thread - this makes a sort of loop:


I kept pulling and a knot began to form:


Done! 


Now I went to the opposite side and do the same steps: set up like a Buttonhole Stitch:


Pull through:


Bring the needle around and go under the two threads:


but over the working thread:


and pull through to form the knot:


Then back to the opposite side and start again:


I just kept stitching on alternate sides:


until I was at the end of the fabric.  100 Stitches didn't explain how to finish this, so I just went back into the fold of the fabric at the end and tied a small knot to secure my floss.


Then I cut away the stitches that were holding the fabric to the paper and admired the finished stitching!


I really enjoyed learning how to do this stitch.  I think it is so beautiful.  
This stitch is in the Insertion Stitches category and is #100 on the 100 Stitches list.  I didn't do these stitches in any sort of order, so I am not finished with the list yet - I still have 22 more stitches to learn! 

Thursday, January 17, 2013

100 Stitches - Twisted Insertion Stitch

Time to show you the latest stitch I have learned from 100 Stitches.  This is the twisted insertion stitch:


This is a stitch used to join two pieces of fabric together:


I used the recommended technique of first stitching the fabric pieces to heavy paper.  Remember when I did this for the Buttonhole Insertion Stitch? This is the same set up but for the Twisted Insertion Stitch, I spaced the fabric edges about 3/8" apart.  I folded under the fabric edge to act as a hem and then stitched the two pieces of fabric to the paper.


To demonstrate my stitch, I am using some perle cotton floss - DMC color variations #4210 - radiant ruby :)


The first step is come up through the fabric inside the hem.  This will hide your knot.


Pull the thread all the way through and go into the opposite piece of fabric.  Go into the fabric from the underside and emerge on the top side of the fabric.  Pull the thread all the way through.  For this stitch, you will always be entering the fabric from beneath:


Now these next steps I found a bit confusing...according to the picture in 100 Stitches, I am doing this correctly, it just seems sort of awkward the way the needle wraps around the thread.  I think it will be difficult to explain in words but hopefully my pictures will make sense!  The needle passes under the thread that just went into and out of the fabric:
 

Then straighten the needle and bring the tip of the needle over that same thread...?!  Better just look at the picture!


Once the needle is in this position, go into the opposite fabric from underneath:


and pull the thread all the way through.  This creates a little twist on the opposite fabric:


Now bring the needle around and once again bring the needle tip under the thread and then over the thread:


Bring the needle into the opposite fabric from the underside and pull all the way through:


Just keep doing that side to side


until you have joined the two pieces of fabric together:


Cut the stitches holding the fabric to the paper and admire the result!


I think this is really a beautiful stitch:


This is #99 on the list and is found in the Insertion Stitches category of 100 Stitches.

Monday, December 17, 2012

100 Stitches - Buttonhole Insertion Stitch

This interesting stitch is the buttonhole insertion stitch. I am starting a brand new section of 100 Stitches - the Insertion Stitches category.


This stitch is for joining two pieces of fabric.  I practiced this stitch several times with disappointing results.  I had such a hard time keeping the two pieces of fabric the same distance apart while stitching them together.  I kept looking at the example in 100 Stitches and finally noticed that they recommended going back to the front of the book and reading the special instruction notes on Insertion Stitches before working them!  The special instructions are to stitch your fabric to a piece of stiff paper and then work your stitches.
For my demonstration, I just turned under the raw edge of the fabric 1/2" to act as a hem.  If I were making a finished product, I would actually hem each piece of fabric:


I used this green card stock and pinned my fabric in place at about 1/2" apart.   Then I stitched the pieces of fabric to the paper, leaving the folded edge free:


Next, I drew some guide lines.  I drew mine about 1/4" in from the folded over edge.  This line will help me keep my stitches the same size!


This stitch is really simple.  It is sets of four buttonhole stitches worked alternately on the two pieces of fabric.  Just start the first buttonhole stitch at one end - I hid my knot under the folded edge:


I stitched the buttonhole stitch, first on the left side:


and when I had four done, I moved to the fabric on the right side and did four stitches:


When those four were finished, back to the fabric on the left:


and so on until the two pieces of fabric were joined:


Then I took the joined fabric off the card stock and washed out the marker lines:


Beautiful! I think this stitch would be perfect for joining panels on a table runner or table cloth.  I can't wait to try it on a real project. 


This stitch is number 98 on the 100 Stitches list.  The floss I used is DMC pearl cotton color variations #4060.