skip to main |
skip to sidebar
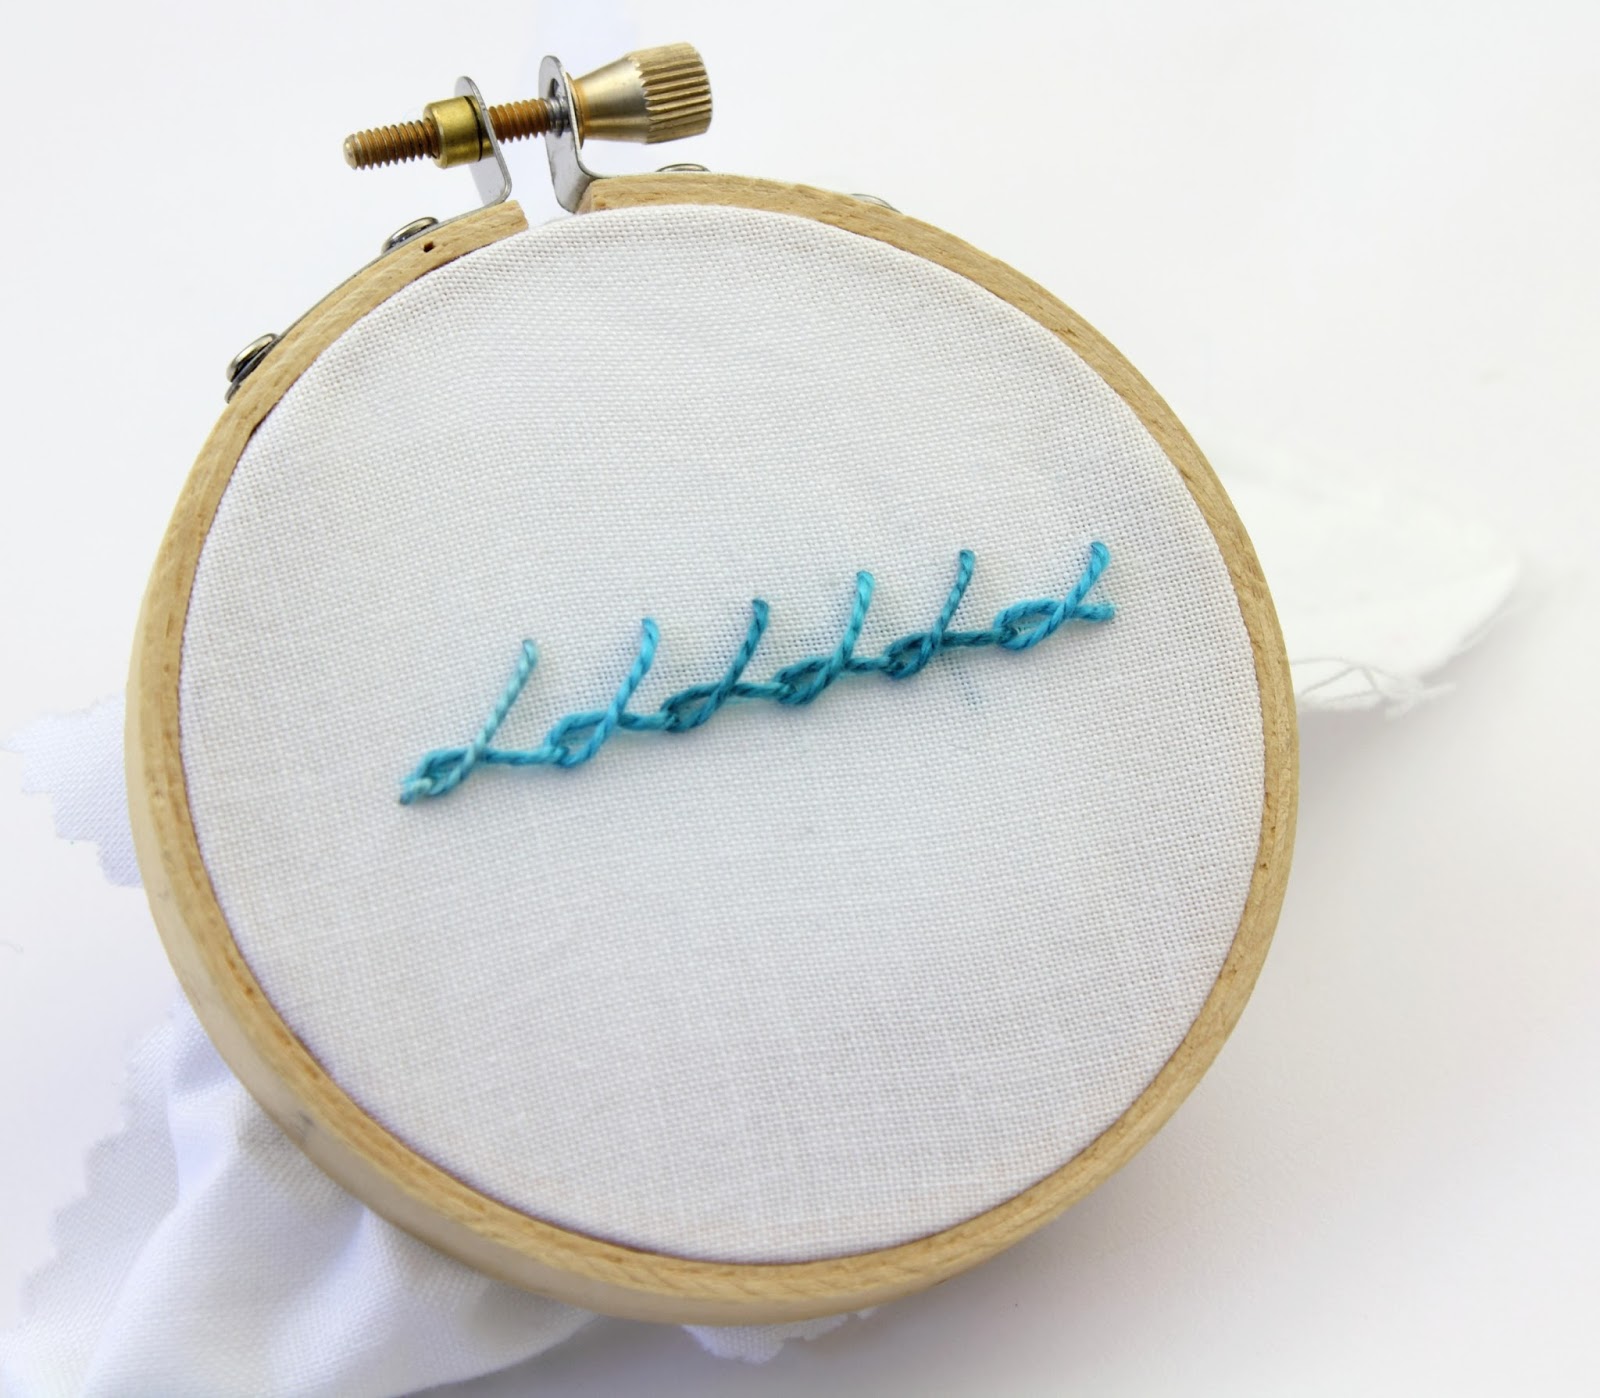
I just learned a new stitch that I would like to share. This is the Snail Trail Stitch and it is from my 100 Stitches Plus list.
Isn't it beautiful? This stitch is really easy to learn.
This is worked from the right to the left. I used a ruler and a water soluble marker to draw a stitching guide line.
The first step was to come up through the fabric on the right end of the guide line:
Then pull the thread all the way through to the left:
Next, the needle comes back around to the right:
and goes back into the fabric a little ways above the spot where the thread first emerged. Notice the position of the working thread - bringing the needle around has formed almost a circle
The needle goes in and then comes out on the guide line to the right of where the thread first emerged. Notice that the needle is at a bit of a diagonal slant pointing to the left.
Pull all the way through towards the left. Notice that the needle is coming out on the guide line and is under the working thread {at the top of the circle} but as it fully emerges it will pass over the working thread {at the bottom of the circle}:
When pulled all the way through a loop forms. This is the first stitch:
Now it is just like the start of the first stitch. The thread has emerged on the guide line so now the needle goes back around to the right and into the fabric above the guide line. Just repeat the steps:
All the way to the end. I went back into the fabric after the last stitch and secured my thread on the underside:
Complete!
This stitch is from the lovely book Elegant Stitches by Judith Baker Montano.
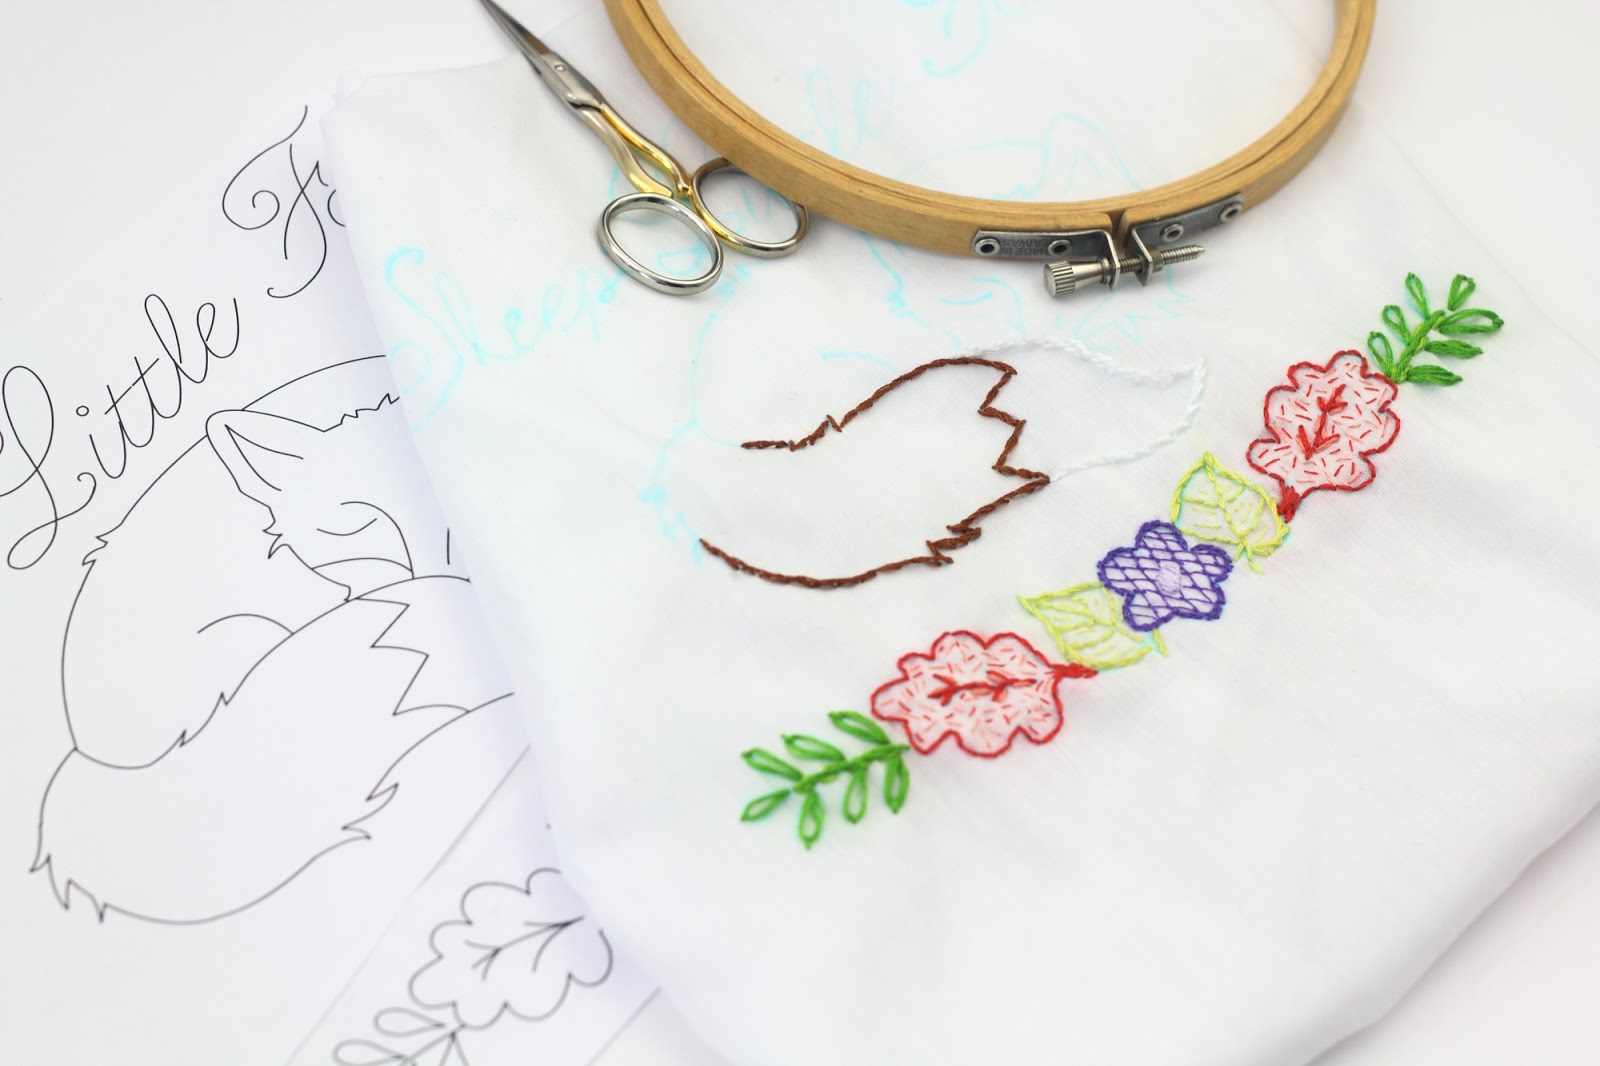
I have a quick update to my Sly Fox embroidery project. You may remember when I last posted about this project I had just started on the fox's tail and the flower/leaves border:
Since that post, I have not made any progress on the fox stitching but I have finished the border :
The purple flower in the middle has a Stem Stitch outline, Trellis Couching Stitch inside and a Satin Stitch center. The green plants are Stem Stitch stems with Lazy Daisy Stitch leaves. The pale green leaves are Stem Stitch outlines with Straight Stitches for fill. The fill on the orange leaves is Seeding Stitch in two colors.
I will be back soon to share my progress on the fox!
I have made some progress on a few items that I mentioned in my last post.
First up is this heart. I used quite a few different stitches on this one and I love the result!
The blue lines are Double Knot Stitch. In between each of the blue lines are Straight Stitches done in sliver metallic thread. The red outline is Back Stitch and the red lines are done in Stem Stitch. The white lines are done in Chain Stitch. The white stars are outlined with Back Stitch and filled with Straight Stitches.
I also finished this star. The outline is all done with Whipped Back Stitch. The inside is done with Trellis Couching Stitch:
If you look closely, you can see that the couching is done with silver metallic thread:
So these two are finished:
and I still have a few more to stitch:
I have three new hand embroidery projects to share. Two are actually in progress and one is still in the planning stages.
First up is this sleeping fox.
These motifs are from my Sly Fox pattern set. I combined a few border motifs with the fox and text of "sleep little fox". I have just gotten started on part of the border and the fox's tail:
I am also working on this beautiful horse. This motif is from my I Love Horses embroidery pattern set. I am working the mane with Double Knot Stitch and Stem Stitch. So far for colors I have a lot of pink, purples and I am thinking of adding a few shades of mint green:
The project in planning is something for the Fourth of July...
I will be sure to keep posting my progress on these three projects!
I have an update to my wedding wreath stitching that I first posted about here and here.
I transferred the bridal couple's initials and the ceremony date to the middle of the wreath motif:
Then I stitched the wreath:
I used the bride's colors - this beautiful palette:
And lastly, I stitched in the initials and the date:
I only used two stitches for this whole project, the Stem Stitch and French Knots.
Here is a list of the floss colors I used: