Time for another installment of my journey through 100 Stitches! This is the Spanish knotted feather stitch. A beautiful stitch isn't it?
This is a stitch I have wanted to feature and tried to do several times before. However, I just couldn't "get" how to do it. I was so confused by the explanation and accompanying pictures in 100 Stitches. I tried again yesterday and finally in frustration, I did a net search and came up with this extremely helpful how to on YouTube. It was done by Mary Corbet of Needle 'n Thread. She has a such a wonderful website and blog with beautiful pictures too! Anyway, just watching her video once answered all my questions and I was able to do the stitch.
Here, after a little practice, is how I did my stitch. For my demonstration, I am using this gorgeous pearl cotton floss. It is dmc color variations #4210 radiant ruby. I am also debuting the latest addition to my embroidery hoop collection, this little 4" hoop:
I am doing this stitch from top to bottom - that is how 100 Stitches demonstrates the stitch. A helpful tip from the Mary Corbet video is to draw three parallel guidelines - it makes all the difference to doing this stitch! I drew mine spaced 1/8" apart:
The first step is to come up on the right hand guide line. Come up a little below the starting end of the line:
Pull your floss all the way through. Now go back into the fabric at the top end of the middle guide line. Slant your needle to the left:
Come back out of the fabric on the left guideline:
Notice the needle tip is emerging under the working thread:
Now bring the working thread over the needle tip - the working thread is going to go over then under the needle:
So it looks like this:
Start pulling the needle through and this loop will start forming:
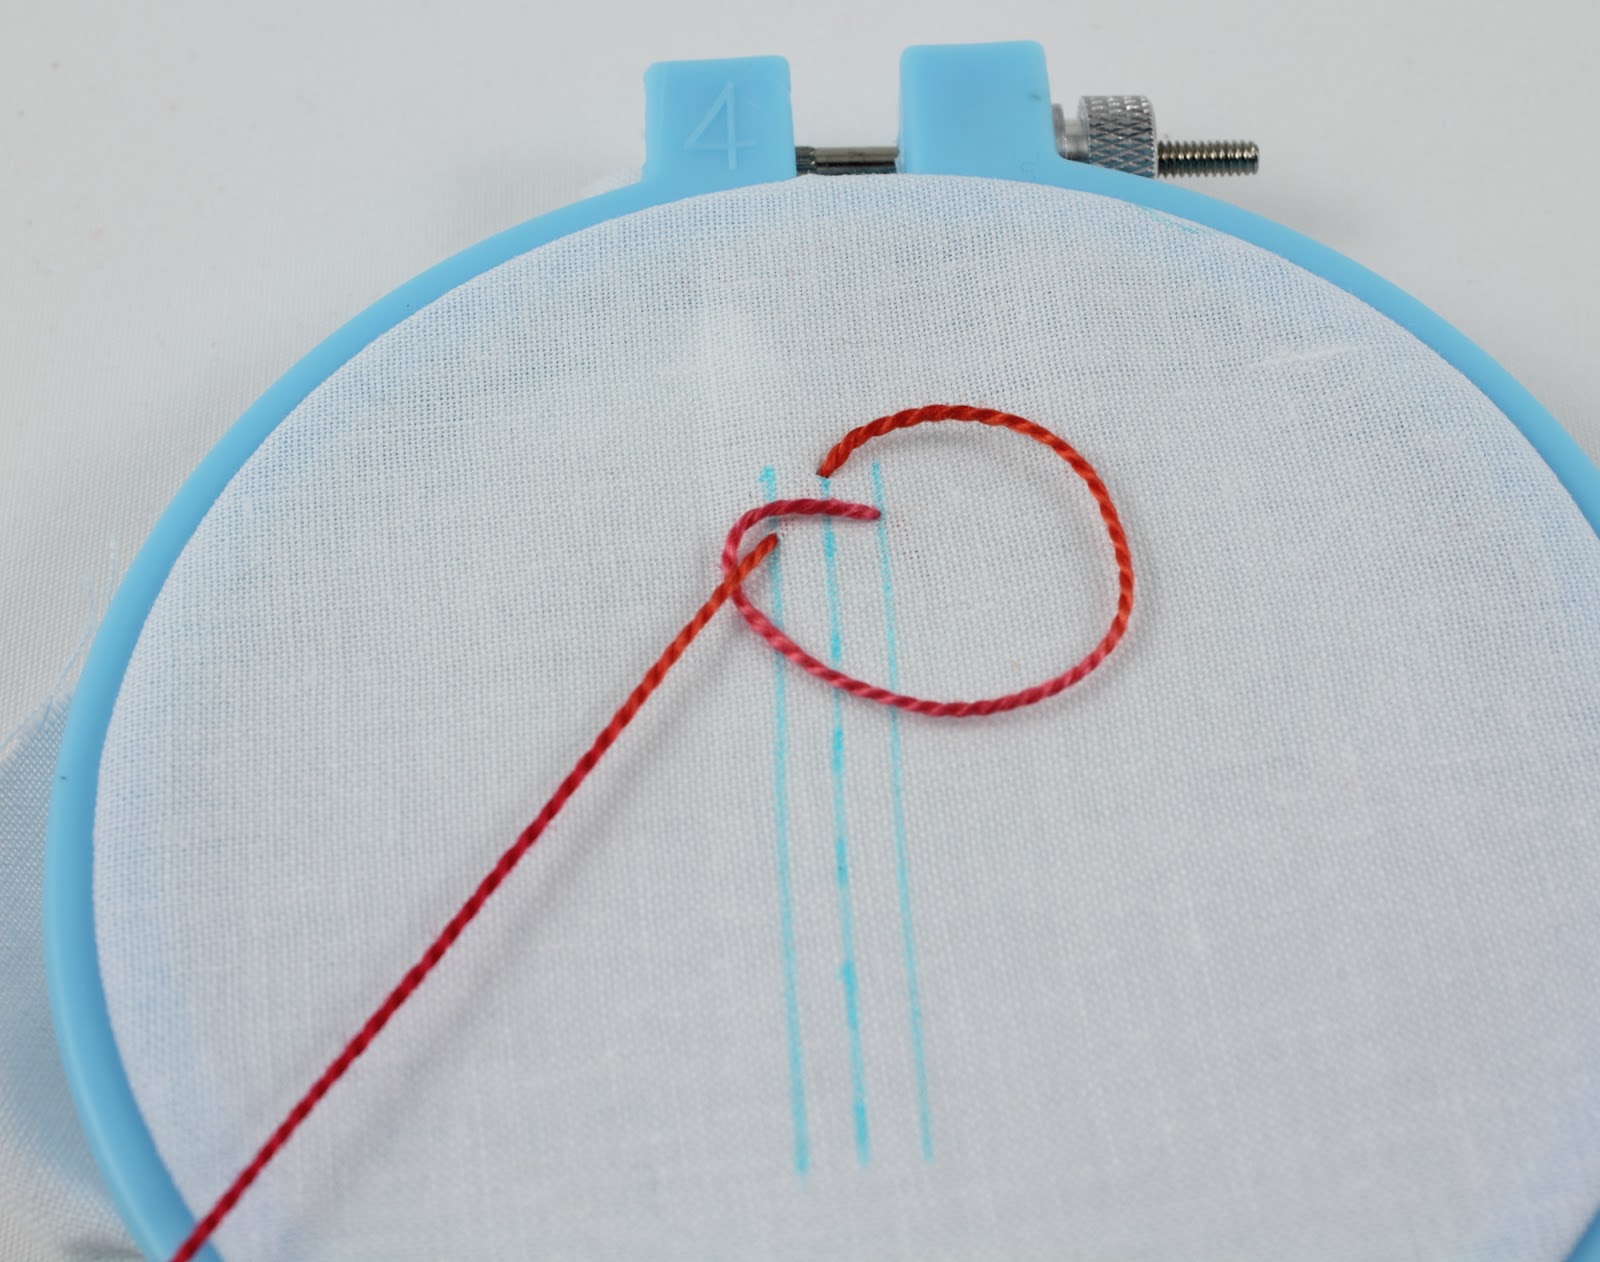
Pull all the way and you will have this slanted stitch.
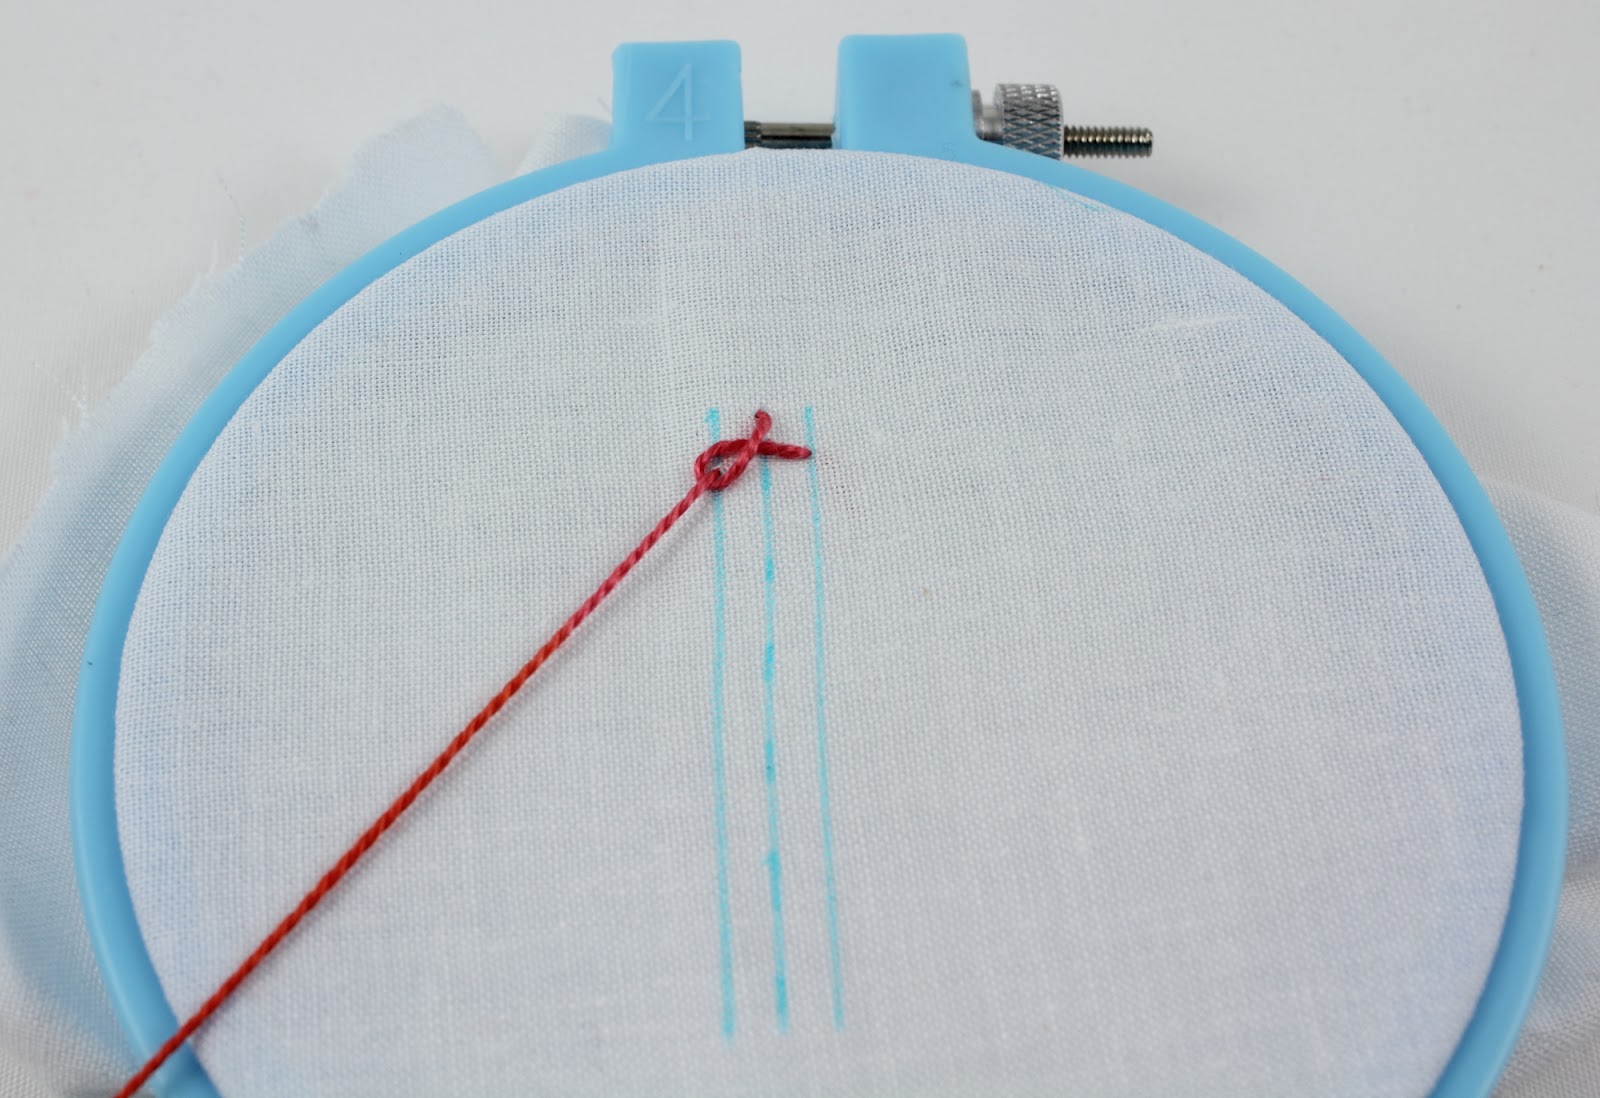
Now the needle goes back into the fabric on the middle guideline. It is going to go into the fabric between the two threads making up the slanted stitch. It will go in on the middle guide line slanting to the right. The needle will emerge on the right guide line:
Once again, bring the working thread over the needle:
and then under the needle:
and pull the needle through, forming a loop
Pull all the way through and a right slanting stitch is formed:
Now the needle goes back into the fabric on the middle guide line. Notice it is going between the two threads of the right slanting stitch.
Slant this stitch to the left and the needle emerges on the left guide line.
Again, the working floss goes over/under the needle:
Pull and form the loop:
and then go back into the fabric on the middle guide line. Just keep doing these steps until your line of stitching is complete.
Here is a view of the finished stitching without the guide lines:
and here is what the underside of the stitching looks like:
I love this stitch now and I certainly want to express my thanks to Mary Corbet for the excellent stitch tutorial she provided on her video!
The Spanish Knotted Feather Stitch is #59 and is in the Knotted Stitches section of 100 Stitches. This was the eighth and final stitch in the knotted stitches section. I think the knotted stitches have become my favorite category of stitches so far :)
Showing posts with label knotted stitches. Show all posts
Wednesday, April 25, 2012
Tuesday, February 28, 2012
100 Stitches - Knotted Cable Chain Stitch
This beauty is the Knotted Cable Chain Stitch. It is the latest stitch I have learned on my 100 Stitches list.
Happily, I didn't have any trouble learning this stitch, it is very straightforward. For my demonstration, I am going to draw a straight line and stitch along it but I think this stitch would work beautifully for a curvy line too!
The stitch is worked from right to left. The first step is to come up through the fabric at the right end of the stitching line:
Pull the floss all the way through and lay it against the stitching or pattern line:
Now bring your needle all the way around to the right and above the stitching line. This is making a sort of loop:
The needle goes into the fabric a little above the stitching line and emerges on the stitching line - notice it is emerging under the working floss that is laying on the stitching line:
Start pulling the needle through but now the needle is going to pass over the top of the bottom edge of the loop:
Keep pulling and see the loop tightening:
Pull all the way through and a bit to the left until a knot forms. The knot will form to the left of where your floss fist emerged:
Bring the needle around to the right and slide the needle under the floss that first emerged. The needle tip is going between the point where you very first came up through the fabric and the knot - don't pierce the fabric, just slide under the floss:
Here is another view:
Slide all the way under and around to the left:
Pull tight and bring your needle around to the right, below the stitching line:
Now the needle is going to go into the fabric a bit below the stitching line and emerge on the stitching line. You are taking a slanting stitch to the left. Notice that the needle tip is going over the top of the working floss:
Pull through as a loop forms:
Pull all the way and the stitch is completed!
To start the next stitch, just like at the beginning, your needle comes all the way around to the right. It will go into the fabric a little to the left of your first stitch. The needle goes into the fabric a bit above the stitching line and emerges on the stitching line.
A whole line of these stitches looks really nice:
Here is a look at the underside of this stitch:
Easy and fun!
This is stitch #57 and is in the Knotted Stitches section of 100 Stitches.
Happily, I didn't have any trouble learning this stitch, it is very straightforward. For my demonstration, I am going to draw a straight line and stitch along it but I think this stitch would work beautifully for a curvy line too!
The stitch is worked from right to left. The first step is to come up through the fabric at the right end of the stitching line:
Pull the floss all the way through and lay it against the stitching or pattern line:
Now bring your needle all the way around to the right and above the stitching line. This is making a sort of loop:
The needle goes into the fabric a little above the stitching line and emerges on the stitching line - notice it is emerging under the working floss that is laying on the stitching line:
Start pulling the needle through but now the needle is going to pass over the top of the bottom edge of the loop:
Keep pulling and see the loop tightening:
Pull all the way through and a bit to the left until a knot forms. The knot will form to the left of where your floss fist emerged:
Bring the needle around to the right and slide the needle under the floss that first emerged. The needle tip is going between the point where you very first came up through the fabric and the knot - don't pierce the fabric, just slide under the floss:
Here is another view:
Slide all the way under and around to the left:
Pull tight and bring your needle around to the right, below the stitching line:
Now the needle is going to go into the fabric a bit below the stitching line and emerge on the stitching line. You are taking a slanting stitch to the left. Notice that the needle tip is going over the top of the working floss:
Pull through as a loop forms:
Pull all the way and the stitch is completed!
To start the next stitch, just like at the beginning, your needle comes all the way around to the right. It will go into the fabric a little to the left of your first stitch. The needle goes into the fabric a bit above the stitching line and emerges on the stitching line.
A whole line of these stitches looks really nice:
Here is a look at the underside of this stitch:
Easy and fun!
This is stitch #57 and is in the Knotted Stitches section of 100 Stitches.
Friday, January 13, 2012
100 stitches - knot stitch edging
This beautiful stitching is knot stitch edging. According to 100 Stitches, this is also know as Antwerp Stitch Edging. This is the first stitch I have done on my 100 Stitches journey that is done of the edge of fabric and I didn't use an embroidery hoop!
I did however, very much enjoy making a hem using my wonderful sewing machine! I am really pleased with the nice way it stitches:
To demonstrate my stitch, I am using this lovely pink floss, DMC color variations pearl cotton #4180:
For the first step of this stitch, the 100 Stitches instructions say to bring the thread in from the back of the fabric. I wanted to hide the knot so I started by slipping the needle into the hem:
and out through the bottom of the hem pulling all the way through. Now the the knot is hidden inside the hem:
The next step is to set up your needle and floss like you are doing a single blanket stitch. Just bring your needle down through the top or right side of the fabric out the back. Where you put your needle in determines how long vertically your stitch will be. I put mine right on my hem stitching line so that I could use that line as a guide line. Notice the postition of the needle and the working thread - the needle is going to pass over the working thread:
as you pull, it begins to form a blanket stitch:
pull all the way through:
Bring your needle around and pass it above the floss that is edging the bottom of the fabric but behind the loop you have just formed:
and start to pull it through - again notice the needle is going to pass over the working thread:
pull all the way through forming the "knot"
That is all there is to it! Now you just set up for the next stitch:
make the single blanket stitch:
and then the knot stitch:
100 Stitches suggests that you space these stitches about 1/4" apart:
It makes for an impressive line of stitching. I think this would look so pretty as an edging on a pillowcase:
This stitch is just as beautiful on the back too:
This stitch was very easy to learn and do. It was a relief after all the trouble I had with the eyelet hole stitch :) Thank you again everyone for all your help!
This is stitch #56 and is in the knotted stitches section of 100 Stitches.
I did however, very much enjoy making a hem using my wonderful sewing machine! I am really pleased with the nice way it stitches:
To demonstrate my stitch, I am using this lovely pink floss, DMC color variations pearl cotton #4180:
For the first step of this stitch, the 100 Stitches instructions say to bring the thread in from the back of the fabric. I wanted to hide the knot so I started by slipping the needle into the hem:
and out through the bottom of the hem pulling all the way through. Now the the knot is hidden inside the hem:
The next step is to set up your needle and floss like you are doing a single blanket stitch. Just bring your needle down through the top or right side of the fabric out the back. Where you put your needle in determines how long vertically your stitch will be. I put mine right on my hem stitching line so that I could use that line as a guide line. Notice the postition of the needle and the working thread - the needle is going to pass over the working thread:
as you pull, it begins to form a blanket stitch:
pull all the way through:
Bring your needle around and pass it above the floss that is edging the bottom of the fabric but behind the loop you have just formed:
and start to pull it through - again notice the needle is going to pass over the working thread:
pull all the way through forming the "knot"
That is all there is to it! Now you just set up for the next stitch:
make the single blanket stitch:
and then the knot stitch:
100 Stitches suggests that you space these stitches about 1/4" apart:
It makes for an impressive line of stitching. I think this would look so pretty as an edging on a pillowcase:
This stitch is just as beautiful on the back too:
This stitch was very easy to learn and do. It was a relief after all the trouble I had with the eyelet hole stitch :) Thank you again everyone for all your help!
This is stitch #56 and is in the knotted stitches section of 100 Stitches.
Subscribe to:
Posts (Atom)
