skip to main |
skip to sidebar
Finished! You may remember from this post when I started this project.
Since that post, I finished up all the stitching. Here are some close ups that show the different stitches I used. For most of the outlines, I used the stem stitch. I also used the stem stitch for some of the interior accent lines. I especially like the purple onion interiors, I used two colors of floss on the stem stitch:
I used multiple rows of stem stitch to give interest and weight to the edges of some of the vegetables. You can see that on the carrots, radishes and radish leaves. The X's are straight stitch and there are plenty of French knots:
To prepare this for framing, I evened up all the raw edges of the fabric. This is a cotton fabric and it is so ravely!
Now for the framing. I used this black frame, it is size 8 X 10:
The stitched area of my fabric measures about 7-1/2" x 8 -1/2", too big to use the matting provided with the frame. Instead, I used the chipboard backing for the frame and added a piece of white paper to give a smooth white surface and then placed my fabric on top of that:
I wrapped the fabric edges around the chipboard:
Folded all the corners over:
and then, using this strong polyester thread:
I stitched back and forth on the long edges and across and back on the short edges. This really allowed me to pull the fabric snug. Hopefully it will keep this looking good in the frame!
All framed:
and ready to display - I love the way this project turned out!
Here is the color palette for this project:
I have another installment of my 100 Stitches journey to share.
This is the Double or Italian Hemstitch. Beautiful, isn't it? I had a few problems working this stitch which I will explain at the end of this post.
For the floss, I used DMC Color Variations, this is number 4160 in perle cotton.
This stitch is from the Drawn Thread Embroidery category so I prepared the fabric by pulling the horizontal threads from the area to be worked with the stitch.
This one was a little different than the usual Drawn Thread stitches in that there needs to be two working areas to complete the stitch:
This stitch is worked from right to left starting with the top working area. The first step is to come up through the fabric behind the first four threads:
Pull the needle to the left all the way through. Then bring the needle back around to the right and go into the fabric behind those first four threads. Bring the needle back out where the floss first emerged. Notice the needle is behind the working thread:
Pull all the way through and now the needle is going to work on the bottom area.
Bring the needle into the fabric behind the second group of four threads on the bottom working area. Come back out of the fabric:
and pull all the way through:
Bring the needle around and go back into the fabric at the right edge of the group of four threads you just passed under. Pass the needle under the fabric and emerge on the top working area four threads to the left of the first thread group worked.
Notice the needle is passing under the working thread:
Now the same steps are just worked over and over until you fill up the areas to be worked:
I had three problems with this stitch.
First - There are no instructions on where to secure your floss when beginning the stitch.
Second - Notice the bottom working area - the first group of four threads on the right side are skipped. According to the instructions, this is worked from top area to bottom area from right to left so how can the bottom right thread group be included?
Third - How to finish off this stitch. I finished at the top left side of the working area - where should the floss be secured?
I am going to do a little more research on this stitch - any tips would be appreciated!
This is a fun stitch to do and really pretty. I especially love the way it looks when done with the color variations floss.
This is number 80 on the 100 Stitches list and is from the Drawn Thread Embroidery category.
You may remember way back last spring, I posted about my sewing machine table situation.
I did not have a dedicated sewing table so I had been doing my sewing at my big work table. The work table is quite tall and I had been sewing standing up. Not an ideal situation!
Happily, my sister gave me a table she had that she wasn't using anymore.
It was the perfect size and even had drop down sides so that it could sit flat against a wall.
It just needed a new coat of paint!
Since that post, I have painted the table and set it up with my sewing machine.
The table fits perfectly in the space! I have a really nice chair that matches:
Did you notice all that beautiful sewing thread on the new table?
That was a gift for my recent birthday along with these sewing needles!
You may have also noticed the pin cushion. I just finished it and I will post about that project soon!
I have an update on one of my projects from my Autumn Projects post {here}. You may remember, I was going to stitch this small table topper and I was deciding on floss colors
I decided to go with the perle cotton in this beautiful color variation. This is DMC No. 4128. I am very happy with the selection!
It really compliments the fabric and I just love the effect that the color variation gives. For the embroidery, I used the Lazy Daisy, Stem, and Straight Stitches.
After I did all the embroidering on this, I cut piece of white fabric to use as a backing piece.
I pinned the two pieces right sides together
and sewed around the edges. I left about a 2" opening so that I could turn the piece inside out and have the seam and raw edges inside and the right sides out.
Before I turned this inside out, I cut each corner on a diagonal so that it would reduce bulk and be easier to turn the corners.
I turned it right side out and then I hand stitched the 2" opening closed.
This table topper really matches these wood pieces. I am looking forward to using it with them!
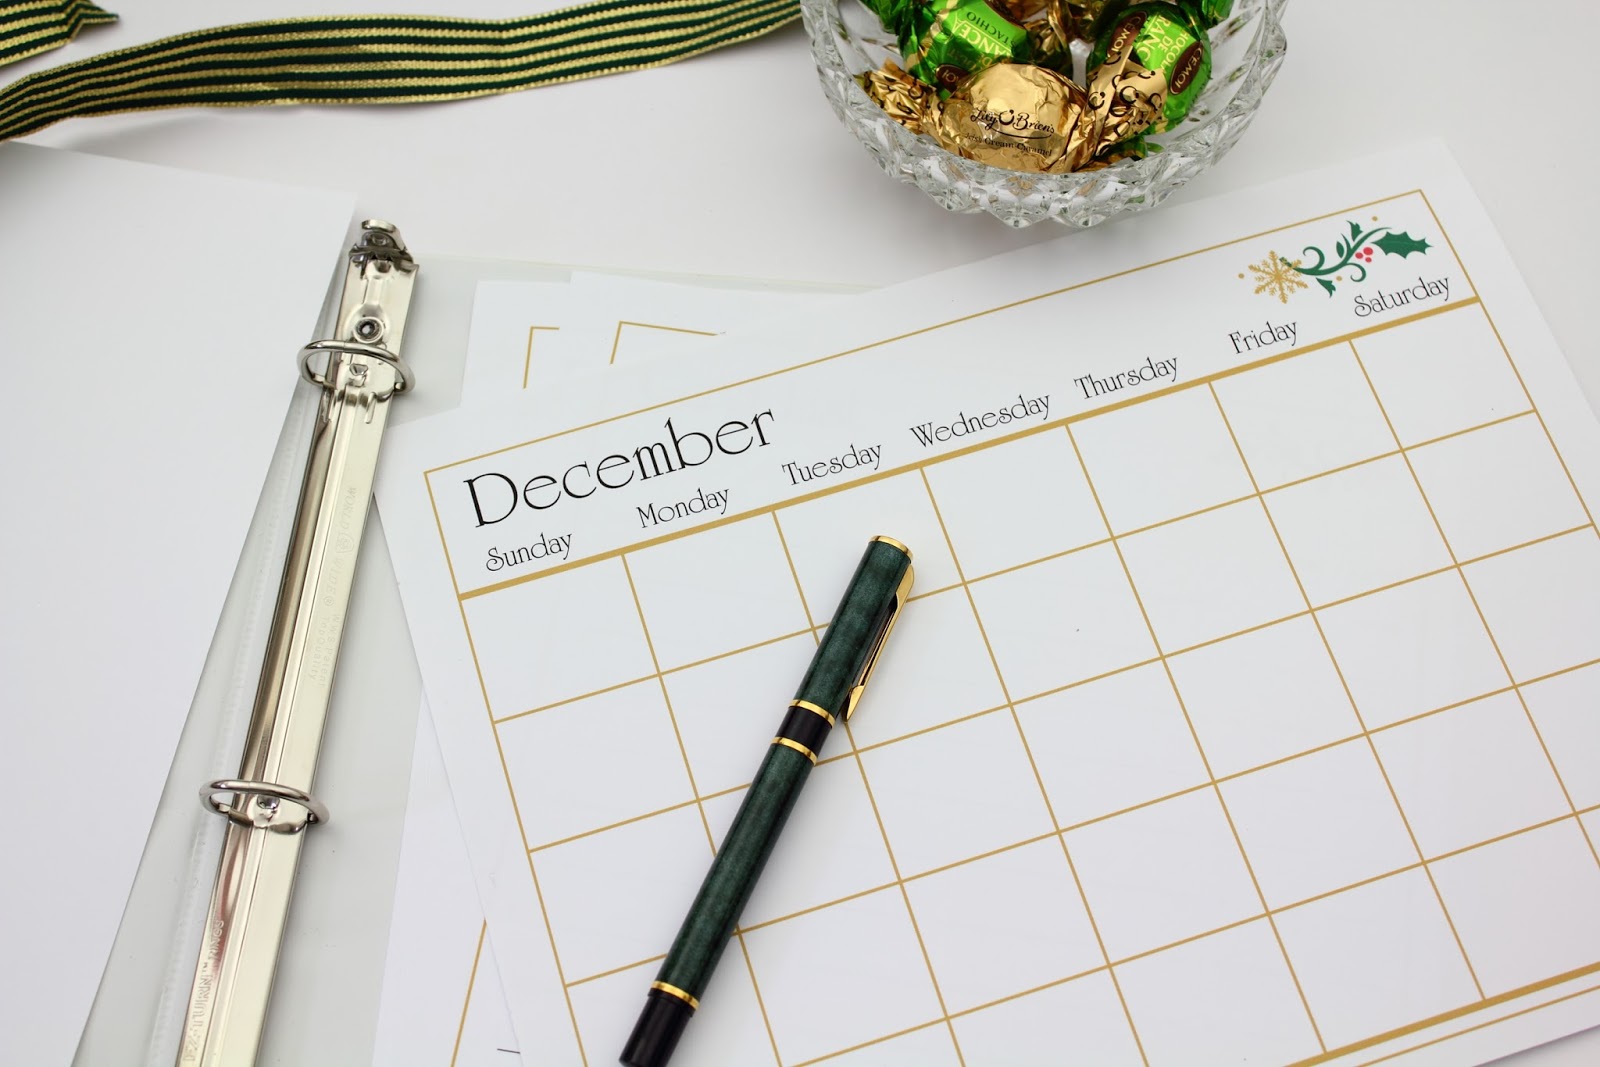
I have a new item in my shop! It is a Christmas Planner. I know it is a little early to be thinking about Christmas, but it is never too early to start organizing for the busy Christmas season.
I love the colors gold, green and red. They look so festive together and that is the color scheme I used for this planner.
This planner is much like my Embroidery, Sewing, Knitting and Crochet Journals in that it is a printable file and there is a page for just about everything you need to plan, keep track of and record! The pages are 8-1/2 x 11" and are intended to be used in a standard sized binder.
There is a perpetual calendar for both November and December. You can print them out year after year. I also like to keep mine from past years - they are fun to read over and remember!
For all your special Christmas recipes, there are three different recipe card options including a full page size that is editable.
The planner cover page looks like this:
There is also a section divider page included. It is fully editable so you can type in whatever personalized title you want. Use it for the different sections of your binder {print as many as you need!} or you could also use it as a custom binder cover and use your own wording rather than "Christmas Planner".
There are also blank editable section tabs. You can organize your planner any way you wish with divisions that are useful for you.
Just type in the word you like to use:
There are nine party planning pages that cover everything you will need for planning a Christmas party, large or small.
There are so many different planning pages!
There is a To Do page in each of three formats: standard - weekly and timeline.
There is also a helpful Black Friday page so you can plan your shopping strategy!
These are just some of the highlights - this is a 42 page packet.
The pages include:
- Cover Page - Gift Planner - Gift List - Budget - Order Tracker - Black Friday Planner - Gifts Received - To Do - Cleaning Schedule - Decorations - Decoration inventory / Storage Inventory - Card List - Notes - Perpetual Calendars - Activities - Baking List - Baking Schedule - Favorite Recipes - Recipes To Try - Party Planner - Recipe Cards - Editable Divider Page - Spine/Tab Inserts
The Christmas Planner is available in my Etsy shop here.