The latest stitch in my 100 stitches project is stitch #40, the lazy daisy stitch. I have had so much trouble learning this stitch! It isn't that the stitch itself is hard to do, it's that it is so hard to make the stitches even and the same size when making a flower! Here is the least embarrassing example of my first attempts
 I thought it might not look so bad if I added some french knots in the centers :)
 Still noticing the uneven, poorly spaced and loopy stitches :( After much stitching, removing of stitching and re-stitching...I think I am happy with the result:
 sort of.
 This really is a pretty stitch. I think I will love stitching lazy daisies when I have a pattern to work from. This stitch is from the "linked stitches" section of the 100 stitches book
***update*** When I first started posting about my journey through the 100 Stitches book, I mostly just took a picture of my completed stitch or line of stitching. The more comfortable I got learning these new stitches, the more I started to document the steps of the stitches as I went along. Now my 100 Stitches posts always have a step by step demonstration of my stitching. I am currently going back through my early 100 Stitches posts and adding demonstration pictures. Here is my demonstration of the lazy daisy stitch. I am using a beautiful orange dmc color variations pearl cotton floss. I started with a daisy from the Daisy embroidery pattern packet and transferred it onto my fabric:
 The first step is to bring your needle up through the fabric at the base of one of the daisy petals:
 pull the thread all the way through:
 Now take your needle back down through the fabric right where it first emerged:
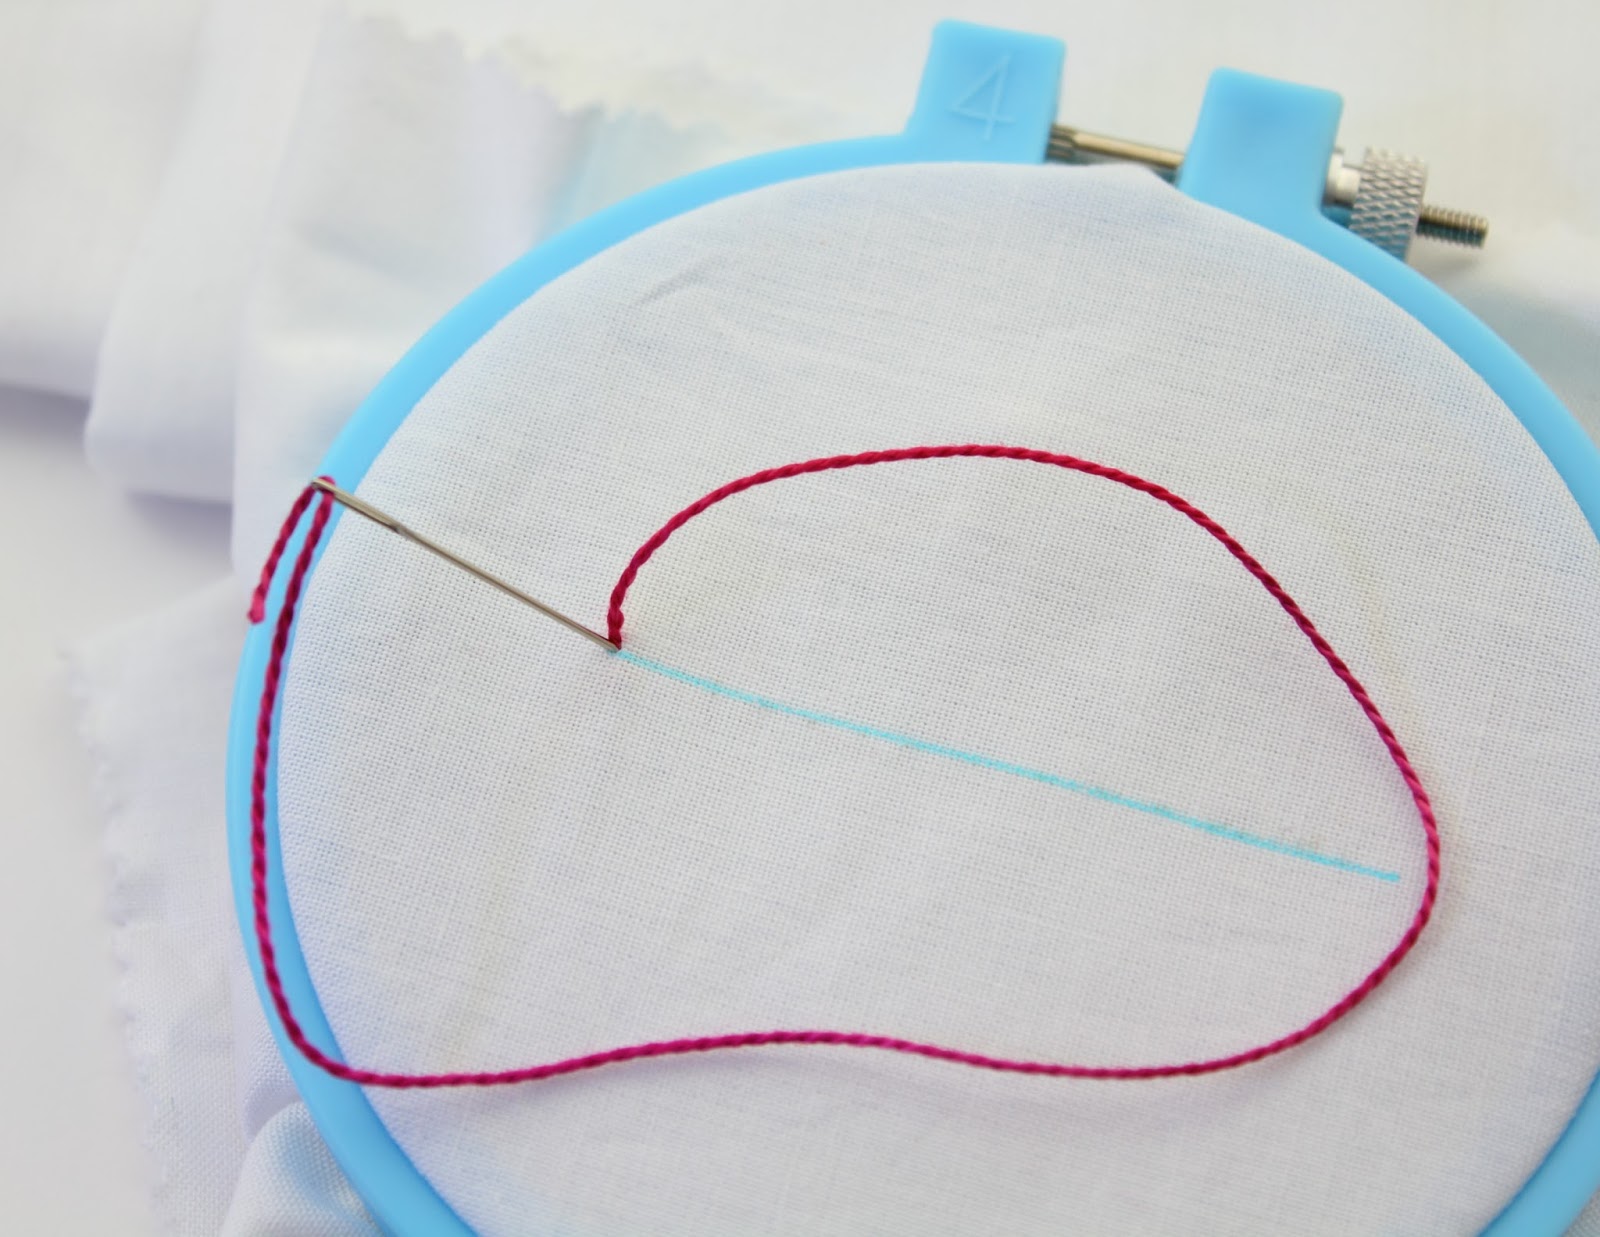
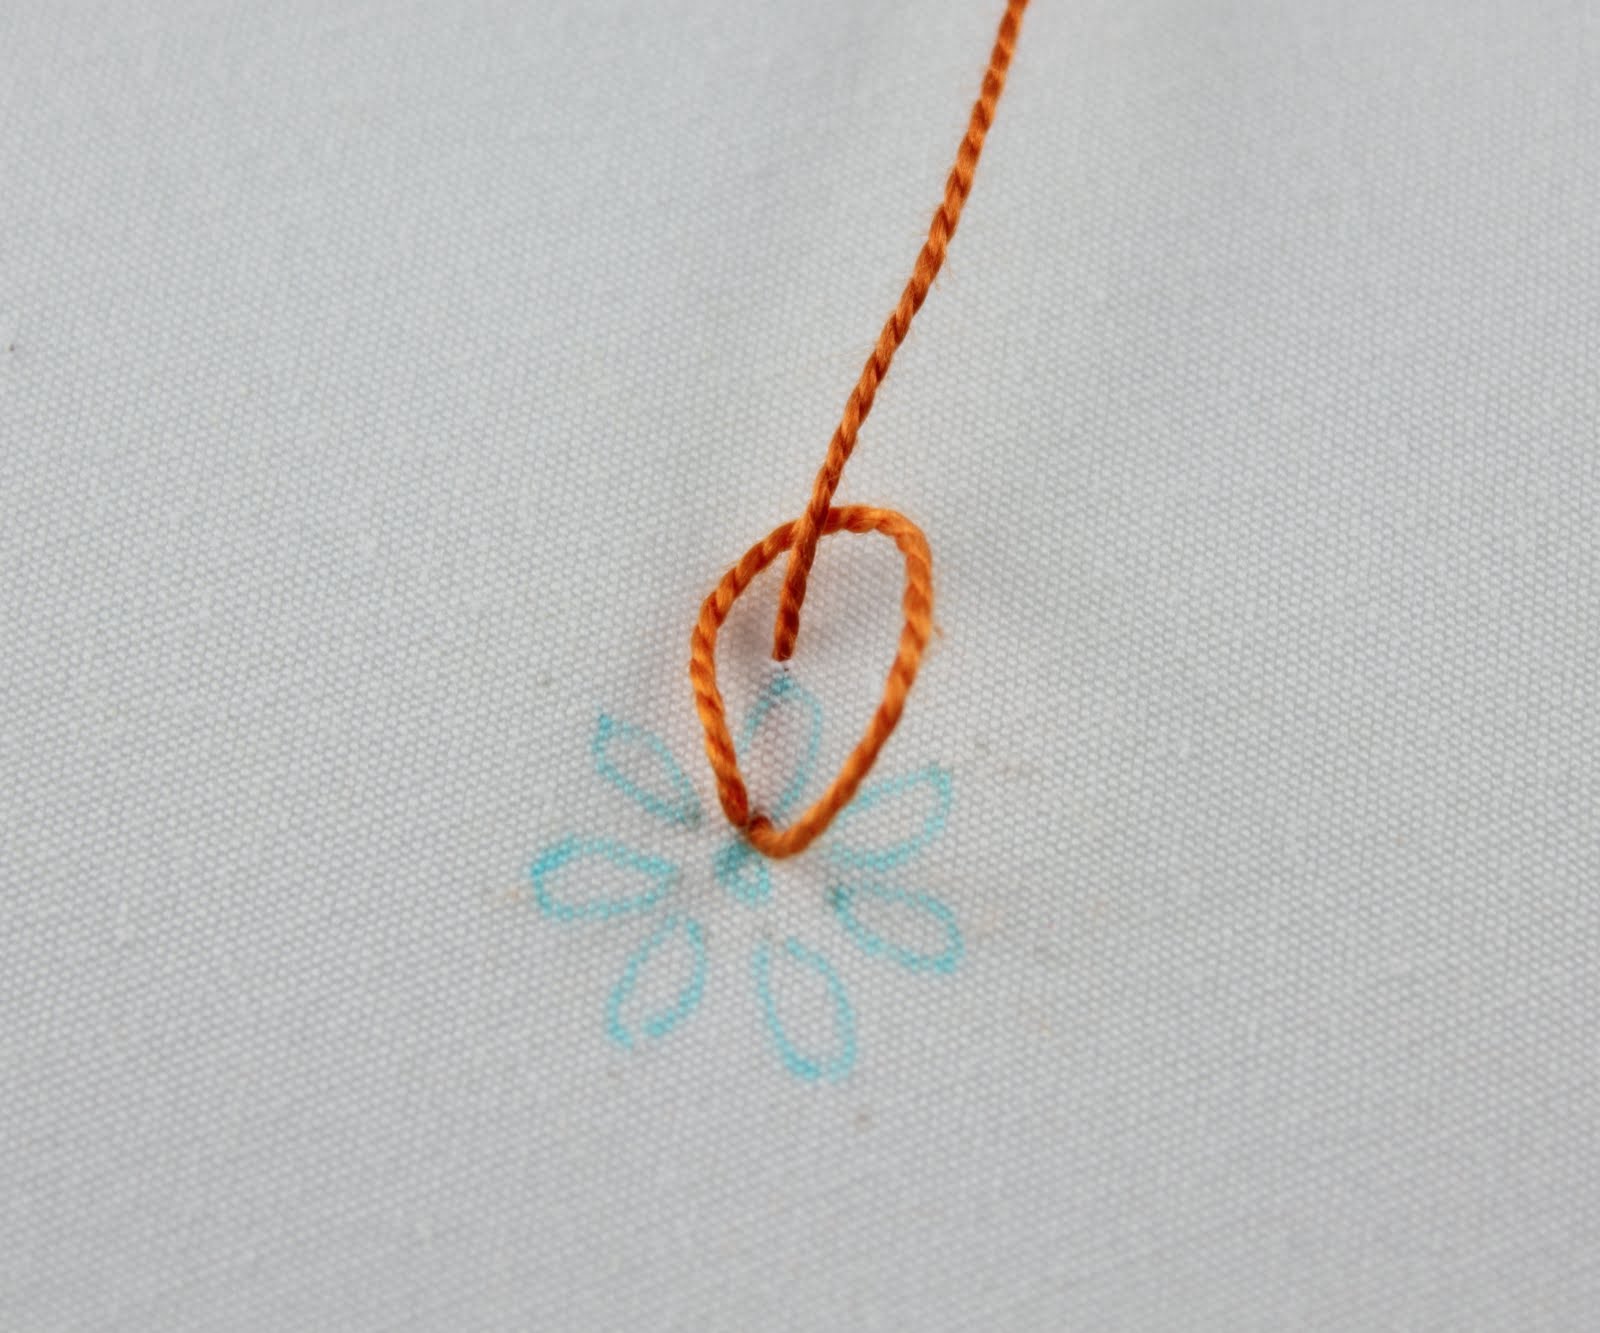
 and bring your needle back out at the end of the daisy petal. As your needle emerges, make sure it is going to over the working floss. Start pulling:
 and keep pulling...you can see a loop forming:
 when you have pulled all the way, you will have a nice petal formed
 You now can secure the petal in place by taking a single stitch:
 that is all there is to this stitch, just do the same steps on the next petal:
 until you have completed all the petals. I added a french knot in the center of mine:
 and here is what the underside of my stitching looks like:


 The pictures for "checkered chain stitch" and "rosette chain stitch" in particular look pretty complicated!