Well - I tried :( Unlike so many of the stitches that I have learned from
100 Stitches, this eyelet hole stitch looked sooooo easy but turned out to be almost impossible for me to do! These three are the best I could do:
Here is a darker picture so that you can see the white satin on white fabric. Don't look too carefully!
Here is the hall of shame with a few of my many attempts. What am I doing wrong?! At first I thought that these looked so horrible because the outer edge was so jaggedy and uneven looking.
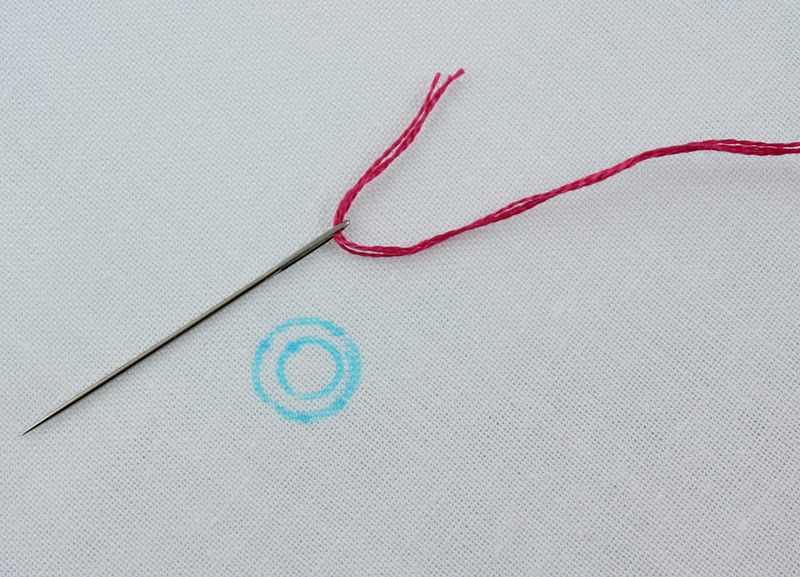
So, I decided to use this hole template as a guide:
I drew a 1/4" inside hole and a 3/8" outside hole. After practicing with different types of floss, I decided to go with three strands of cotton floss:
The first step is to stitch a
running stitch all around the outer circle:
The next step is to
pierce the center of the small hole. 100 Stitches suggest either using a "stiletto" to pierce the fabric - or to cut across the center both ways. I used my scissors to cut two small x's:
I think at this point, I had the best results with using only one strand of my cotton floss:
Come up through the fabric right at the outer edge of your running stitch:
Now bring your needle down into the open area of the hole and back out through the fabric on the outside edge of the running stitch. Notice the needle is emerging right next to where the floss first came through. This is just a simple
overcast stitch:
Pull all the way through:
and take the next overcast stitch by going back into the hole and out on the outside edge of the running stitch:
Just keep overcast stitching and it will start to draw the raw edges of the fabric to the underside of the fabric and enclose them in the stitching.
Just keep working your way around.
Until you are done. Now secure the floss on the underside.
Here is a closer look at the uneven outer edge! I seem to be having trouble with two things...keeping a consistent outer edge of my stitching and stitching so that there is even "coverage" all around the circle. I would
very much appreciate any suggestions or tips or ideas for improvement!
Here is the underside of my stitching:
I think I like these best in a white on white. It seems more traditional, like eyelet lace fabric. I also really liked using the satin floss on these. I think it looks prettier.
This stitch is in the
flat stitches section of 100 Stitches and is #21.
UPDATE - please read
this post for updated instructions and corrections on this stitch!