There are so many ways to transfer a pattern onto fabric! I have been doing a little experimenting:

I selected three different fabrics. The dark blue fabric is a medium weight tight weave. The white is a light weight, medium weave fabric that you can easily see through. The pale blue is a medium weight, medium weave fabric:

I selected three different transfer methods. Wax free tracing paper, graphite transfer paper and

transfer pens. I chose two different transfer pens, both are water soluble:

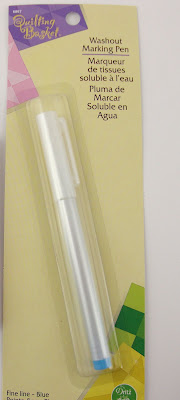
The difference between the two pens is in their tip size. One has a regular tip and the other one has a fine tip:

You can really see the difference!

Now to start transferring! I have several images; a Christmas tree, two stockings and a present. I am going to start with the stockings:

I am going to transfer these onto the white fabric. Since you can easily see through this fabric, I am going to use the transfer pens to transfer. I will lay the image down - face up, and position the white fabric over the top. I usually put some tape on the edges of the image, also face up to keep it attached to the fabric:

Then I lay the white fabric over the top and start transferring. First the regular tip transfer pen:

See now easy it is to trace the lines?

And now for the fine tip - I love the fine tip - it makes for such an exact narrow line:

One thing to remember when using these pens is to not press too hard. Especially with the regular size tip - it seems to lay down too much ink and make a blurry transfer. The great thing about these water soluble pens is that if you make a mistake you can easily remove the lines with a damp cloth:

Gone!

Then you can stitch your image and remove the blue tracing lines when you are done. Make sure to remove them with just plain water and
before you launder or iron the item! Otherwise, the pen marks may set and then you cannot remove them. Now for the Christmas tree. I am going to transfer this onto the light blue fabric, using the graphite transfer paper. I put the transfer paper on top of my fabric. Make sure the shiny side is against the fabric and the dull side is face up:

Then I put my image face up on top of the graphite transfer paper. I usually tape the three layers in place to keep everything from shifting around. Now you need something you can press along the lines to trace. I usually use a stylus:

I love this transfer method and see what a nice and crisp the image it transfers?

This has always been my favorite way to transfer - however, there are two drawbacks to this method. The first one is that the marks are permanent - you cannot wash them out. The second drawback I have only recently discovered. Since starting
100 Stitches, I have been wanting to incorporate the stitches I am learning into my projects. I noticed that some stitches do not cover my tracing lines. The chain stitch is the perfect example. Notice you can see the tracing lines inside the stitch :(

The next method is the wax free tracing paper. This comes in several colors for use on any dark colored fabric. My pack inludes white, yellow, orange, red and blue. I am going to use this yellow to transfer onto my dark blue fabric:

Place the colored side of the tracing paper against your fabric and place your image face up on top of the tracing paper. Tape into place and trace the lines with a stylus:

This method also leaves a nice crisp image that can easily be removed with a damp cloth.

I like all of these methods - they are easy to use and give good results. They all have different advantages/disadvantages. I think that the transfer pens take a little practice to get just the right touch for a crisp transfer. And as much as I have always favored the graphite paper, I think that if I am planning on using stitches such as the chain stitch in a project, I may opt for the transfer pens or removable tracing paper.




 Posts
Posts


