skip to main |
skip to sidebar
I have a new project finish to share - this holly leaves and berry motif from my Winter embroidery pattern.
For the holly berries, I used two sizes of cup sequins. The large sequin is a 12mm size and the smaller ones are 7mm.
The holly leaves are stitched with the Fishbone Stitch. The leaf center lines are Back Stitch. I added accents to the leaves with Straight Stitches using Kreinik blending filament.
The swirly line is stitched with the Double Knot Stitch and then whipped with blending filament:
The sequins are attached with a 1.5mm glass seed bead stitched through the sequin center.
The floss is all perle cotton. Here are the color numbers:
Time for another stitch from my 100 Stitches Plus list. This is the Plaited Fly Stitch.
The first steps are done exactly like the Fly Stitch :
At this point, the Plaited Fly Stitch differs from the Fly Stitch. Instead of going back into the fabric right below the stitch to tie it down, go into the fabric much further below:
This results in a long tail tie down stitch:
I have an update to share on my Arizona embroidery project.
I have finished stitching the diamondback rattlesnake:
and the lettering:
Next up is this large paddle or prickly pear cactus:
I will post my color palette and stitch list as soon as I finish this project!
I have a new embroidery pattern set in my shop. This one is all about the wonderful state of Arizona.
I really enjoyed drawing the motifs for this one - Arizona has so many interesting features that are perfect for hand embroidering.
Here is a look at the pattern set :
My first work in progress is this "Arizona" text surrounded by a paddle or prickly pear cactus and a western diamondback rattlesnake.
These vintage postcards have really been an inspiration!
The Square Boss Stitch is the latest entry on my 100 Stitches Plus list.
Also known as the Raised Knot Stitch, the Square Boss is an isolated stitch. However, it is often worked in multiples to cover a wide area of fabric.
The Square Boss is made up of two stitches: the Cross Stitch and the Back Stitch. For my demonstration, I am going to use two different colors of floss. This will make it much easier to see the steps.
The first step is to form a Cross Stitch:
As you can see the Cross Stitch was done in blue floss. Now for the Back Stitch, I have switched to this orange. The first step is to come up through the fabric at the base of the X of the Cross Stitch:
Pull the floss all the way through and go back into and out of the fabric under the center of the X {right to left}:
Pull the floss all the way through and then go back
In a previous post {here}, I mentioned that the next motif I was planning to embroider was this pumpkin. This is from my Thanksgiving embroidery pattern set.
I am going to use the Jacobean Couching Stitch to fill the pumpkin. I hope this will look good and not too busy! I started on one section and as you can see, I used large Straight Stitches under the diagonal lines that will be couched. There is a lot going on and there are six more sections to fill on the pumpkin.
I am also starting in on some Christmas projects. I will post some updates on these new projects as well!
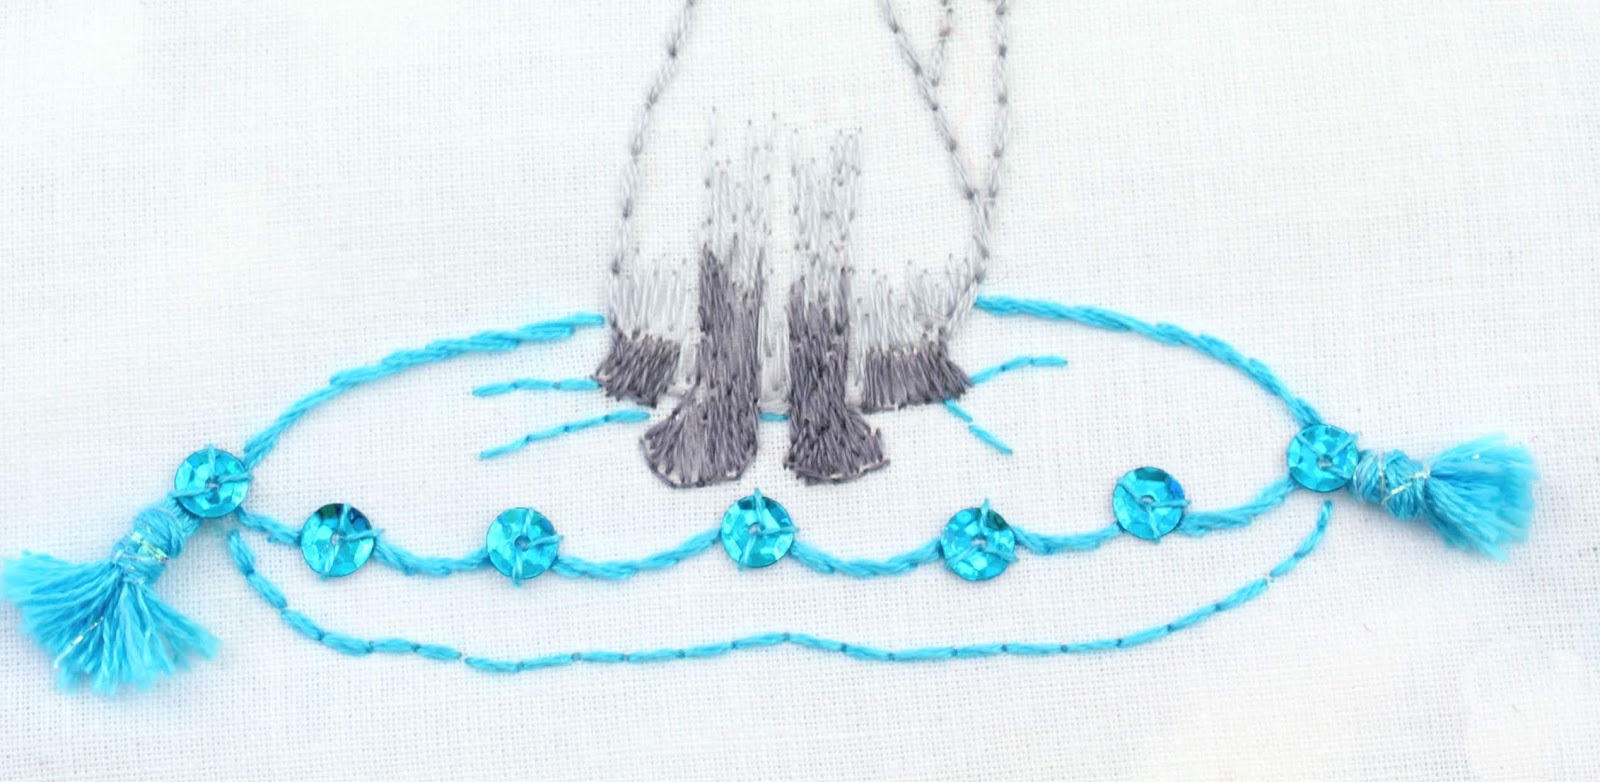
Notice some 3D additions to this embroidery? Sequins and pillow tassels! I am very pleased with the way these look - especially the tassels. As you can see from the pattern, these tassels could be stitched using an outline stitch such as Back Stitch or Stem Stitch. They could have been done with a filling stitch such as Satin Stitch.
I made these tassels using 6 strands of cotton embroidery floss. There are quite a few tutorials on YouTube on making tassels - most suggest using a safety pin to loop your embroidery floss. When the tassel is the size you want, cut the safety pin free. The floss is in a double layer of fringe, which forms the tassel:
Project Details - This fancy kitty is from my Le Chat embroidery pattern set.
The sequins are 5mm cup style.
Here is the stitch information for this project.
For the cat's outline, I used the Back Stitch. I used one strand for his head and three for his body. The ears, fur, mouth and eye and collar outlines are also Back Stitch. The eyes, nose and collar jewels are Satin Stitch. The whiskers and the pillow top outline are Stem Stitch. The pillow bottom and accent lines are Back Stitch.
My color palette floss numbers:
This wheat sheaf border is another of the motifs from my Thanksgiving embroidery pattern set.
This was a very easy embroidery project and did not take me long to stitch.
I used simple stitches on this project. The wheat heads are done with Straight Stitch and Lazy Daisy Stitch. The Straight Stitches are six strands of cotton floss, the Lazy Daisies are done with perle cotton floss. The wheat stalks are done with Stem Stitch - in three strands of cotton floss. The center heart is done with Double Knot Stitch using three strands of cotton floss.
Here are the color numbers for the floss I used:
Now which of these should I start embroidering next? I really like the pumpkin!