skip to main |
skip to sidebar
Time for another 100 Stitches post! This is the Four-legged Knot Stitch. It is an isolated stitch:
For my demonstration, I used perle cotton floss in DMC no. 995:
The first step is to make a vertical Straight Stitch:
Then come up through the fabric on the right side of the Straight Stitch :
Pull the needle over the Straight Stitch so the floss crosses over the Straight Stitch and then bring the needle back around :
Now slide the needle under the floss and the Straight Stitch without going back into the fabric.
Pull the needle all the way through. You will see the floss is creating a loop - make sure the needle is going through it :
this will create a knot :
Now go back into the fabric on the left side of the Straight Stitch. This will create a small horizontal Straight Stitch:
Pull all the way through and that completes the Four-legged Knot Stitch:
If you wish to make a row of these just follow the above steps and work from right to left:
Here is a look at the underside of this stitch:
I learned the stitch from the book Embroidery Stitches by Mary Webb.
All done with the embroidery on this project! You can see the other posts here: {1 2 3}
Here is my stitch list - I used Long and Short Stitch for the cactus paddles. Straight Stitch for the cactus fruit, spines and for the interior of the rattlesnake body. I used Back Stitch for the rattlesnake outline and some of the text outlines. The spots on the cactus paddles are French Knots.
Here is my color palette along with the corresponding floss numbers:
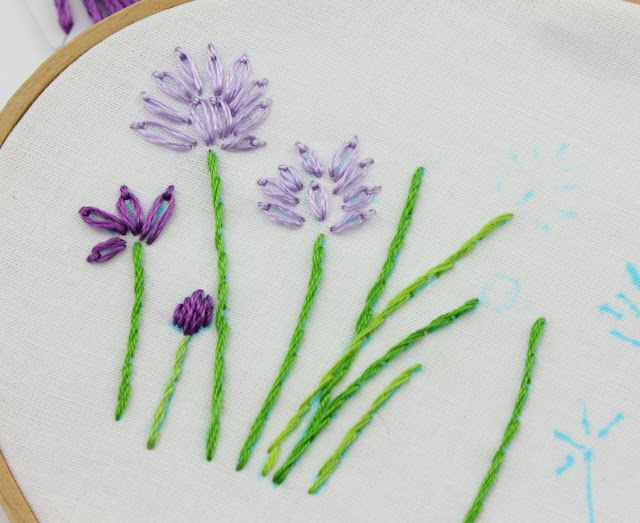
I have a work in progress to share. I am embroidering this chive border from my Herbs embroidery pattern set.
For the chive flowers, I am using satin embroidery floss. Satin floss is slippery and a little difficult to work with - but very much worth the effort! It has such a beautiful sheen:
For all the stems, I am using regular cotton floss in a mixture of greens.
I will post soon on the floss color numbers and the stitches used in this project.
This black and grey butterfly is stitched from another motif included in my Butterfly Garden embroidery pattern set. I introduced this set in my previous blog post.
He is stitched with Lazy Daisy stitches in an ombre color effect from black to light gray. For his body, I used a Couching Stitch couched with silver metallic floss.
Also, as I mentioned in my previous post, I want to share the stitch and color information for the butterfly wreath.
All of the stems are done with the Back Stitch. The leaves are Fish bone Stitch. The light and dark pink flowers and all flower centers are French Knots. The random accent leaves are Lazy Daisy. The light yellow starburst flower is formed with Straight Stitches:
The butterfly is Back Stitch, Lazy Daisy Stitches and French Knots:
Here are the floss color numbers used in this palette:


