Showing posts with label fish bone stitch. Show all posts
Wednesday, January 27, 2016
Home Sweet Home Stitching Complete!
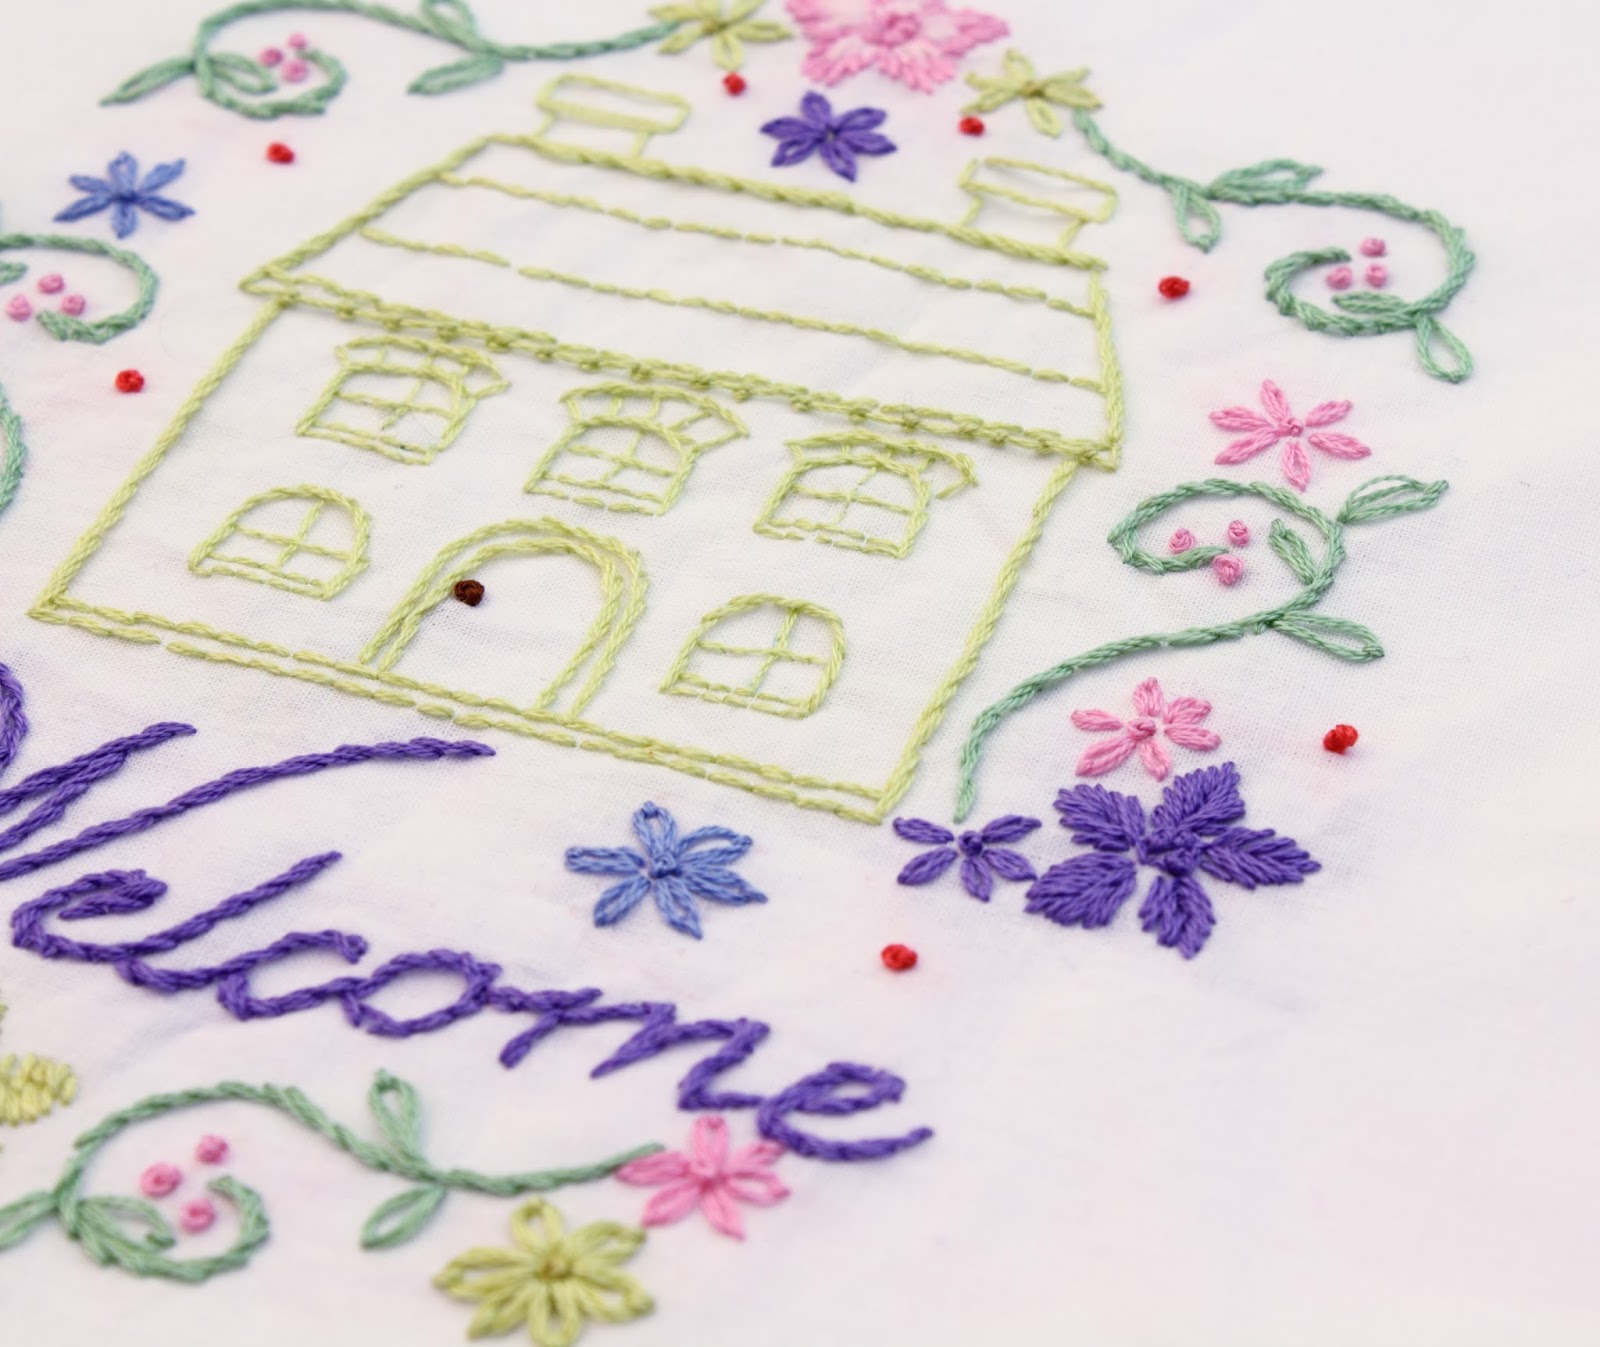
I finished stitching my welcome motif from the Home Sweet Home embroidery pattern.
I used a variety of stitches. Stem Stitch, Double Knot Stitch, French Knots, Lazy Daisy Stitch, Long and Short Stitch and of course, Back Stitch:
Oh and I almost forgot - the Fishbone Stitch! I used that for the biggest purple and blue flowers:
You might remember when I started this project I had quite the color palette planned.
As it turned out, I did the majority of the project using these beautiful colors:
and didn't use any of the black, gray or charcoal!
I think there is a nice balanced combination of colors and nothing stands out too much:
Here are the floss numbers of the colors I used:
Posted by
Kim
at
1/27/2016
Labels:
back stitch,
fish bone stitch,
french knot,
home sweet home embroidery pattern,
lazy daisy stitch,
stem stitch
5
comments
Thursday, October 8, 2015
Two New Works In Progress
I have two new works in progress to share. The first one a set of napkins. I will be embroidering an Autumn motif on each one.
For my first napkin, I am stitching this beautiful leaf garland.
This is the Fishbone Stitch that I am using for the leaves. I love this stitch because it is easy to do and fills a leaf shape so nicely!
I really like the cream colored fabric that I am using for the napkins. This is a fabric I have had for a long time and I think it will be perfect sewn up into napkins. I have already used some of this fabric for a table topper. You can see that project {here}.
My next project is a tea towel embroidered with tiki-statues and interesting border. You may remember when I was planning this - you can read about it {here}. Since that post, I have made some progress:
I have finished the border. I did the whole thing in Stem Stitch. The floss is perle cotton {dmc color variations 4200}.
Now I need to choose the floss colors for these three. Should be fun!
Posted by
Kim
at
10/08/2015
Labels:
autumn embroidery pattern packet,
fish bone stitch,
Hawaii Embroidery Pattern Packet,
stem stitch
2
comments
Saturday, September 13, 2014
Ballerina Pillow Project - Part Seven
I have an update to my ballerina pillow project. If you remember from my last post on this project, I was beginning to stitch the motif for the pillow back.
I have completed all the stitching. I used the fishbone stitch for the leaves, the long and short stitch for the rose, and the stem stitch for the rose outline.
For the swirly lines, I used the double knot stitch :
Then I added a line of back stitch to each edge of the double knot stitch. I used green floss on the back stitch to add interest. Here is a little better view of the green:
Once I finished the stitching, I compared it to the stitching on the piece that will be the pillow front. They look great together except
I used this rainbow blending filament to add sparkle to the stitching on the ballet costumes. It really added an extra dimension so I decided to add some of the filament to the back piece too.
Once that was done, my next step was to rinse out all the blue water soluble marker pen lines.
Give it a final pressing with the iron {on the underside!}
After all the wrinkles were ironed out, I snipped off any remaining thread tails:
My next steps will be to sew the back and front pieces together
and finish the pillow!
Posted by
Kim
at
9/13/2014
Labels:
back stitch,
ballerina embroidery pattern packet,
ballerina pillow project,
fish bone stitch,
stem stitch
3
comments
Wednesday, August 6, 2014
Ballerina Pillow Project - Part Six
I have started on the back panel of the ballerina pillow!
If you remember from my last post on this project, I was deciding which motif to use for the back panel. {You can read my other posts about this project here: {part one} {part two} {part three} {part four} }
I decided to go with this one - a beautiful rose and some swirly lines.
I chose this one because it is about the same size vertically as the motif on the front panel.
To start on the back panel, I first placed the fabric for the back panel over the front panel:
I lined up the two edges and pinned both panels together. I could see the front panel motif through the fabric so it was easy to center the motif for the back panel both vertically and horizontally.
I made a mark indicating the top edge, middle and the bottom edge as well as the left and right edges of the motif:
Once I had the spacing correct, I taped the motif to my cutting mat and put the back panel fabric over it, making sure to line up the marks:
I transferred the motif to the fabric using a water soluble marker:
Done!
I think this will look really beautiful for the back of the pillow:
Now to stitch the back....I have the leaves done and part of the rose. You probably recognize the fishbone stitch that I am using on the leaves. I love doing that stitch and I think it is the perfect stitch for leaves!
I am not sure which colors or stitch I will use for the swirly lines.
I will be back soon with part seven!
Posted by
Kim
at
8/06/2014
Labels:
ballerina embroidery pattern packet,
ballerina pillow project,
fish bone stitch
8
comments
Thursday, February 4, 2010
100 stitches - fish bone stitch
100 Stitches time again! I have just learned how to do the fish bone stitch! I am really excited about this beautiful stitch. According to the 100 stitches description, this is an excellent stitch for filling small shapes. So to practice the stitch, I drew a leaf shape with a center line marked...

I am using six strands of this beautiful green - dmc color 907. I will refrain from saying "i love this color!" since I say that in nearly every 100 stitches post!
The first step is to come up through the fabric and go back down through your fabric making a small straight stitch. Come up again next to the straight stitch and make a slanting stitch that slopes across the center line and goes back through the fabric at the base of the first straight stitch.

Now come up through the fabric on the opposite side of the first straight stitch, make a slanted stitch again sloping to the center line and overlap the base of the second stitch.

Just continue working opposite sides of the shape, always slanting your stitch to the center line and always overlapping the base of the stitch before.
This was a very easy stitch!
This stitch is #11 and is in the flat stitches category of 100 stitches.
Subscribe to:
Posts (Atom)


