skip to main |
skip to sidebar
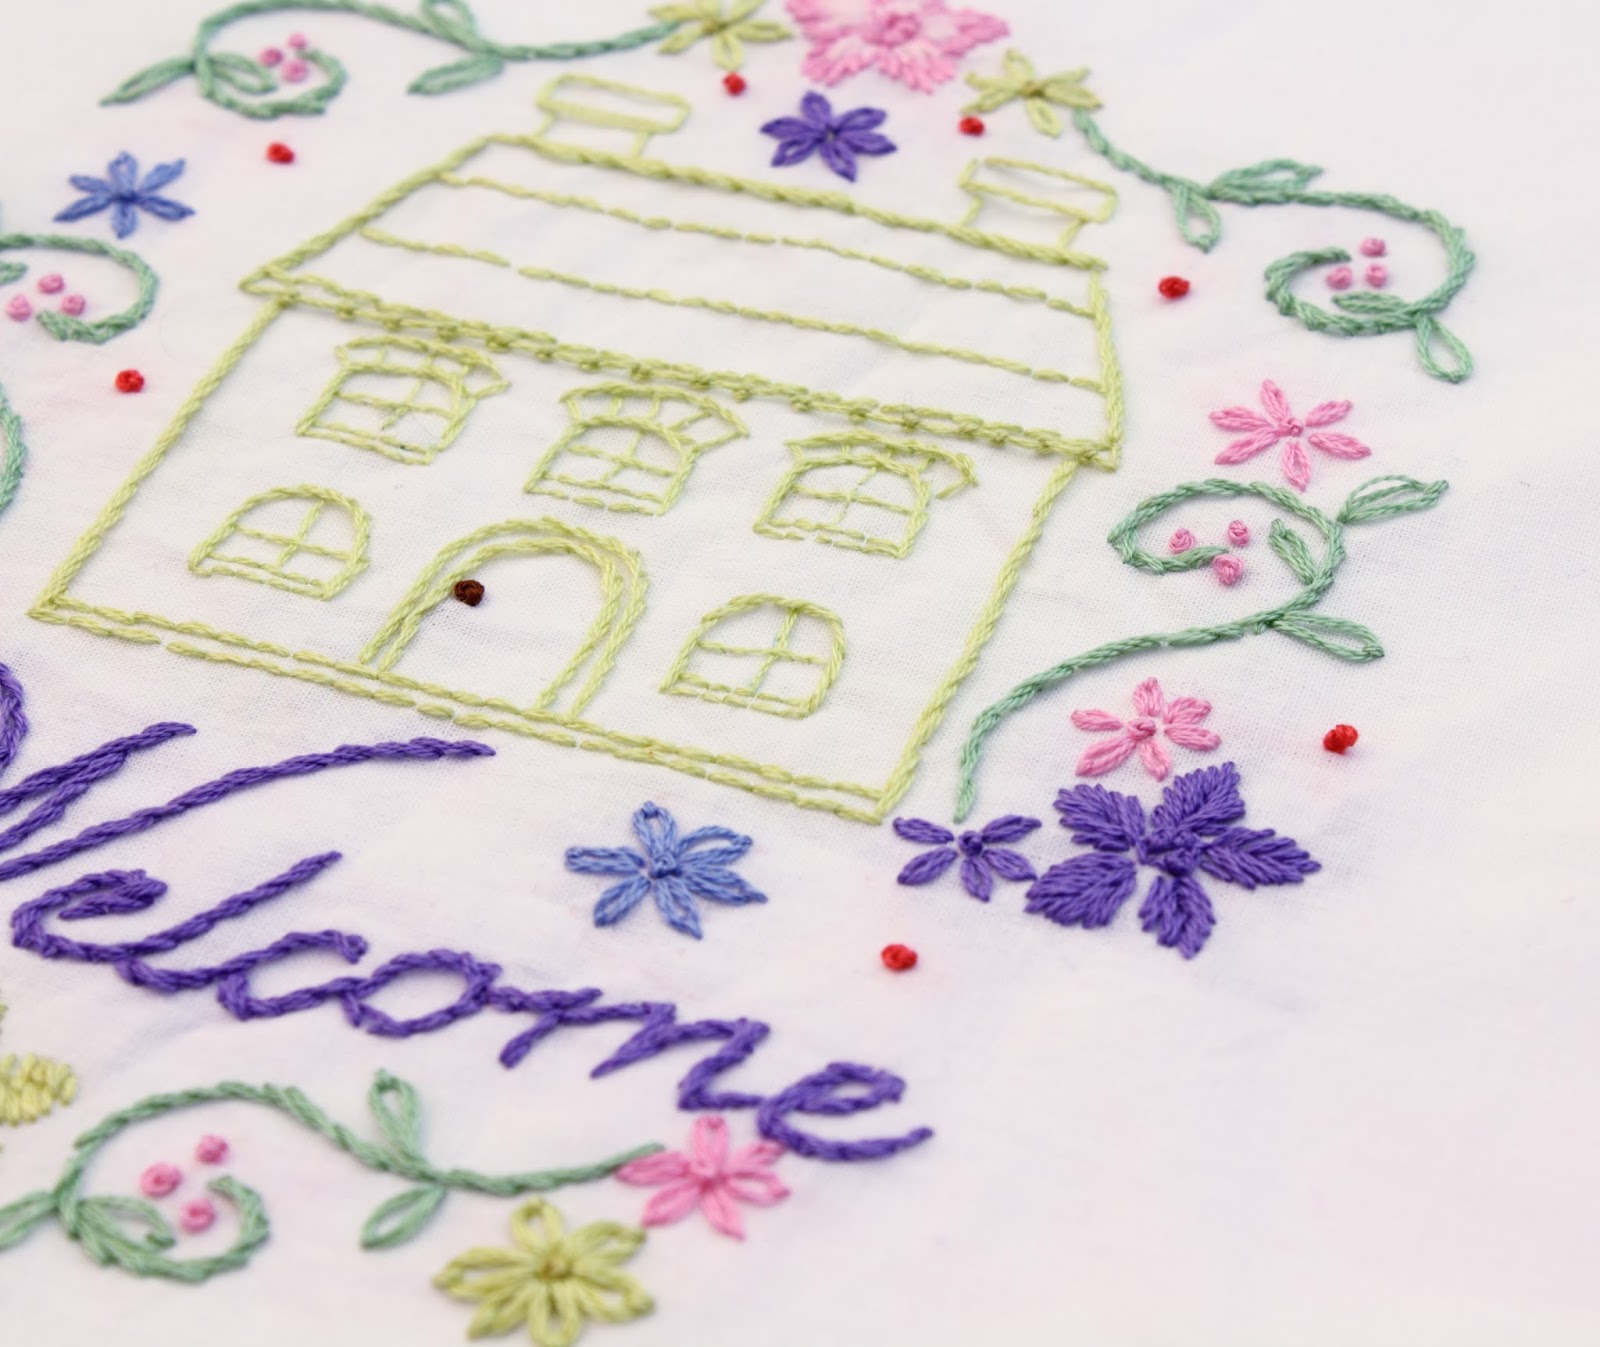
I finished stitching my welcome motif from the Home Sweet Home embroidery pattern.
I used a variety of stitches. Stem Stitch, Double Knot Stitch, French Knots, Lazy Daisy Stitch, Long and Short Stitch and of course, Back Stitch:
Oh and I almost forgot - the Fishbone Stitch! I used that for the biggest purple and blue flowers:
You might remember when I started this project I had quite the color palette planned.
As it turned out, I did the majority of the project using these beautiful colors:
and didn't use any of the black, gray or charcoal!
I think there is a nice balanced combination of colors and nothing stands out too much:
Here are the floss numbers of the colors I used:
I have a finished stitching to share.
Do you remember when I posted about combining some motifs from my Here Comes Santa Claus pattern set?
I put these motifs together and finished up the stitching. I am so happy with the result!
The red lettering and the white snowflakes are the perfect combination for Christmas. I added some sparkly rainbow blending filament to the snowflakes.
I used a Whipped Blanket Stitch for the left arm of each H. The Blanket Stitch in red and the whipping in white. It reminds me of a candy cane. I also added some of the rainbow blending filament to the right arm of each H:
I also completed a beautiful border. This is all done in metallic floss!
Well, except for the red berries. They are Satin Stitched in regular cotton floss. I added a few Straight Stitches using gold blending filament to add some sparkle.
The holly leaves are outlined with Stem Stitching and filled with Straight Stitches.
The light and dark green lines with the gold French Knots are couched. What an easy way to deal with metallic floss!
I started this candy embroidery project a while ago - you can read about it {here}.
Now that I have finished it, I want to share some of the stitching details and my color choices.
This sweet motif is from my Candy & Sweets Embroidery Pattern and I have to say this was so much fun to stitch!
For the big pink swirl in the background, I used parallel rows of Split Stitch. The lollipops are outlined in Stem Stitch and filled with Straight Stitches. The The lollipop sticks are parallel rows of Stem Stitch - this technique is a nice way to fill in spaces. For the red candy, I used all Stem Stitch.
The cupcake paper is outlined in Stem Stitch and the accent lines are also Stem Stitch. The top border of the cupcake border is Double Knot Stitch. The cupcake is done in rows of Straight Stitch. The cupcake frosting is a combination of Stem Stitch and French Knots. All the red accent dots are also French Knots.
On the lavender candy, I used Stem Stitch for the outlines and a Straight Stitch for the stripes. The big lollipop has a Stem Stitch outline, Straight Stitch interior lines and rows of Stem Stitch for the stick.
I really like the colors I used on this project, all reminiscent of candy and sweets. Here are the floss numbers in my palette:
Next up are some new projects - maybe these dipped apples...
I finished my ladybug embroidery project. I first blogged about this {here}.
I had wanted to challenge myself to use as many different stitches as possible. By my count, I ended up using eight different stitches.
The ladybug's antennae and body outline are Stem Stitch, her wings are outlined in Double Knot Stitch and filled with lines of Running Stitch. The spots on her wings are Satin Stitch and French Knots. For her body, I used Trellis Couching Stitch:
For the flowers, I outlined the petals in Blanket Stitch, and put in a Lazy Daisy Stitch. For the flower centers I used three French Knots. I also used French Knots for the blue accent dots spaced randomly round the motif:
I am really pleased with the variety of stitches I included on this project!
I think this project would look really sweet framed in this hoop - maybe embellished with some matching trim? This is a 6" hoop and is the perfect size for this motif.
Here are the floss colors and numbers I used for this project:
I have an update to share on my Le Chat work-in-progress. You may remember this kitty from my earlier post {here}. Since that post, he has been outlined in gray floss and had all his features stitched.
Once I finish the bicycle basket, I think he will look very comfortable surrounded by these beautiful flowers.
I stitched the flowers in Straight Stitch with French Knot centers.
For the kitty's collar, I used Stem Stitch for the pink outline and Satin Stitch for the jewels. I really love his eyes - this is blending filament satin stitched:
Here are the floss colors I have used so far. I am still wondering about the best color to use for the bicycle basket...
I will keep you updated on my progress with this project!
I have some progress to share on my Fourth of July stitching. This is a 17" x 17" table topper. You can catch up with this project here: {part one} {part two}. Since my last post, I have finished some motifs and taken some of my stitching back out!
I took a nice aerial shot so you can see the whole thing:
I have finished this rocket motif, I used Chain Stitch for the stripes on the rocket, French knots above the stripes, Stem Stitch for all the outlines and the fill on the top of the rocket and Straight Stitch for the sparks:
I am almost done with this big firecracker, I am just deciding if I want all the stars in red or maybe stitch the other two in blue.
Same with the Uncle Sam hat...lots of color decisions even with this limited color palette!
The stitching I removed was all the blue around the star field on the flag. I kept the ring of stars but I am still figuring out how I am going to fill this in:
I will post my progress on this as I finish - hopefully in time for the 4th of July!
After introducing the Le Chat pattern set on my last blog post {here}, I wanted to share some of the stitching details on this particular project.
I used Stem Stitch on the woman's skirt, legs and shoe straps. For her shoes, I used the Split Stitch. I also used the Stem Stitch for the wrought-iron fencing and the Satin Stitch for the fence finials.
For the cat's leash, I used the Stem Stitch in metallic cord. It worked really well:
The cat is outlined in Stem Stitch, with two rows on back of his legs and tail to give a little more weight and emphasis. His fancy collar is all Satin Stitch.
For the cat's eye, I used Satin Stitch and I combined blending filament with the floss to add sparkle. His nose is also stitched in Satin Stitch. For the planter, I used Stem Stitch. The leaves are Fishbone Stitch and the flower is Long and Short Stitch with a French Knot Center.
The curb is done in Back Stitch and the road edge is in Stem Stitch.
For all the floss I used, here are the color numbers:
Now onto my work-in-progress. It is the cat sitting in a bicycle shopping basket. I am selecting my colors and experimenting with which stitches to use!
I will be sure to post my progress!
I have a few Easter embroidery finishes and a new work-in-progress to share. First up is this sweet egg basket and flowers:
I used an Easter basket motif and two border patterns from my Easter embroidery pattern set:
I finished stitching it yesterday and washed out all the water soluble marker lines. Then I pressed it and took a few pictures. When I was uploading the pictures, I spotted a mistake that I hadn't seen before - look closely at the ribbon hanging off the bow:
I forgot to finish the edge on the right-hand side! It was only a few stitches missing so I was able to fill them in.
It looks much better now!
The stitches I used on the ribbon are the Herringbone Stitch for the inside and the Stem Stitch for the edges. I used the Blanket Stitch for the handle. The scalloped rim of the basket and the accent lines on the front of the basket are all done in Stem Stitch. The outline of the basket is done in Split Stitch and Back Stitch. I used all of these stitches on the eggs and also French Knots and Chain Stitch:
The flowers and the green curvy lines are Stem Stitch. There are also Lazy Daisy Stitch and more French Knots:
Here are the floss colors and numbers I used for this project:
My other finish is this decorated egg. This was so fun to stitch and since I used such easy stitches, it was very quick to finish! This is Stem Stitch for the egg border and the flowers, French Knots, and Cross Stitches with a Straight Stitch in a contrasting color over their middles:
Here are the floss colors and numbers I used for this project:
My new work-in-progress is this little duckling. I am picking some nice colors to finish this:




 Posts
Posts

