Showing posts with label composite stitches. Show all posts

Friday, February 5, 2016

Butterfly Chain Stitch


Isn't this a beautiful stitch?! This is the Butterfly Chain Stitch and it is the newest stitch I have learned from my 100 Stitches Plus list.

The Butterfly Chain Stitch is actually a composite stitch,  made up of two stitches - the Straight Stitch and the Twisted Chain Stitch.  The Straight Stitches are stitched in clusters of three stitches and then the Twisted Chain Stitch is worked over each cluster.

This stitch can be worked using two different colors or weights of floss or you could also use the same floss for both stitches.  

I like this pink and gray combination of perle cottons.
The pink is DMC color variations 4180 and the gray is DMC 414. 


Even though this looks fairly straightforward...I found it very helpful to measure and mark a few guidelines!


I marked two parallel guidelines at 1/2" apart.  These will define the width of the Straight Stitches.


I also marked a line equidistant between the two parallel lines.  This will be the guideline for the Twisted Chain Stitch:


First up are the Straight Stitches


To form these, I came out of the fabric on one parallel guideline and went back into the fabric at the opposite parallel guideline:


Three Straight Stitches - fairly close together make up the first cluster:
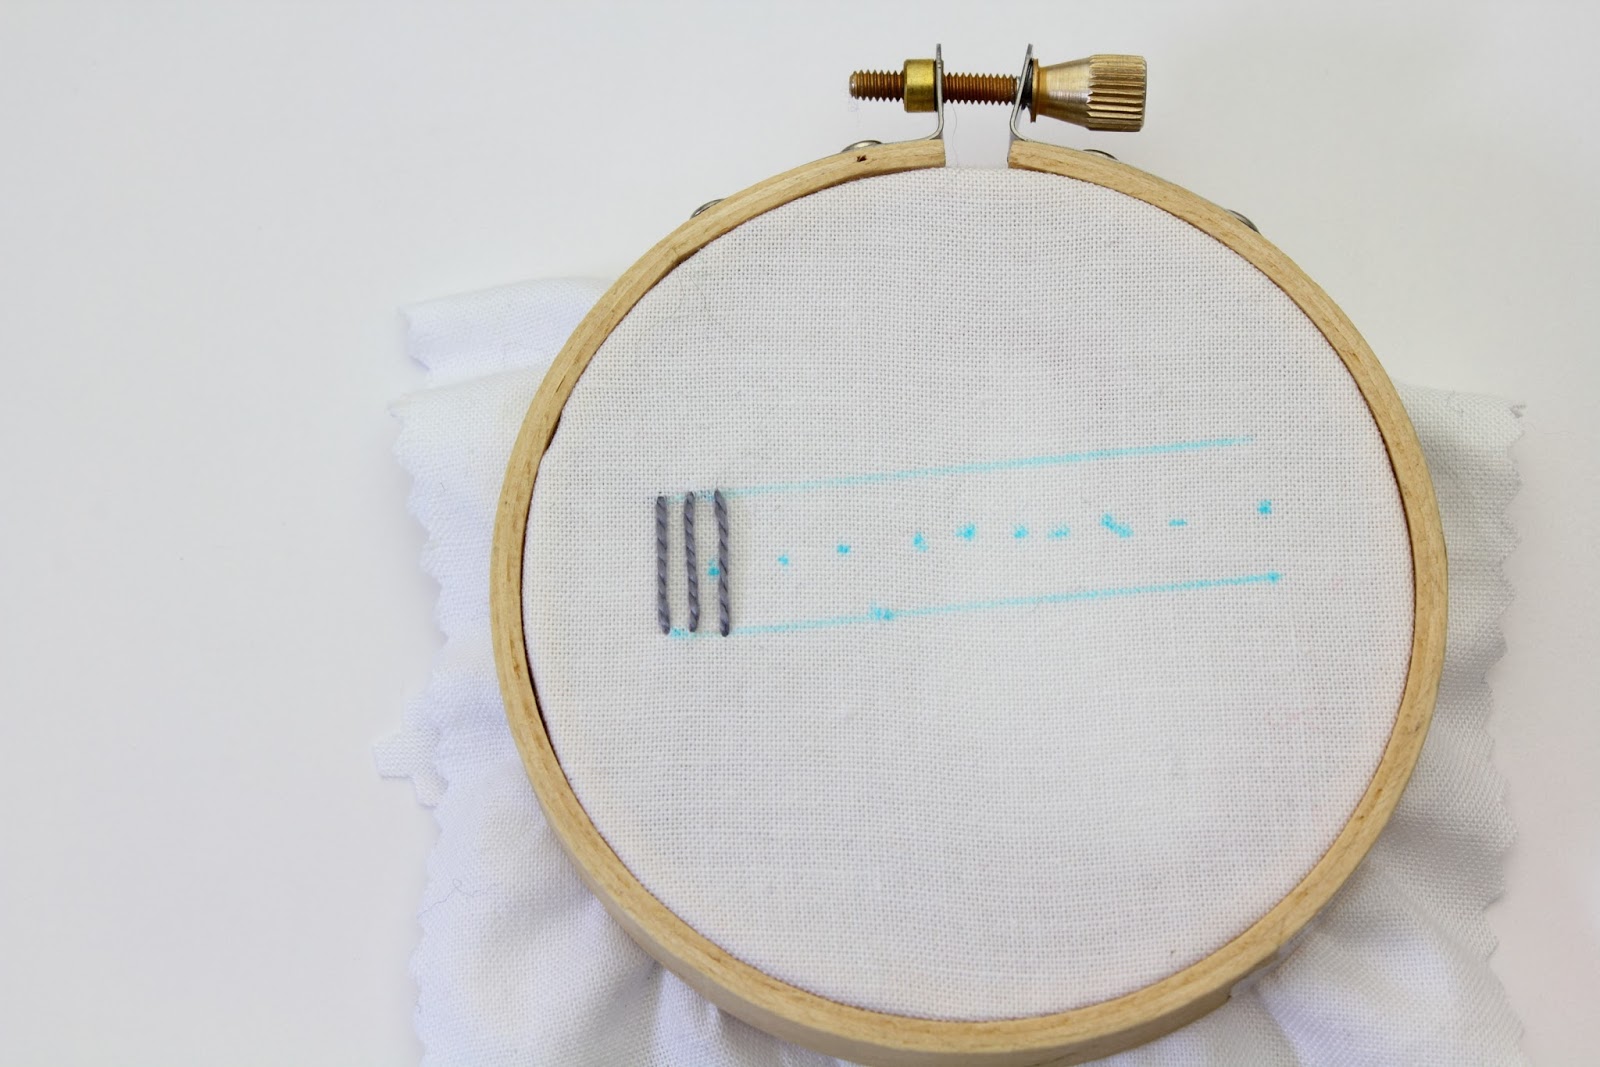


The clusters should be spaced so that the space between each cluster is the same as the width of each cluster.  So for mine, my cluster is 1/4" wide so I started the next cluster 1/4" to the right of the first cluster.


And the same for the next cluster:


All the way to the end of the parallel guidelines:


Next is the Twisted Chain Stitch in pink:


To start, I came up through the fabric on the center guideline at the edge of the last Straight Stitch cluster:


I pulled the thread all the way through:


Then I brought it back around and slid the needle under the first stitch cluster.  Notice in this picture the needle tip is going under the Straight Stitches and the working thread but is not entering the fabric.  It is just sliding across it:


Now the needle goes over the working thread - this creates a loop: 


and as the thread is pulled:


It draws the Straight Stitches together in the center. Make sure to pull this nice and tight so it forms a butterfly :) 


Now repeat for the second cluster:


Sliding under the cluster and working thread and then over the working thread:


Keep working down the line of clusters until the final one - I went back into the fabric on the center guideline right next to my final chain loop/knot:


Here is a look at the underside of this stitch:


And a final look with all the guidelines washed out:


This stitch is from the book Embroidery Stitches by Mary Webb.

Wednesday, October 21, 2015

Whipped Stem Stitch


This interesting stitch is the Whipped Stem Stitch.  It is the latest addition to my 100 Stitches Plus list.


As the name suggests, this stitch is made up of a single line of Stem Stitch that is whipped.  The whip is very effective when done with a contrasting color floss.  
The floss that I used for my stitching is perle cotton. The colors numbers are DMC 414 {gray} and DMC color variations 4180 {pink} 


Once the line of Stem Stitching is done, the next step is to whip it.  I used the gray for the Stem Stitching and now the pink to whip:


I worked the whip from left to right.  I came up through the fabric on the left side of and right below the Stem Stitching line:


I pulled all the way through:


Then I brought the needle around to the top of the stitching line and passed the needle under the stitching line.  I just slid it under the Stem Stitch and did not pick up any fabric: 


I pulled the floss all the way, creating the first whip:


Then I brought the needle back around and did the second whip in the same way, sliding under the next Stem Stitch:


Here is a good view of the needle sliding under the next Stem Stitch:


I just continued the same steps until the end of the stitching line:


To finish, I brought the needle around and went back into the fabric:


and secured my floss on the underside:


This is a really simple way to embellish Stem Stitching.  I think I will like using this on a lot of different projects.


This stitch is from the book Embroidery Stitches by Mary Webb.

Monday, October 15, 2012

100 Stitches - Maltese Cross Stitch

I found this latest stitch on my 100 Stitches list to be so complicated that I actually had to draw a diagram to follow!


Here is the stitch completed - wow!  This is the Maltese Cross Stitch.  100 Stitches calls this a decorative motif.  Bascially, it is a foundation of crossed straight stitches with an interlacing thread on top:


I used two different colors for my stitch.  The purple is DMC #550 in pearl cotton and the yellow is DMC #727 also in pearl cotton:


I transferred my diagram onto my fabric.  Notice the end point of each line in this diagram.  These are all the spots where you come up or go into the fabric.  Notice also the outer most lines are split into two lines each but the four interior lines are solid across the whole motif.   My first step was to come up through the fabric at the very top of the motif.


Here is a partial list of the stitch order. 


You can follow the thread in these next pictures:


When I finished I had the foundation for this stitch.  The over/under positions of the threads making up this foundation are critical - if they are not correct, the top thread cannot be interlaced to make the design. 


Next I started the interlacing with the yellow thread.  I came up through the fabric at the top of the center square:


Then I started the interlacing:


The pictures included in the 100 Stitches book showed the interlacing progression and I literally had to trace my way through to follow all the over and under weaving!


Very confusing! 


This stitch is a lot like the Interlacing Stitch.


Here is a picture of the underside of the stitching:


Whew! I am glad I learned this stitch and so happy to have a picture to prove it!


It is a beautiful stitch:


The Maltese Cross Stitch is #62 on the list and is in the Composite Stitches section of 100 Stitches.