
 Doing this stitch is all about the preparations. You will need two different colors of floss. One for the parallel lines of stitching and another color for the interlacing.
 You will want to draw two parallel lines to keep your stitches in line. 100 Stitches suggests the lines be between 1/2" and 3/4" apart. I did mine 1/2" apart:
 After you have drawn your lines, stitch the first line with the back stitch . Here is a little refresher on the back stitch. Working from right to left, come up through your fabric, then back into the fabric to the right of where your floss came up and come back out of the fabric to the left of where your floss came out:
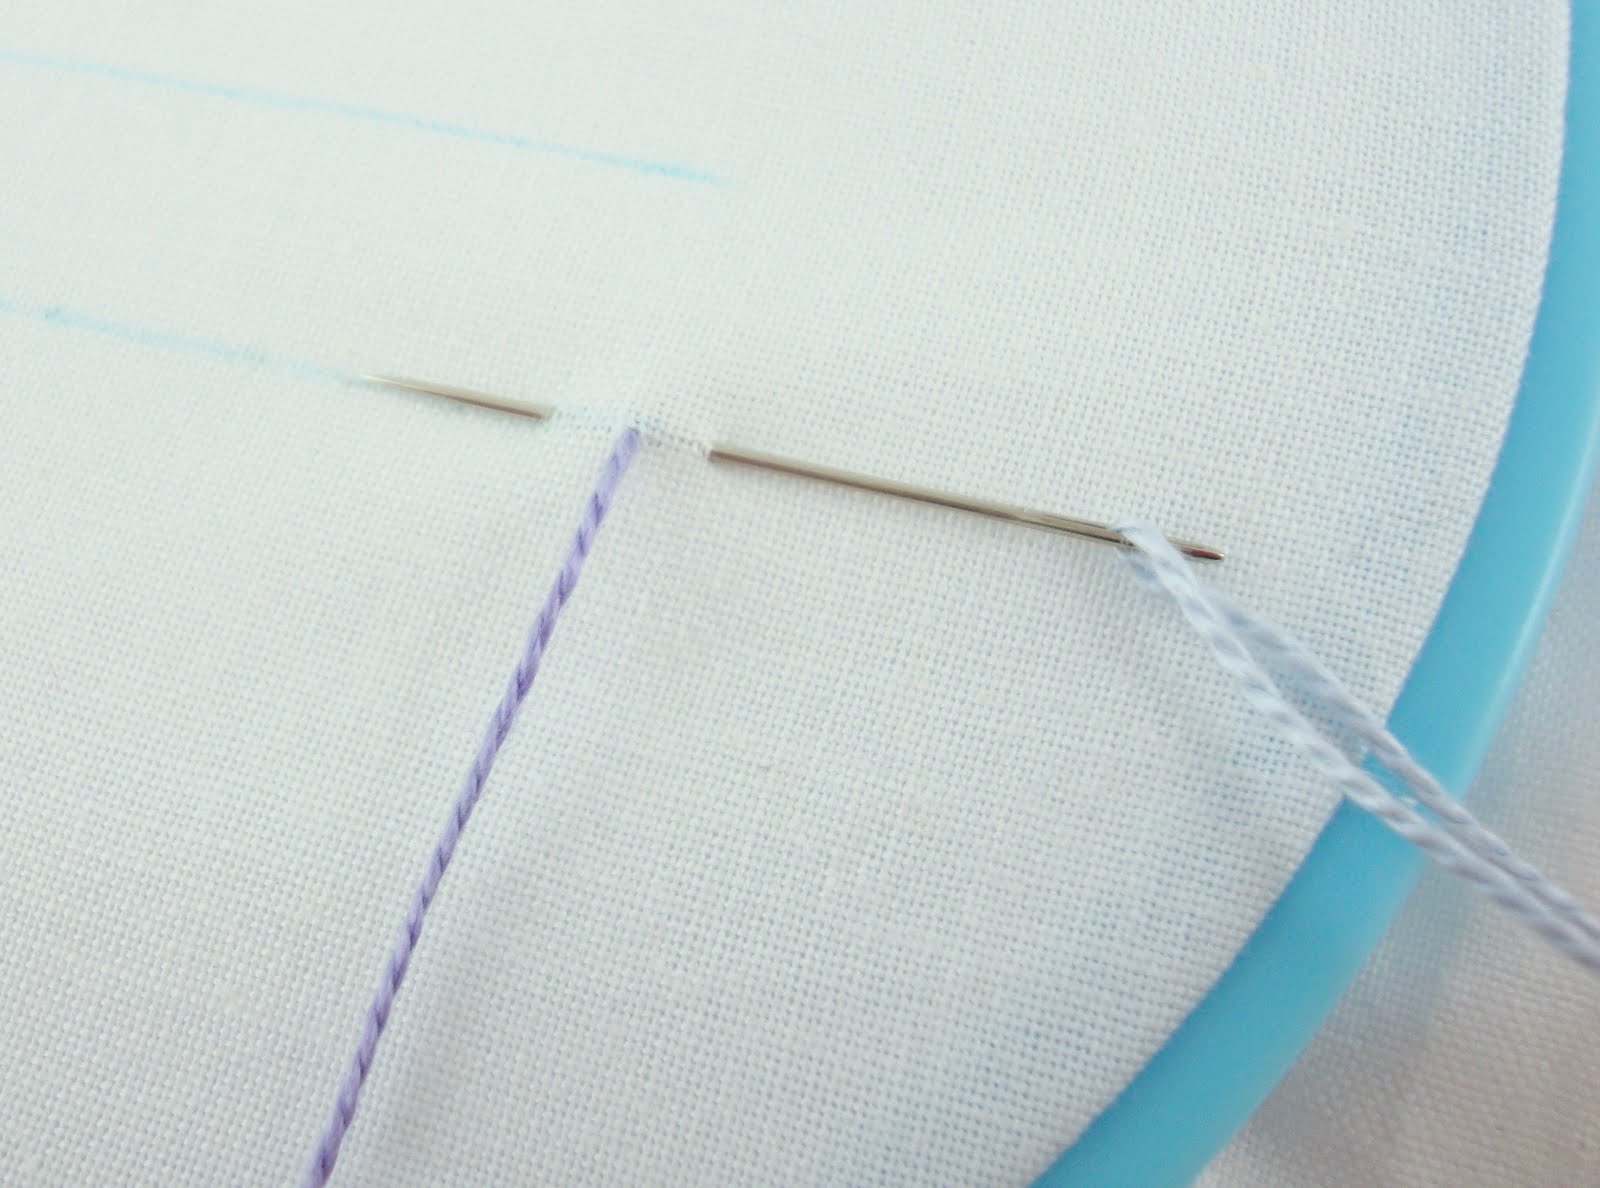 Pull the floss all the way through and go back into your fabric at the end of your first stitch and back out of the fabric to the left of the new spot your floss came through :
 Once you have the first line of back stitch done, you start on the second line. This line will also be back stitches but make these stitches start and end even with the center of the stitches directly opposite them in the first line of back stitches:
 Here is a closer view with a helpful ruler showing how the end of the stitch on the top line is lined up with the center of the stitch on the bottom line:
 And a closer view without the helpful ruler:
 Now finish the top line of back stitches so that you have two parallel lines. Make the last stitch on the top line extend a little further to the left than the last stitch of the bottom line. Whew!
Now the fun part! Using a contrasting color of floss, bring your needle up through the fabric, in the center of the parallel lines: Pull it all the way through:
 Now to interlace - this is easier than it sounds! Keep the floss to the right and bring your needle under the last stitch on the top line - not picking up any fabric, just sliding the needle under the stitch:
 Pull the floss all the way through - and to the right. Notice, the needle goes under the stitch but over the interlacing floss:
 Keeping your floss to the right, bring your needle under the last stitch of the bottom row. Don't pick up any fabric, just slide the needle under the stitch and then over the interlacing floss:
 Pull all the way through and keeping the floss to the right, slide your needle under the next stitch on the top row:
 Then the bottom and then the top...interlacing the contrasting floss through every stitch in the two parallel lines!
 Until you have this beautiful interlaced band of stitches:
 Here is a closer look. I was not really sure about how tight to pull everything but my finished product looks just like the picture in 100 Stitches so I must have done it correctly!
 I love this stitch! It is so beautiful and I really like the way the two different variegated flosses look! This stitch is very easy and fun to do and give a dramatic result. It is stitch #60 and is in the Composite Stitches section of 100 Stitches.
 Pull it all the way through:
 Now to interlace - this is easier than it sounds! Keep the floss to the right and bring your needle under the last stitch on the top line - not picking up any fabric, just sliding the needle under the stitch:
 Pull the floss all the way through - and to the right. Notice, the needle goes under the stitch but over the interlacing floss:
 Keeping your floss to the right, bring your needle under the last stitch of the bottom row. Don't pick up any fabric, just slide the needle under the stitch and then over the interlacing floss:
 Pull all the way through and keeping the floss to the right, slide your needle under the next stitch on the top row:
 Then the bottom and then the top...interlacing the contrasting floss through every stitch in the two parallel lines!
 Until you have this beautiful interlaced band of stitches:
 Here is a closer look. I was not really sure about how tight to pull everything but my finished product looks just like the picture in 100 Stitches so I must have done it correctly!
 I love this stitch! It is so beautiful and I really like the way the two different variegated flosses look! This stitch is very easy and fun to do and give a dramatic result. It is stitch #60 and is in the Composite Stitches section of 100 Stitches.


Gracias por compartir sus puntadas siempre.
ReplyDeleteHi Kim!...Love this stitch!...I've never seen it before and I too was wondering how tight it should be pulled...Beautiful with the variegated floss that you chose!...Thanks for the clear and easy instructions!...Annie
ReplyDeleteStunning work Kim! Thank you for all the great photos & instructions one day when I am feeling brave, I might have a go at this one :-)
ReplyDeletexxh
This is really a beautiful! Your pics and instructions are always so clear and pretty!
ReplyDeleteThanks for your comments everyone.
ReplyDeleteRosali - Gracias! Estoy feliz de compartir :)
This is very pretty.I love your tutorials as they are very clear.
ReplyDelete