Thursday, August 13, 2009

butterfly wip continues!

I have started stitching on the butterfly wip. I decided after trying out several colors that I really love this satiny white floss and bright red floss together.


There was an unfortunate incident when I was finishing the butterfly's eye. I didn't like the way the floss was looking - I had used too many strands - and I decided to take it out. Instead of patiently and carefully pulling the stitching out, I used scissors and of course - I snipped through the fabric - sooooo I don't exactly know how I will fix this...maybe a button?


The word butterfly is almost done and I love the way the white french knots look!


Now to choose the perfect trim!


Tuesday, August 11, 2009

100 stitches - french knot


As I mentioned in a previous post, I am working my way through an embroidery book called 100 Embroidery Stitches. Stitch number one was the back stitch . The second stitch I am going to show is found in the knotted stitches section of the book and is: the French knot (stitch #52).


To demonstrate my learning of this stitch, I am using a beautiful orange floss.  This is DMC color variations number 3840.


The first step is to bring the needle up through the fabric:


Pull the floss all the way through:


Now bring the needle around close to where the floss first emerged:


Wind the floss around the needle -  over, under


Over, under.  This makes two wraps around the needle:


Carefully tighten the wraps so they are snug but can still slide against the needle.  Do this by holding the needle and carefully pulling on the floss:


As the floss is tightening, carefully move the needle point into position to go back into the fabric right alongside where the floss first emerged.  As you are doing this, keep pulling on the floss and the wraps will naturally slide to the bottom of the needle:


Push the needle right through to the underside and as you draw the needle through, keep pulling on the floss - you can see in this picture I am keeping the floss taut - this keeps the wraps in place while the knot is forming:  


Keep pulling and drawing the floss through:


all the way....

et voilĂ  a French Knot is formed:


This is a look at the underside of the line of French Knots:


Thursday, August 6, 2009

Work In Progress

I am starting a new embroidery project on this very light-weight denim fabric. I am not sure what I am going to do with this - perhaps make a little pillow or use it as a patch on a tote bag. I think it would also look good framed or even as part of a journal book cover.
The patterns I am going to embroider are embellishment patterns from the "Butterfly" pattern packet. I am using the butterfly and the word butterfly. I used my copier to increase the size of the butterfly by 130%.
Here they both are ready to be traced onto my fabric using carbon transfer paper. In a previous post I detailed this process.
The transfer came through really well on this light colored fabric!Now I am ready to stitch! I think I will use these bright colors.
Add Image

Tuesday, August 4, 2009

100 Stitches


I am attempting to work my way through a book titled "One Hundred Embroidery Stitches".  I will post my progress as I learn each stitch.


* Update - I completed the book, learning all 100 Stitches.  
Since I would like to continue improving my skills and expanding my stitch repertoire, I have compiled a new list of stitches to add to the original 100.  
The new list is made up of stitches from several embroidery books and online sources.  As before, I will post my progress.


http://www.bigbgsd.blogspot.com/2015/06/100-stitches-plus-stitch-list-by.html


Saturday, August 1, 2009

Tea Embroidery Pattern Packet


Here is what the pattern packet for the
"Tea" embroidery pattern looks like.
This packet turned out to be eight pages! There
is the introduction page, the main pattern and
then six pages of embellishment patterns. There are so many fun ways to draw teapots, cups and
all the tea accessories.


This is what the main pattern looks like all stitched up. I used the silver metallic floss for the tea tray to make it look like a silver tray. Metallic floss is SO difficult to stitch with but it just looks so beautiful when you are finished!
The covered sugar bowl and creamer were really fun to stitch. In the embellishment patterns, there is a sugar bowl with the lid removed and you can see all the sugar cubes.


So far, I have made two tea towels - one with the main pattern and one with this yellow diamond patterned teapot.
I just love the color combination on this tea towel -
here is a close up of the word Tea at the bottom of the towel.


And I am making this tea tray doily. I really love the way it is turning out!
I do think however that it needs some sort of finishing trim around the edge.


Thursday, July 30, 2009

How I transfer a pattern to my project:

I have tried many different methods for transferring a pattern to a project. The one method that works the best for me is to use carbon or graphite transfer paper and a stylus. Here is what I do:


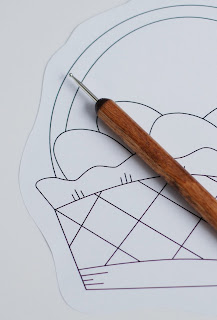
I start with a pattern and my favorite tool - this little embossing stylus. I love this tool because it is as easy to use as a pencil. Each end has a steel ball tip. This strong steel tip allows you to get a precise even line while applying enough pressure to make a clean, easy to see transfer. I always use the end with the super small ball tip. I bought this embossing stylus at a craft and hobby store called Ben Franklin.
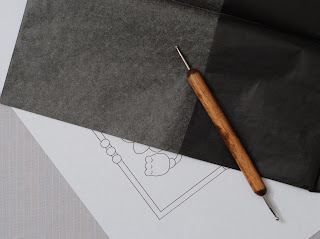


The transfer paper I usually use is called
graphite transfer paper. I buy it at Joann Fabrics. It is black and has a dull side and a shiny side. This graphite transfer paper works perfectly for transferring onto light colored fabrics. It leaves a very nice clear easy to see line. However - it is NOT removable from fabric. It leaves a permanent line. That hasn't been too much of a problem for me - I have made a few mistakes but was able to cover them up with creative stitching :)
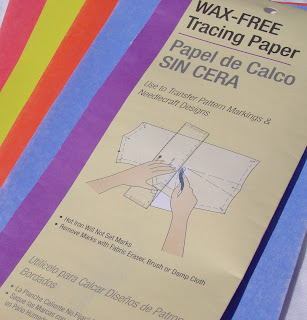


If I am working on dark colored fabrics, I will use
this tracing paper that I also buy at Joann Fabrics. The marks are removable with a damp cloth.
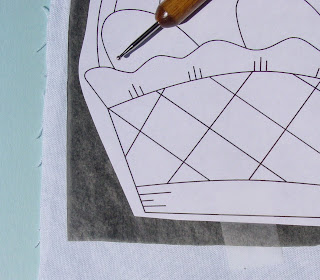


Once I have my pattern ready to go, I cut a piece of the transfer paper about the same size as the pattern I am transferring, and lay it on my fabric. So the transfer paper is sandwiched (shiny side against the fabric, dull side against the pattern) between the fabric and the pattern. I usually put a few pieces of tape down to keep all the layers in place. Then I use the little embossing stylus to trace all the pattern lines. I always peek under the transfer paper when I am starting to make sure I am getting a good transfer. One time I traced an entire pattern with the transfer paper wrong side down so ended up with a blank piece of fabric :(
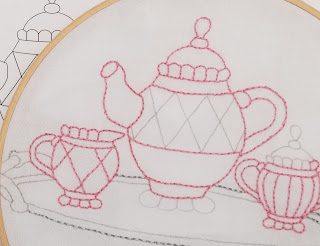

On this work-in-progress picture, you can see what a nice easy to see line the transfer paper left. It is very easy to stitch on those lines!


I know there are a so many ways to transfer patterns but this is the easiest most accurate way I have found.

Sunday, June 21, 2009

Flowers

"Flowers" - my new embroidery pattern packet is ready to go! I have stitched up several examples of some of the patterns included in this packet.
This first one is a beautiful bouquet of spring flowers - this particular pattern has a border around it. Since i stitched the border in a floss color that turned out to be way too dark, i cropped the border out for this picture :) You can see what the border looks like on the picture of the pattern packet - below.


I love this little flower image and the french knot
border! That is a tiny 4" hoop and it makes such a
nice frame i may just keep it as is!


This particular pattern stitched up so quickly and really
turned out beautiful. I used a back stitch for everything. I really love this picture framed in this white frame.


Here is the pattern packet and you can see
the border around the main pattern. This is a really fun set of patterns to stitch and the flowers really look beautiful and delicate. I think any color scheme would work beautifully for the flowers as well. I will just select a nice light floss color for my border next time!
Ok - back to designing - i am finishing up a new pattern packet featuring a beautiful tea service with all the accessories!