This is the sheaf filling stitch:
I can see why it is called the sheaf filling stitch since these sort of look like sheaves of wheat!
This lovely stitch is the latest stitch I have learned from
100 Stitches
I am happy to report that this is a very easy stitch to learn and do.
It is made up of three vertical stitches and two horizontal stitches. So easy, and I think this stitch gives such a beautiful result:
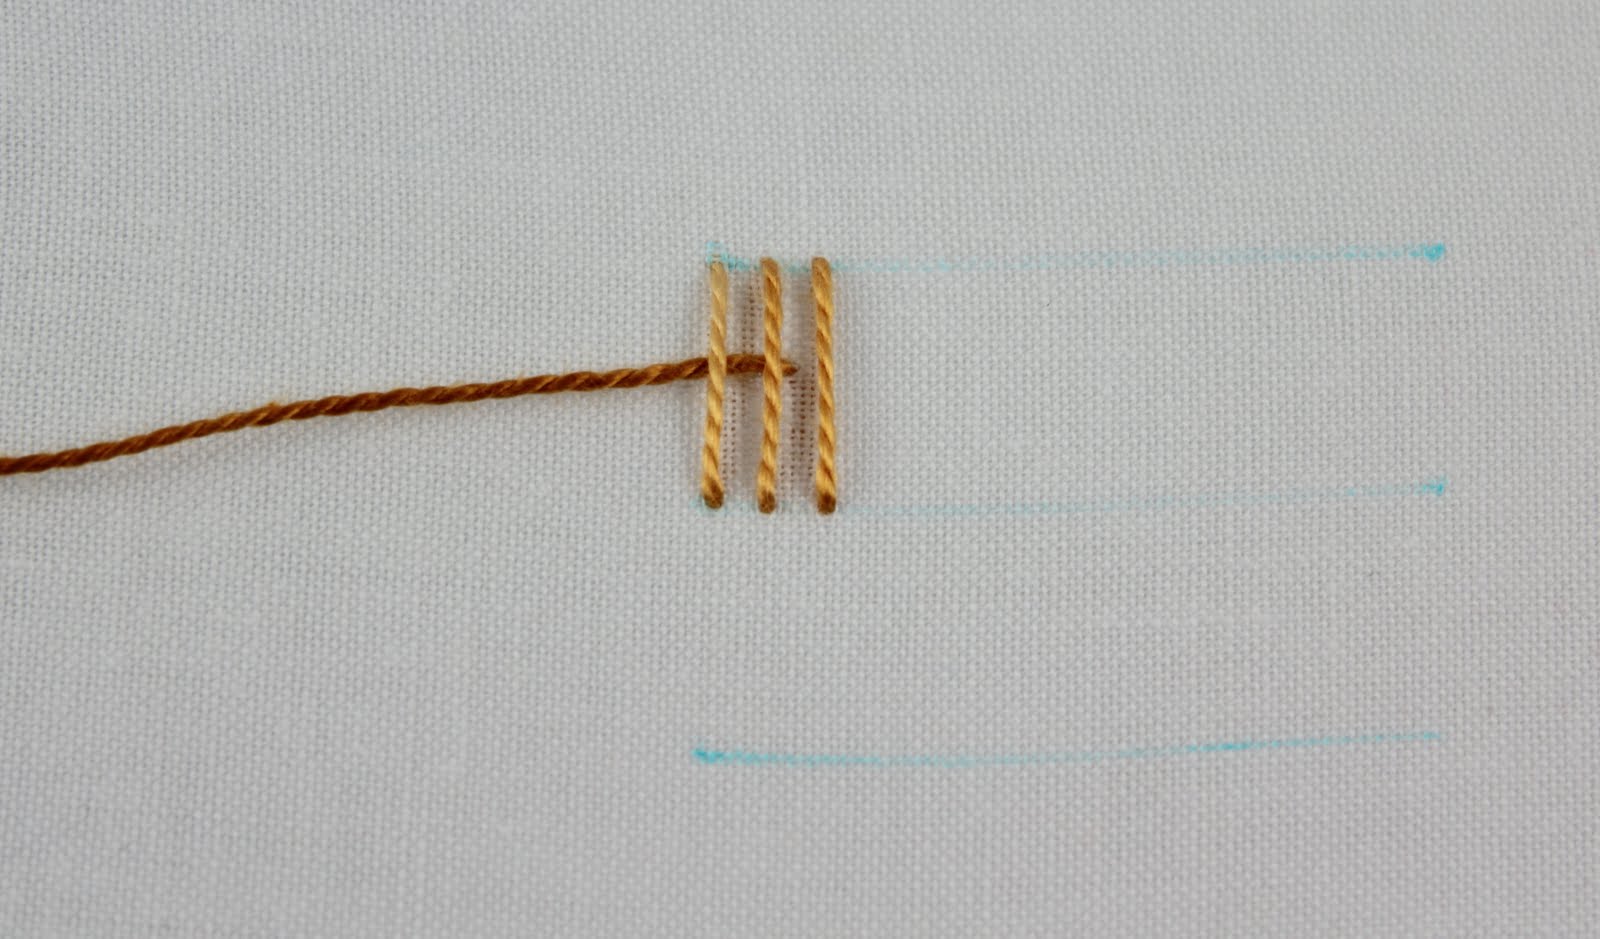
I really love this "wheat" colored floss I am using. It is pearl cotton floss - color variations from dmc and is #4128. To demonstrate my stitching, I am marking three vertical, parallel lines, 1/2" apart:
The first step is to come up through the fabric on the left side of the top line:
Pull all the way through and go back into the fabric on left side of the middle line, directly below where your floss first emerged.
Pull all the way through to make a vertical straight stitch:
Come back out a little to the right of the first stitch
and make a second straight stitch:
Do the same think to make a third straight stitch:
Now for the two horizontal stitches. Bring your needle up through your fabric under the center vertical straight stitch. Don't pierce the vertical stitches, just slide the needle under them towards the left:
Pull the needle all the way towards the left:
Keep pulling all the way:
Now bring your needle around to the right side of the three vertical straight stitches and slide it under the three vertical stitches. Don't pierce the fabric or the stitches...just slide the needle under the stitches. Notice the working floss is curving around above the three stitches and the needle is sliding below where the floss emerged:
Slide the needle all the way and keep pulling to the left. Notice the loop forming?
Pull all the way until the loop is fairly tight and this will draw the three vertical stitches together. This is the first horizontal stitch:
Now to make the second horizontal stitch, bring the needle around to the right side of the three vertical stitches. Notice the working floss is looping over the vertical stitches and the needle is sliding to the left and under the vertical stitches and below the first horizontal stitch:
Keep sliding the needle to the left and keep pulling until the second horizontal stitch is formed:
To finish this first sheaf, just go back into the fabric under the two horizontal stitches;
If you were only doing this stitch as an isolated stitch, you would now secure the floss on the underside of the fabric.
To stitch in rows, now come back up through the fabric on the middle guide line, to the right of the fist sheaf filling stitch:
Make the three vertical straight stitches:
and then the two horizontal stitches:
and complete the second sheaf filling stitch:
just keep alternating stitching on the top and bottom rows for this border effect:
Here is the interesting look of the underside of this stitching:


I really love this stitch, I tried it when I first started stitching, but it didn't go very well. I should give it another go, it really is a lovely stitch. It would look really nice running around the trim on something fallish... napkin, bread basket liner, simple linen table cloth... I love the floss you've used here too!
ReplyDeleteThis is so pretty!! I am just getting started with embroidery and I love how clear your intructions are!
ReplyDeletegorgeous AND it will be a wonderful addition to my patterned fabric embroidery project...THANK YOU MUCH FOR THE STEP BY STEP...FRONT & BACK! :)
ReplyDeleteUn blog precioso!!!!
ReplyDeleteGracias por tanto tutorial.
Bss.
Mil gracias por compartir el tutorial. Saludos desde México.
ReplyDeleteLisa - Thank you - this floss is really beautiful and so easy to stitch with. I love the idea of this stitch as trim on a linen table cloth. Especially in this floss color :)
ReplyDeleteShanna - Thanks! I hope this is helpful!
donna!ee - Thank you! I think this stitch would be gorgeous on patterned fabric!
ara - obrigada!
Hola Rosali! Gracias :)
Oh Kim I come a bit late but happy to catch you... what a cute stitch I never see anything like this... its pretty
ReplyDeleteCome to me at
http://craftaworld.blogspot.com/
Love
Farah