This little baby rattle has several examples of the latest stitch on my
100 Stitches odyssey, the satin stitch:

I have realized that this stitch is an easy stitch to learn and do, but a difficult stitch to do well! So here goes. I started with 6-strand embroidery floss and a #24 chenille needle:

I wanted to do this stitch over a small shape so that my stitches would look smooth and even and have less chance of looking out of line. I also wanted the shape to be a circle. I first traced the outline of a nickel - too big, then a dime - still too big. I finally found this knitting-needle gauge with a perfect circle in a perfect size. This largest circle has a 1/2" diameter:

I drew the circle and then threaded my needle with the six-strand embroidery floss. This is dmc color 827, a really pretty powder blue:

Now according to 100 Stitches, for the satin stitch, you can just work straight stitches across your shape. Or you could make padding under your stitches by outlining the shape with chain or running stitches. Apparently this gives a really nice raised effect. Instead of the chain or running stitch, I just outlined the edge of my circle with backstitch. Once this was completed, I switched to a
single strand of the six-strand embroidery floss. After some experimenting, I found that using the single strand gives the smoothest satiny look.

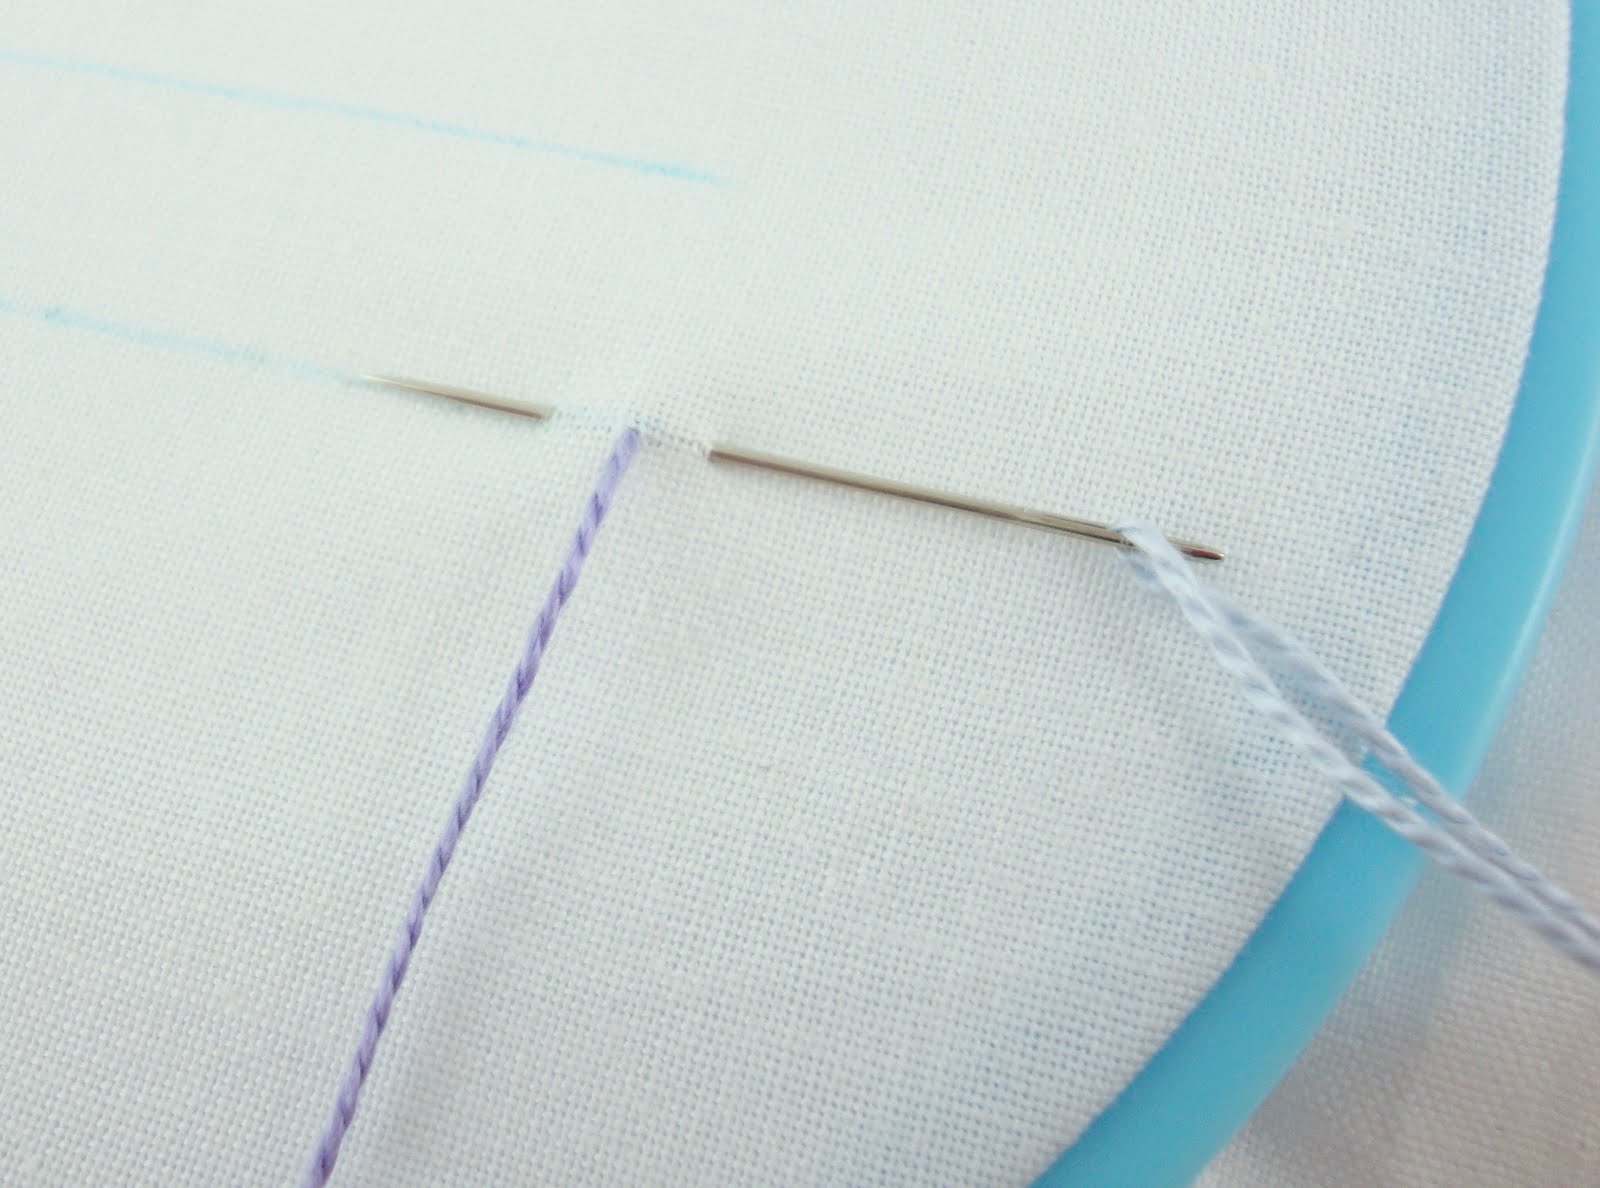
So to do the straight across stitches, 100 Stitches clearly shows that you work from the
outside of the outline stitching. First, come up through the fabric on one side:

and go into the fabric on the opposite side:

After some more experimenting, I started at the widest part of the circle because it is easier to establish nice straight lines. Just keep working back

and forth

until you have covered the whole shape

with this beautiful satin stitch:

This stitch works so well on circle shapes. I haven't tried it on any other shapes but I definitely plan to. I still need practice on keeping the edges of the circle clean, and making
even straight across stitches. It is really obvious if they are not straight and even!

This stitch is number 6 and is categorized in the flat stitches section of 100 Stitches.

 I have realized that this stitch is an easy stitch to learn and do, but a difficult stitch to do well! So here goes. I started with 6-strand embroidery floss and a #24 chenille needle:
 After some more experimenting, I started at the widest part of the circle because it is easier to establish nice straight lines. Just keep working back
 and forth
 until you have covered the whole shape
 This stitch is number 6 and is categorized in the flat stitches section of 100 Stitches.
 I have stitched this
  I have two new sets of floss, these beautiful colors:
 And these gorgeous perle cotton variegated colors! It seems like the variegated colors will make a softer look. I think I will use one of these for the mane!
 or maybe one for the mane and tail and another one for the body? Any suggestions for color combinations would be appreciated!
 According to my color wheel, my new floss is in analogous colors - or those that lie adjacent to one another on the wheel. That would cover all the red, brown, orange, tan and yellow.
  Perfect!
 Speaking of yellow, I also wanted to post some pictures of these beautiful crackerjack marigolds. I started these from seeds - this variety can sometimes grow over 3' high. They are one of my favorites!


 I am using two different colors, a light pink- dmc #957 for the laid thread and a darker pink- dmc#602 for the stitching thread. For the laid thread, I am using all six strands of floss and for the stitching thread I am only using three strands of floss. Notice, only the stitching thread has a needle:
  This first step is where I realized I didn't really understand how to start or end this stitch, but I am going to proceed with how I thought you did this and then explain what I have figured out at the end of my post. So the first step according to 100 Stitches is to lay the laid thread down on the line of your design:
  Taking the stitching thread, come up through the fabric on one side of your laid thread:
 Now go back into the fabric on the other side of the laid thread:


 Now to what I don't understand. I finished my flower outline and just snipped the laid thread ends - they were just raw ends held down by the stitches but I don't think that is correct - you don't want floss that isn't secure poking out, I know it would eventually work itself loose. I did a lot of internet research and no one really explains how to end the stitch. I think in the future, I will take the laid thread and knot one end and come up through the fabric and then lay it on my design line and stitch it in place. Then to finish, I will take the laid thread back down through the fabric and weave it through the floss on the underside of the fabric to secure it in place.
 and lots of embellishement patterns! There are six different gingerbread houses - this is one I stitched all in pastel colors:
 I am going to make this into a tea towel as soon as I find the right trim for the bottom edge. I am thinking pom-poms.
 Here is a picture of what the pattern packet looks like:


