
Monday, October 25, 2010
Ideas on transferring patterns to fabric
There are so many ways to transfer a pattern onto fabric! I have been doing a little experimenting:  I selected three different fabrics. The dark blue fabric is a medium weight tight weave. The white is a light weight, medium weave fabric that you can easily see through. The pale blue is a medium weight, medium weave fabric:
 I selected three different transfer methods. Wax free tracing paper, graphite transfer paper and
 transfer pens. I chose two different transfer pens, both are water soluble:
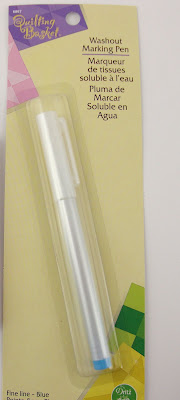 The difference between the two pens is in their tip size. One has a regular tip and the other one has a fine tip:
 You can really see the difference!
 Now to start transferring! I have several images; a Christmas tree, two stockings and a present. I am going to start with the stockings:
 I am going to transfer these onto the white fabric. Since you can easily see through this fabric, I am going to use the transfer pens to transfer. I will lay the image down - face up, and position the white fabric over the top. I usually put some tape on the edges of the image, also face up to keep it attached to the fabric:
 Then I lay the white fabric over the top and start transferring. First the regular tip transfer pen:
 See now easy it is to trace the lines?
 And now for the fine tip - I love the fine tip - it makes for such an exact narrow line:
 One thing to remember when using these pens is to not press too hard. Especially with the regular size tip - it seems to lay down too much ink and make a blurry transfer. The great thing about these water soluble pens is that if you make a mistake you can easily remove the lines with a damp cloth:
 Gone!
Gone! Then you can stitch your image and remove the blue tracing lines when you are done. Make sure to remove them with just plain water and before you launder or iron the item! Otherwise, the pen marks may set and then you cannot remove them. Now for the Christmas tree. I am going to transfer this onto the light blue fabric, using the graphite transfer paper. I put the transfer paper on top of my fabric. Make sure the shiny side is against the fabric and the dull side is face up:
 Then I put my image face up on top of the graphite transfer paper. I usually tape the three layers in place to keep everything from shifting around. Now you need something you can press along the lines to trace. I usually use a stylus:
 I love this transfer method and see what a nice and crisp the image it transfers?
 This has always been my favorite way to transfer - however, there are two drawbacks to this method. The first one is that the marks are permanent - you cannot wash them out. The second drawback I have only recently discovered. Since starting 100 Stitches, I have been wanting to incorporate the stitches I am learning into my projects. I noticed that some stitches do not cover my tracing lines. The chain stitch is the perfect example. Notice you can see the tracing lines inside the stitch :(
 The next method is the wax free tracing paper. This comes in several colors for use on any dark colored fabric. My pack inludes white, yellow, orange, red and blue. I am going to use this yellow to transfer onto my dark blue fabric:
 Place the colored side of the tracing paper against your fabric and place your image face up on top of the tracing paper. Tape into place and trace the lines with a stylus:
 This method also leaves a nice crisp image that can easily be removed with a damp cloth.
  I like all of these methods - they are easy to use and give good results. They all have different advantages/disadvantages. I think that the transfer pens take a little practice to get just the right touch for a crisp transfer. And as much as I have always favored the graphite paper, I think that if I am planning on using stitches such as the chain stitch in a project, I may opt for the transfer pens or removable tracing paper.
Subscribe to:
Post Comments (Atom)


Yeah, I think I just got the hang of "lightly" pressing the marking pen for transferring.
ReplyDeleteThanks for the tips! Loved the tools you are using. Does the pen come in darker colors?
ReplyDeleteThanks for the tips! This comes at a perfect time since my daughter has fallen in love with embroidery : ) and she has been asking about the different ways of transferring.
ReplyDeleteVery interesting post! thank you!!
ReplyDeleteVery good tips B, I really love the transferring pen, thanks for such a useful post.
ReplyDeleteThank you all!
ReplyDeleteaneri_masi - I have the DMC brand and Dritz brand. The DMC has the regular sized tip and I could only find blue ink. The Dritz has the fine tip and they sell the pens in both blue and white ink.
Very nice post , the pictures are great !
ReplyDeleteOccasionally I use the fine tip water soluble pen and they work well ! At times if not rinsed properly the blue marks may appear so instead of spot rinsing I end up filling the sink halfway and submerging the fabric gently a few times and since then no more problems with the ink reappearing.
In the past I tried transfer paper on a cotton knit fabric (baby onesie) and it didn't work.... the image didn't transfer at all :-(. I'm wondering if it doesn't work at all in knit type of fabrics, however I still need to try it on a woven fabric.
Thank you Monika! That is so interesting that the blue marks re-appeared! It is a good tip to submerge the fabric several times, I will make sure I do that. I noticed on the pen directions they noted not to launder the marks with any kind of soap because certain laundry soap ingredients could set the marks. I have not tried transferring onto knit fabrics with transfer paper - I imagine the knit could be too soft and stretchy to take a clear mark. Sounds like I have some more experimenting to do!
ReplyDeleteGreat post!! I will say that I have been using the blue ink pens (the white one with the fine tip) to mark my lines for hand-quilting. I have NEVER had a problem with it! Once at a quilt shop I mentioned this and a lady told me that years from now that blue ink could "eat through" the fabrics???? I'm willing to take that chance!!
ReplyDeleteThanks for the post. This has really helped me understand the transfer method. You break it down and explain it well.
ReplyDeletethank you for sharing these ideas
ReplyDeleteThanks for your lovely comments!
ReplyDeleteHello BigB where are you? I daily checked your blog for any new post, hope everything will be fine at your end...
ReplyDeleteWill you please spare a bit of your time to peek on to my new post at
http://craftaworld.blogspot.com/
hope you like it
Love
Farah
Thanks so much for the great info. I've just started using Transfer Eze and really like it, because I don't have to transfer.
ReplyDeleteI soooo enjoy following your blog!
I personally never could get the hang of being able to keep it moving which resulted in blobs of ink being left where I hesitated. I found the transfer pencil easier for me. Much easier.
ReplyDeleteIs transfer paper the same as tracing paper, just a different name? Or are they two different things.
ReplyDeleteThey are two different things - but I have found that the terms are sometimes used interchangeably. As I have always understood it, transfer paper is paper that has a coated medium that transfers to your fabric when you press on it or heat it. This could either be a colored wax, pigment powder, graphite or carbon. Usually the definition for tracing paper is a very thin paper that you can easily see through. You can place it over an image and trace the image onto your tracing paper with a pencil or pen etc.
ReplyDeleteThe two paper methods I showed above are both transfer paper but the product picture for the wax free tracing paper showed the title "tracing paper" so I used that term as well in my post. I hope this answers your question? If not, please let me know!