Here is the Zig-Zag Coral Stitch. This is the latest stitch on my attempt to work through
100 Stitches!

I used my brand new floss for this stitch:

It is perle cotton DMC #335. Isn't it beautiful? I bought this last week... along with some other items that I will show a bit later. But now onto the stitching! For this demonstration I am using the #24 chenille needle. You might also notice I already have two parallel lines drawn on my fabric. Hopefully, this will keep my stitches in line as I demonstrate. My practice stitching was all over the place!

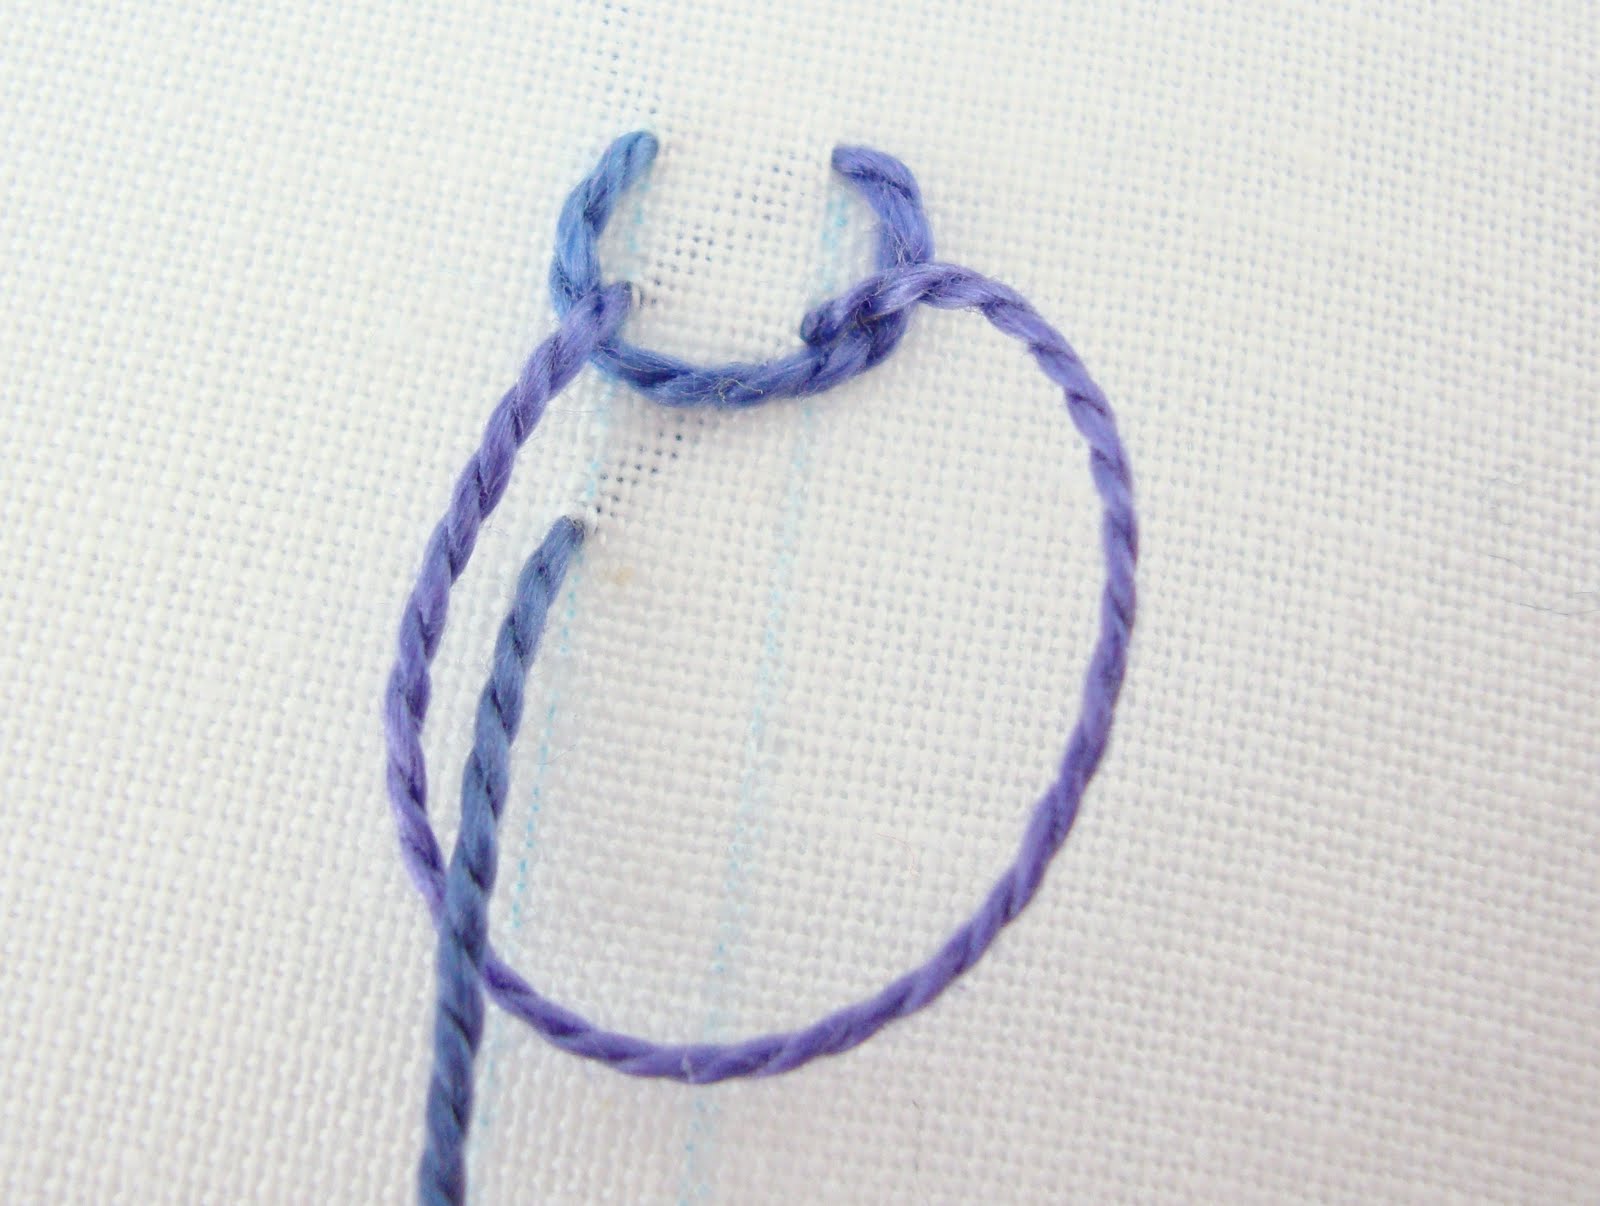
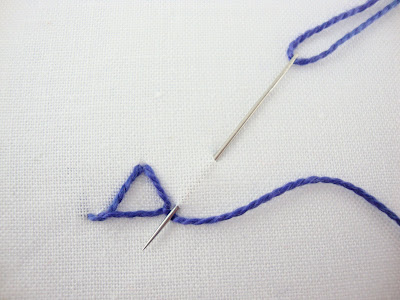
This stitch is done from right to left. The first step of the stitch is exactly like the
coral stitch. You come up through your fabric, and then keeping the floss in place you slide your needle under the floss without catching it and bring the tip of the needle over the floss, forming a loop:

Then you pull the floss all the way through forming a raised knot:

Here is where it turns into the zig-zag coral stitch. You now bring your floss over to the other parallel line at a bit of a diagonal and you slip the needle under the floss and then over the floss, again forming a loop:

Pull the floss through forming another raised knot:

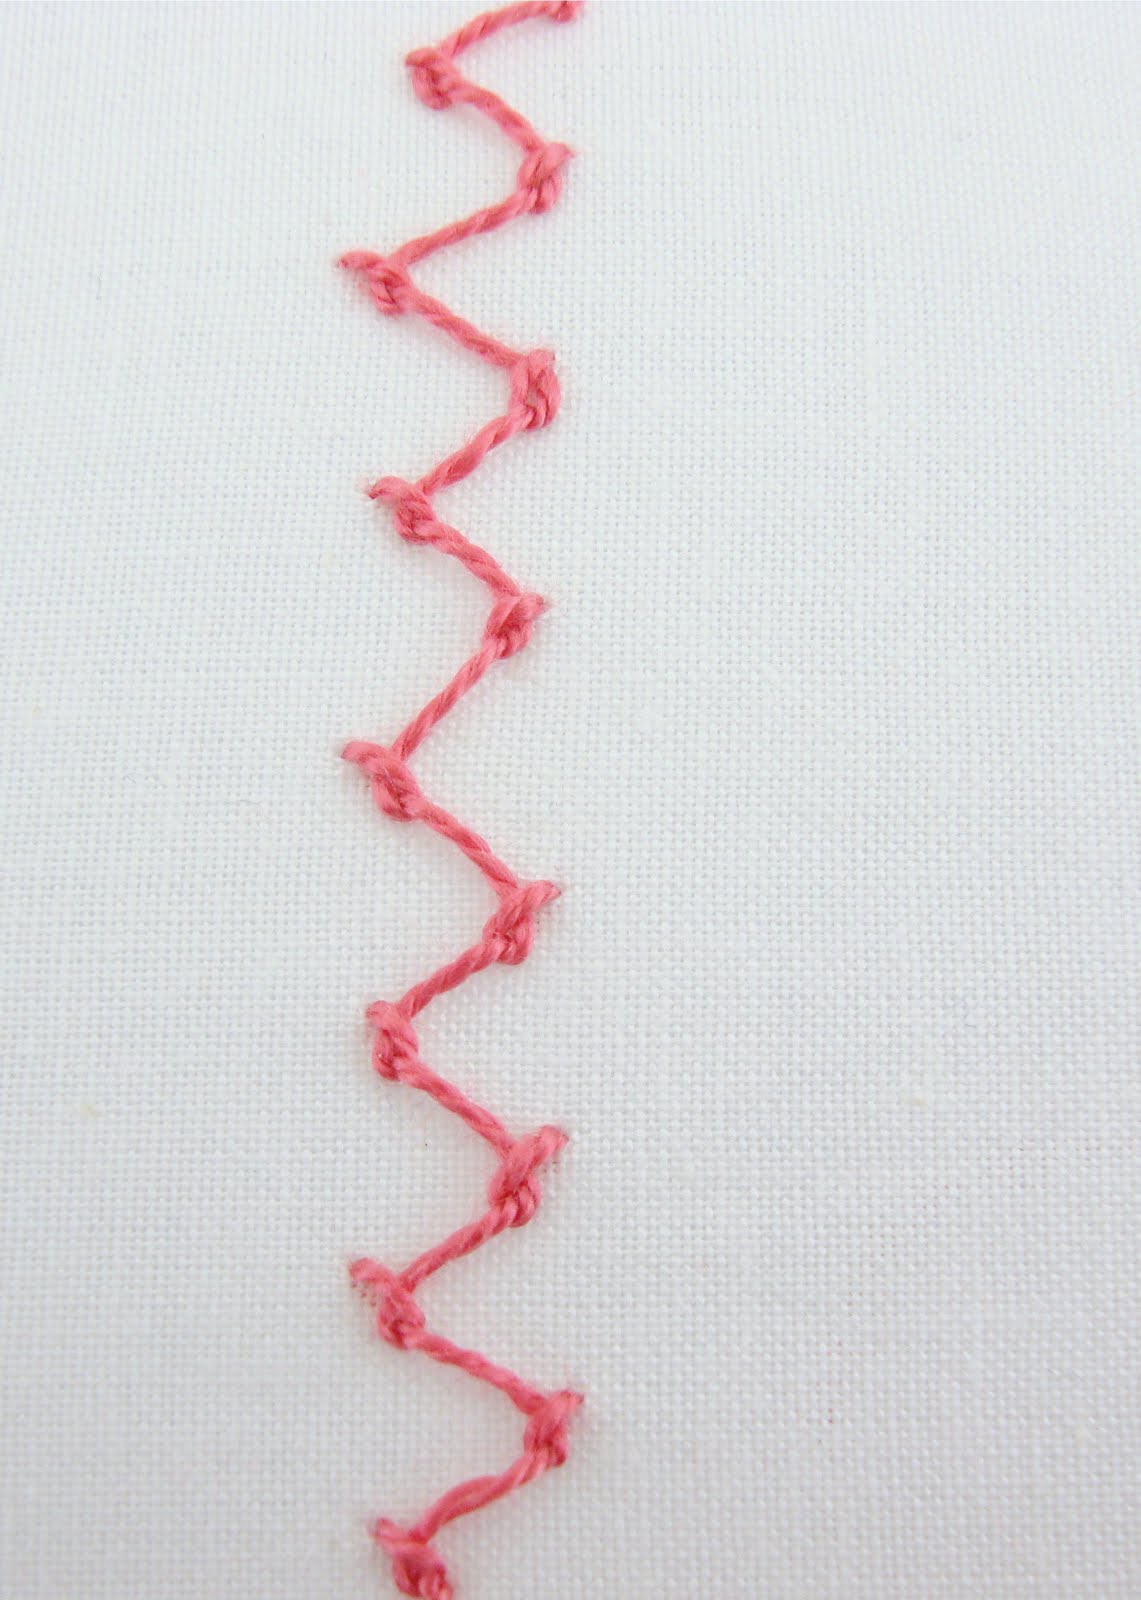
then go back to the first line and form a regular coral stitch knot and just continue back and forth along your stitching line:

Until you have a nice line of stitches!

This was a fairly easy stitch for me to learn, I love the finished line of stitching - it looks like lacing. This stitch is #55 and is in the knotted stitch category of 100 Stitches.

 I used my brand new floss for this stitch:
 It is perle cotton DMC #335. Isn't it beautiful? I bought this last week... along with some other items that I will show a bit later. But now onto the stitching! For this demonstration I am using the #24 chenille needle. You might also notice I already have two parallel lines drawn on my fabric. Hopefully, this will keep my stitches in line as I demonstrate. My practice stitching was all over the place!
 This stitch is done from right to left. The first step of the stitch is exactly like the coral stitch. You come up through your fabric, and then keeping the floss in place you slide your needle under the floss without catching it and bring the tip of the needle over the floss, forming a loop:
  Then you pull the floss all the way through forming a raised knot:
 Here is where it turns into the zig-zag coral stitch. You now bring your floss over to the other parallel line at a bit of a diagonal and you slip the needle under the floss and then over the floss, again forming a loop:
 Pull the floss through forming another raised knot:
 then go back to the first line and form a regular coral stitch knot and just continue back and forth along your stitching line:
 Until you have a nice line of stitches!
 This was a fairly easy stitch for me to learn, I love the finished line of stitching - it looks like lacing. This stitch is #55 and is in the knotted stitch category of 100 Stitches.
  with this tint of yellow - DMC #727:
 with this tint of red DMC #603?
 According to my new
 Using a ruler and a pencil with a light colored lead, I drew two parallel lines. I made my two lines 1/4" apart. The first step is to come up through your fabric at the start of the line on the left side.


 Like a lot of these stitches, the underside of the stitching is almost as interesting as the topside!


 Here are orange, green and yellow:


 I love the fact that embroidery floss comes in such a huge variety of colors. I know that one of my favorite parts of embarking on a new stitching project is the process of selecting colors. I want to learn more about color theory and color relationships and so I bought this color wheel. It is so much fun to use and has so many interesting color facts and advice. For instance, I have this little stitching project from
  According to the color wheel, a nice relationship would be a triad of colors. That means three colors that are evenly spaced on the color wheel and will always look pleasing as a combination:
 So the other two colors in the blue triad are red:
 and yellow:
 I think that makes a beautiful color combination!
 and red for the stripes - I used the split stitch here:
 for the french knots and
 satin stitch stars!

 This stitch is the next stitch on my


 Bring your needle back out right next to where you first came up through the fabric. Notice in the picture - make sure the floss is UNDER your needle:
 Pull the needle all the way through:
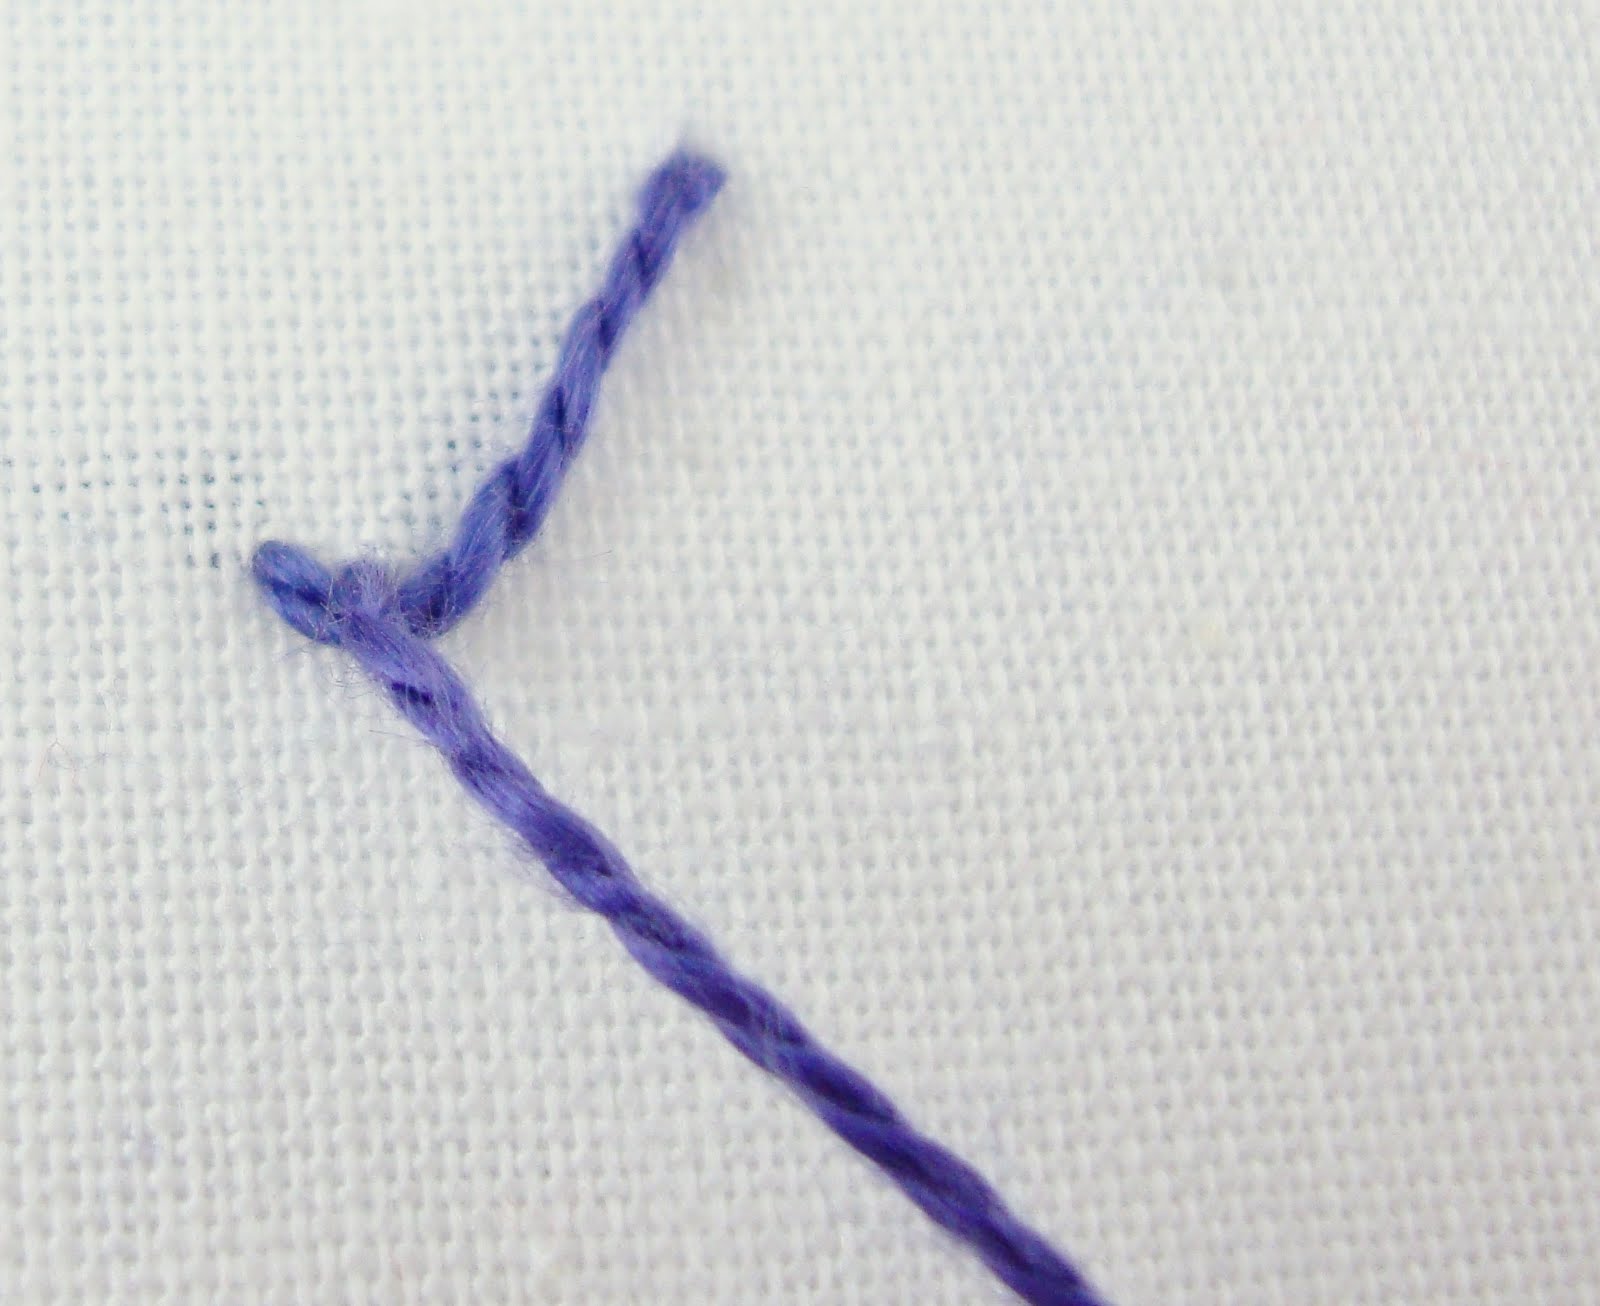
 Bring the needle out - and make sure the floss is under the needle again:
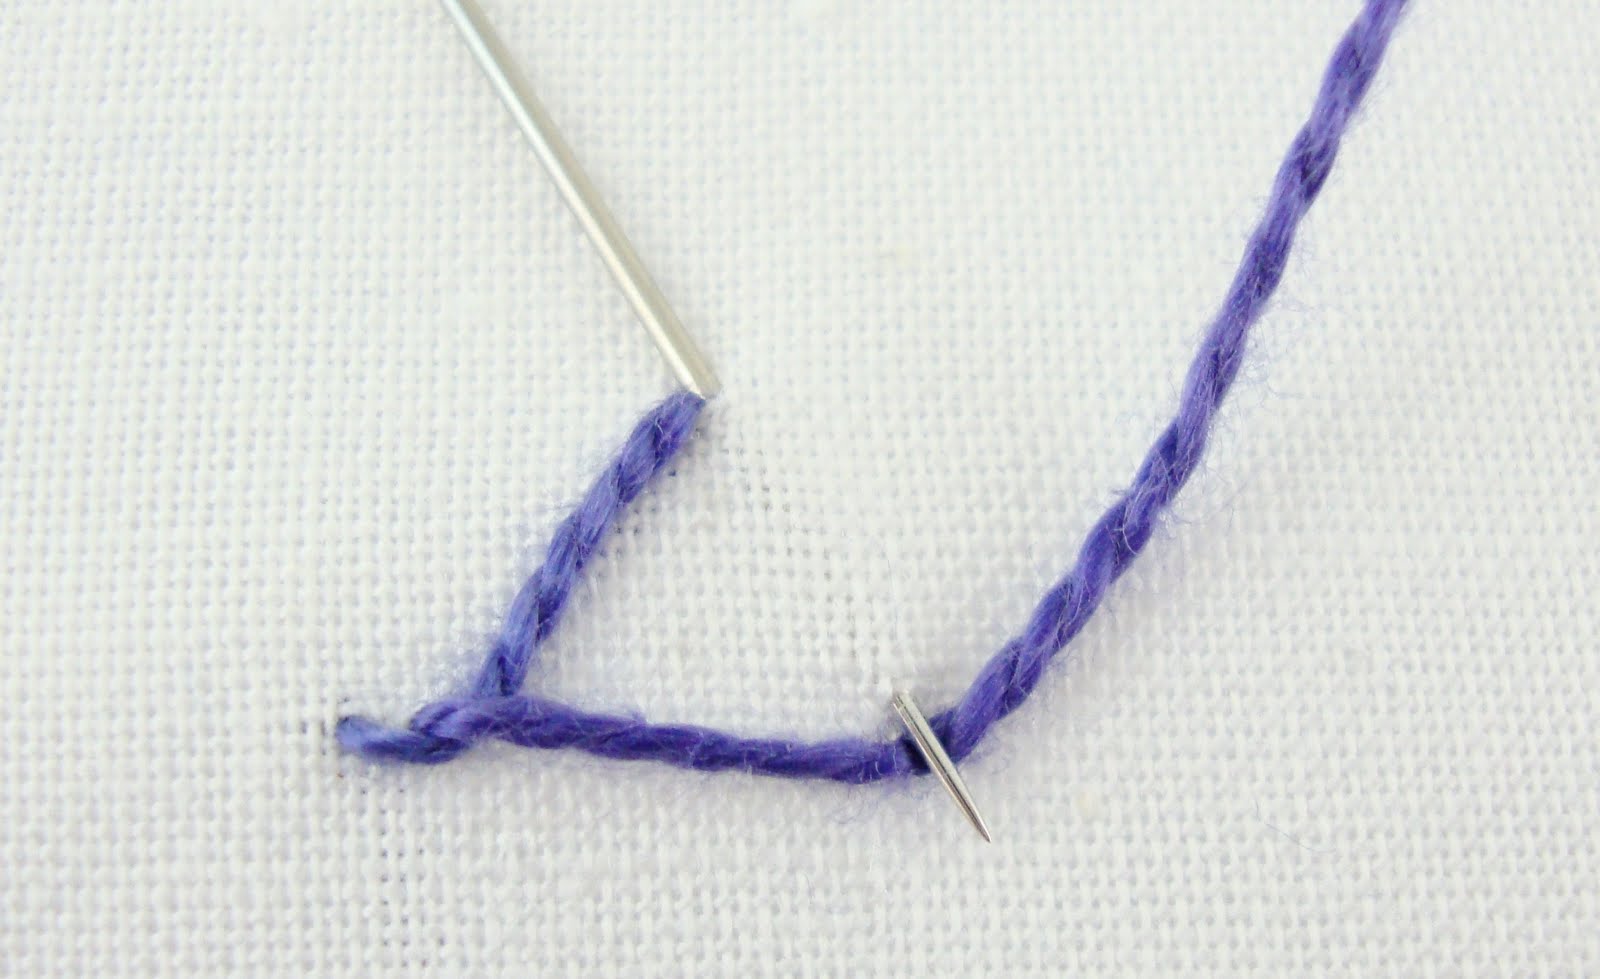


 Pull through:
 Onto the next slant- remember, keep the floss under the needle:
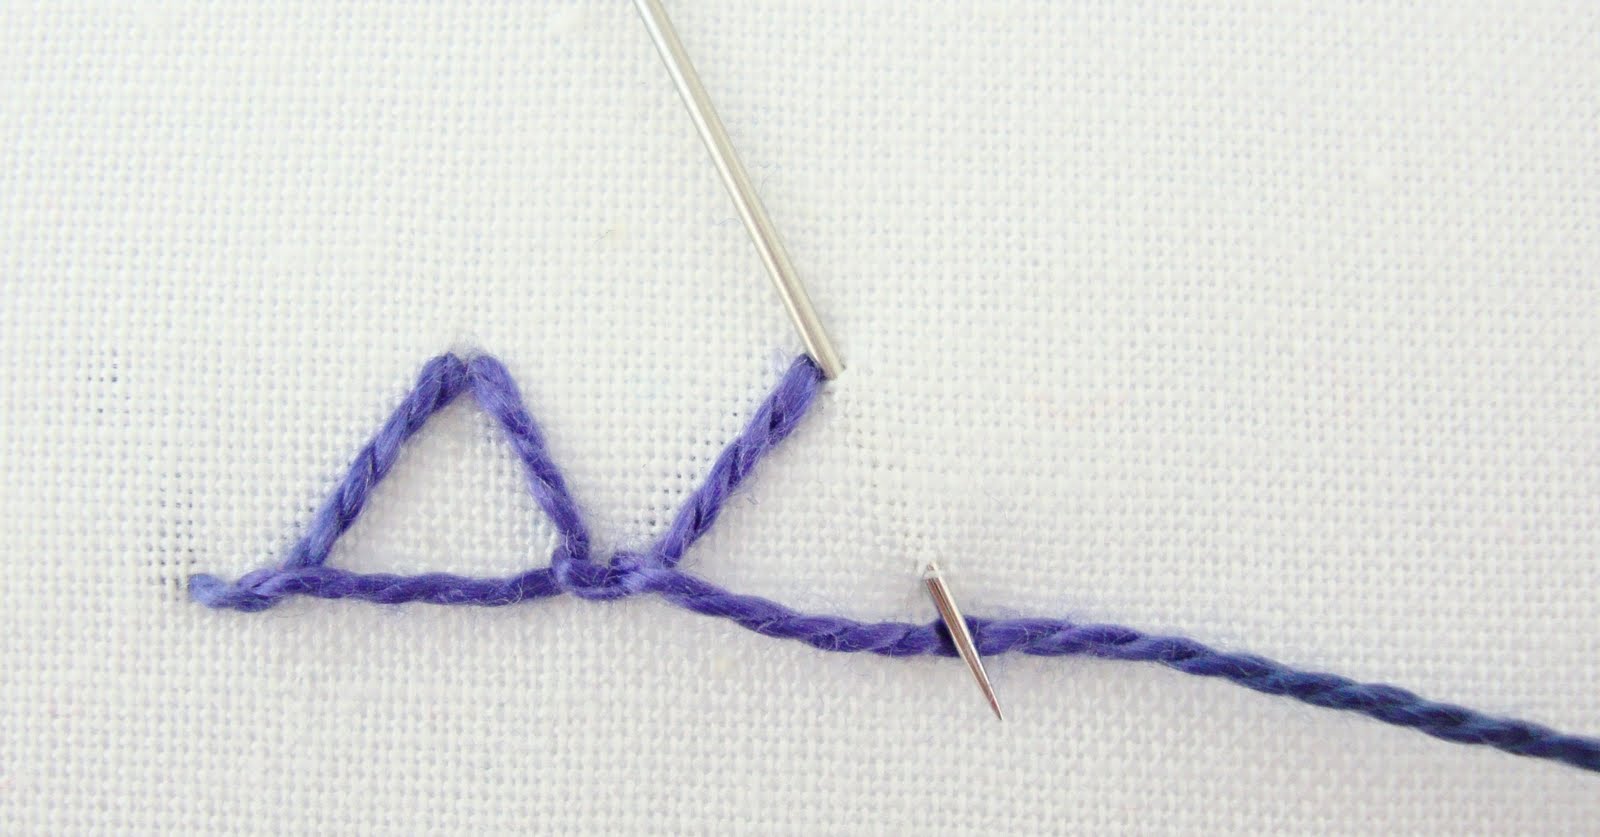


