Thursday, February 18, 2010

100 Stitches - vandyke stitch

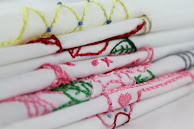
This very complicated looking stitch is the vandyke stitch.
I found it to be a really easy and satisfying stitch to learn! Here are my steps - first, come up through the fabric on the left hand side of an imaginary stitching line.
Next, go back into the fabric to the right of the stitching line and at a point diagonally above where your thread first came up. Just make a straight horizontal stitch here.
Now cross over to the right hand side of your stitch line and go back into the fabric even with where your thread first came up.
Pull the thread through to the back and then come up - this forms a loose x shape. Come up again on the left side, directly below the spot your thread first came through.
Now bring the needle under the x shape with out catching any fabric and carefully pull it all the way under the x shape.
This draws the bottom half of the x together a bit - now go back down into the fabric on the right side below the previous stitch and thats it!
Just continue these steps and you will make a nice complicated looking line of stitches! 100 Stitches suggested not pulling any of the stitches too tightly. This takes a little practice, if you pull the stitches too tightly, the center braid line will look uneven and wavy.
I used 6 strands of dmc 907. This is stitch #34 and is in the looped stitches section of the 100 Stitches book.

Wednesday, February 10, 2010

wip from a new pattern packet

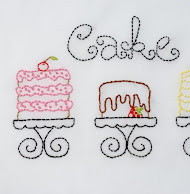
Here is a picture of my latest work-in-progress: Cupcakes!

When finished, this will be a three-tiered cake stand loaded up with delicious looking cupcakes!
I am using quite a few different color combinations and stitching combinations. The chain stitch in a lovely pale pink for the border of the cupcake paper:
The lazy daisy stitch and plenty of french knots in lavender and yellow:


And of course the running stitch in pink and red and my favorite back stitch outlining everything!

This cake stand pattern is just one of the "main patterns" I have in this new pack. I will be blogging the other main pattern soon - it features three cupcakes on doilies lined up in a row with the word cupcakes! below them. I have already sized it to fit into a picture frame and I can't wait to finish it!


Thursday, February 4, 2010

100 stitches - fish bone stitch


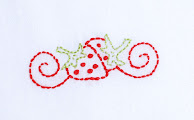
100 Stitches time again! I have just learned how to do the fish bone stitch! I am really excited about this beautiful stitch. According to the 100 stitches description, this is an excellent stitch for filling small shapes. So to practice the stitch, I drew a leaf shape with a center line marked...


I am using six strands of this beautiful green - dmc color 907. I will refrain from saying "i love this color!" since I say that in nearly every 100 stitches post!
The first step is to come up through the fabric and go back down through your fabric making a small straight stitch. Come up again next to the straight stitch and make a slanting stitch that slopes across the center line and goes back through the fabric at the base of the first straight stitch.


Now come up through the fabric on the opposite side of the first straight stitch, make a slanted stitch again sloping to the center line and overlap the base of the second stitch.

Just continue working opposite sides of the shape, always slanting your stitch to the center line and always overlapping the base of the stitch before.
This was a very easy stitch!
This stitch is #11 and is in the flat stitches category of 100 stitches.

Tuesday, February 2, 2010

valentine sachet

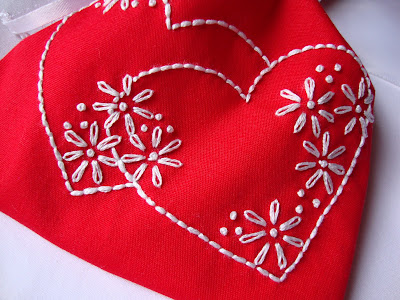
I just finished this little heart sachet. I am loving the all white floss on red I think it makes a really nice combination.
Here is what the sachet looks like. I already had this white silk ribbon trim and a bunch of pink and white daisy flower trim. I cut off two of the little flowers and glued them to the ends of the ribbon. This is a nice drawer sachet and I could also make it into a closet sachet by adding a nice hanger made from ribbon!
I think I will fill this with dried lavender - my mom dries all the lavender
from her garden every year and I love the scent - it lasts for such a long time!