100 Stitches time again! This elegant stitch is the Up and Down Buttonhole Stitch:
I love the floss I used for this stitch. It is pearl cotton, color variations DMC #4230
This stitch is easy to do but I suspect I am going to have a hard time explaining my demonstration, even with pictures! This is one of those stitches that requires guidelines if you want neat, evenly spaced stitches. I made two horizontal parallel lines, 1/4" apart.
You begin this stitch just like you would the blanket stitch. Come up through the fabric on the left side edge of the bottom guideline and pull all the way through:
The needle now goes back into the fabric on the top guideline, and back out on the bottom guideline, a little to the right of where the thread first emerged. Notice that the needle tip is going to go over the working thread:
Pull all the way through - easy blanket stitch:
The needle now goes back into the fabric on the bottom guideline just to the right of the edge of the blanket stitch:
The needle will emerge on the top guideline but...here come the tricky, hard to explain parts:
the needle needs to go over the working thread, so position your thread like this:
As soon as you pull the needle through the fabric, point the needle downward and pull the rest of the way through, and notice the needle tip is going over the working thread:
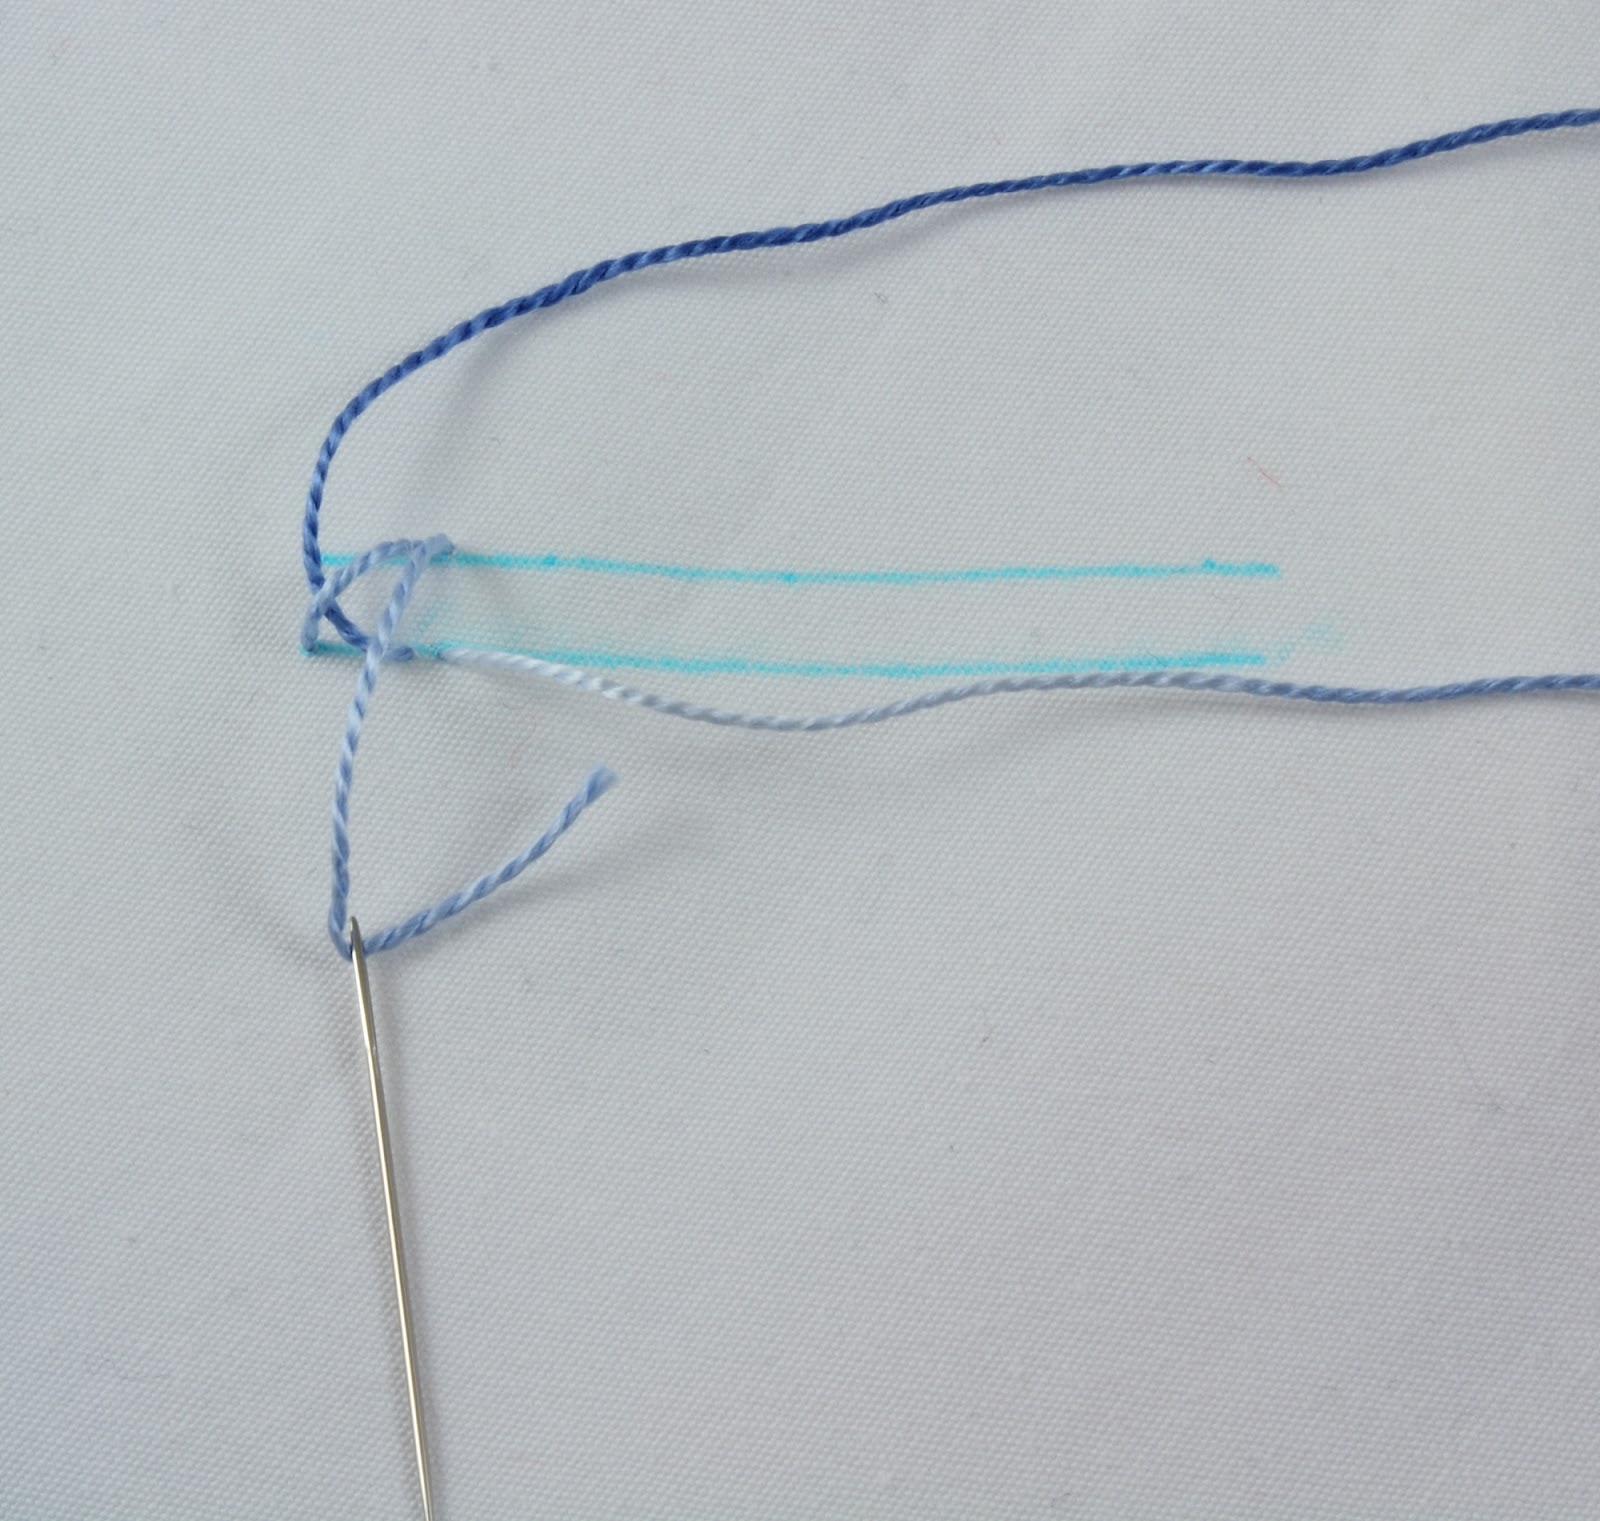
this forms a loop as you pull down:
pull all the way through and the loop slides into place holding the two stitches together:
Tighten the loop by pulling down and to the right:
and now set up for the next stitch, just like setting up a blanket stitch:
pulling all the way through:
back into the fabric alongside your blanket stitch:
don't forget to make sure your working thread is under the needle like this:
pull up and then
pull downward, again the needle is over the working floss:
pull the loop tight and you have completed two up and down buttonhole stitches!
Just continue with the same steps:
until you have a line of stitching:
This is the underside of the stitching. I love the clean look:
Lovely!
This is stitch #26 and is listed in the Looped Stitches section of 100 Stitches.
Wednesday, February 15, 2012
Thursday, February 9, 2012
Bienvenue à La Patisserie
Bonjour! Vous aimez mes macarons?
et mon gâteau?
I have been busy with some new patterns:
stitching this sweet cake:
and these brightly colored and delicious looking macaroons:
The cake and macaroons are two of the patterns in my new pattern packet - La Patisserie:
This is a really beautiful pattern packet, 11 pages of patisserie inspired motifs and borders! I have just listed it in my Etsy shop!
Tuesday, January 31, 2012
100 Stitches rosette chain stitch
This is the rosette chain stitch:
It is the latest stitch on my 100 Stitches journey. I think this is a beautiful stitch that would be nice for borders:
I had avoided learning this stitch because it looked so hard! I had tried it a few times and I just wasn't getting it. But I decided to try again and I am so glad I did because now that I know how to do it, it is very simple and straightforward. For my little demonstration, I am using pearl cotton floss, dmc #666 and I am going to be drawing some parallel guidelines:
I drew mine about 1/4" apart:
This stitch is always worked from right to left. The first step is to come up through the fabric on the right edge of the top line:
Pull the floss all the way through and to the left:
now bring the needle around to the right in a big circle and go back into the fabric on the top line, to the left of where the floss first emerged. Bring the needle back out on the bottom line. Notice the needle is goin into the fabric at a diagonal, from the top line coming out on the bottom line at a slant:
The needle goes over the working floss at the bottom of the big circle:
Pull all the way through and this is the crossed loop that forms:
Now bring your needle up under the right side of the crossed loop. Don't go into the fabric or pick up any fabric, just slide the needle under the floss:
Pull all the way through, but not too tight:
Now, bring the needle around again, creating a big circle. This time, the needle goes under the working floss, into the fabric on the top line at a slant and emerging on the bottom line:
Start pulling through and make sure the needle now goes over the working floss at the bottom of the big circle:
Pull all the way through and you have this crossed loop again:
Slide the needle up and under the right side of the crossed loop, again not picking up any fabric, just sliding under:
And just keep repeating these steps
until you have a full line:
of beautiful stitching:
This stitch is nice and neat on the underside:
and gorgeous on the topside!
I'm really happy to add this stitch to my repertoire. I know I will use it as a border on tea towels. 100 Stitches suggested working this in a circle to form small flowers - I am definitely going to try that too!
This is stitch #48 on the 100 Stitches list, it is in the linked stitches category. I have finished all 13 stitches in the linked stitches category!
Subscribe to:
Posts (Atom)
