Time for another 100 Stitches post. I recently learned this beautiful stitch called the Laced Edging Stitch.
For my demonstration of this stitch, I used two different colors of perle cotton floss.
I found that it helps to use a ruler to make some guidelines for keeping the stitching straight and evenly sized.
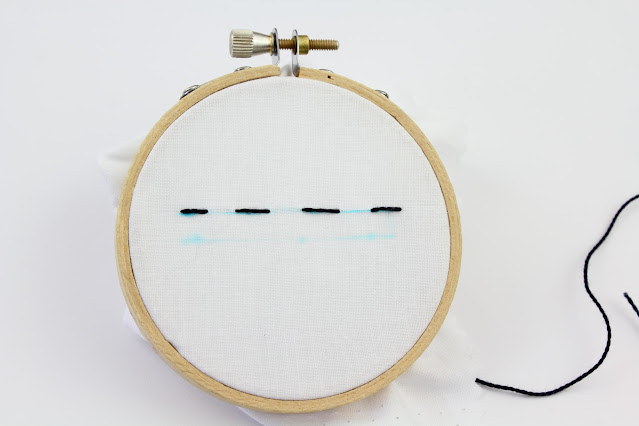
To start, I drew two parallel lines 1/4" apart:
The top line of the stitch is a Running Stitch, worked from left to right. For my demonstration, I did a Running Stitch composed of four large stitches:
Here is a look at the underside of this stitch:
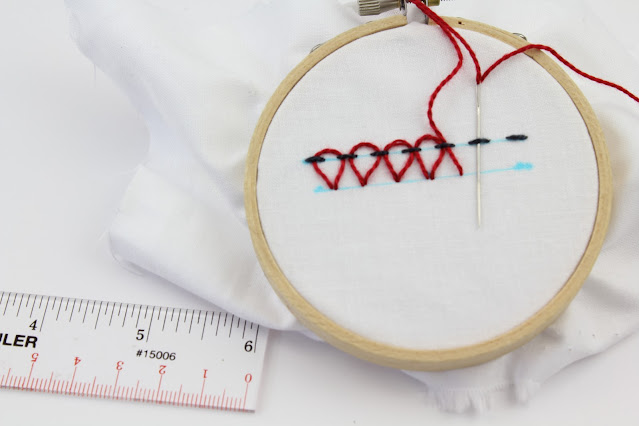
Now for the lacing line. I came up through the fabric on the bottom parallel line. Notice the needle is coming up just a little to the right of the first stitch of the Running Stitch line:
After pulling the thread all the way through, I slid the needle along the fabric and under the first stitch of the Running Stitch.
I slid the whole length of thread under the stitch, then brought the needle around and slid it under the second stitch of the Running Stitch:
Then I took the needle back into the fabric and pulled the thread through, leaving it a bit loose...
so that a sort of loop is left after I have pulled the thread all the way through:
I just repeated these steps along the Running Stitch line
I found this stitch in the book Embroidery Stitches by Mary Webb.


4 comments:
Hi Kim,
A beautiful stitch to start the new year with:)
It looks good and I could think of various laces.
Your details of drawing lines always helps. Thank you
Mallika
Hi Mallika :) THank you! Yes - the lines make it so much easier to keep the stitch looking neat and evenly spaced!
This is a pretty stitch. What I really like about it is how adaptable it is by changing the size and amount of the running stitch. I agree with Mallika, it's always helpful to see how you do it with your tutorials. Guidelines are a good thing! :-)
Hi Darlene - Thank you! Exactly - so adaptable! Both in size and thread color combinations.
Post a Comment