Saturday, February 9, 2013

A new pattern!


I am so happy to announce that I have a new embroidery pattern packet in the shop!  This one is called "Easter" and it is filled with wonderful, whimsical Easter motifs. 


Here I am getting ready to cut out the individual motifs.  This one has around 46 different images.  I am going to be organizing them the same way I posted about here. 


Now I am selecting some Easter color palettes.   I like to collect bunny figurines and they always offer a nice color palette.  I love this sweet inspiration:


as well as these happy colors:


This is what the pdf pattern packet looks like!

Thursday, February 7, 2013

Valentine's day heart progress

I have a progress report on this little project. Since that last post, I added some fiber-fill stuffing under the heart and then finished all the blanket stitching around the edge of the heart.


Here is a closer look at the blanket stitch.  It did a really nice job keeping all the stuffing in and the heart secure to the backing fabric. 


Now to add some text!  I decided to use the Portuguese word for love - amor.  It looks really beautiful written out - especially with a heart for the "o"


To transfer my pattern to my fabric, I used my water-soluble marking pen.  This fabric is fairly easy to see through so I taped my word to a hard, smooth surface.  In this case a clipboard:


Then I put the fabric over the top and traced the word:


Now I am ready to start stitching! 


I have a few more steps after this stitching is done, I will keep you updated with  my progress!

Tuesday, February 5, 2013

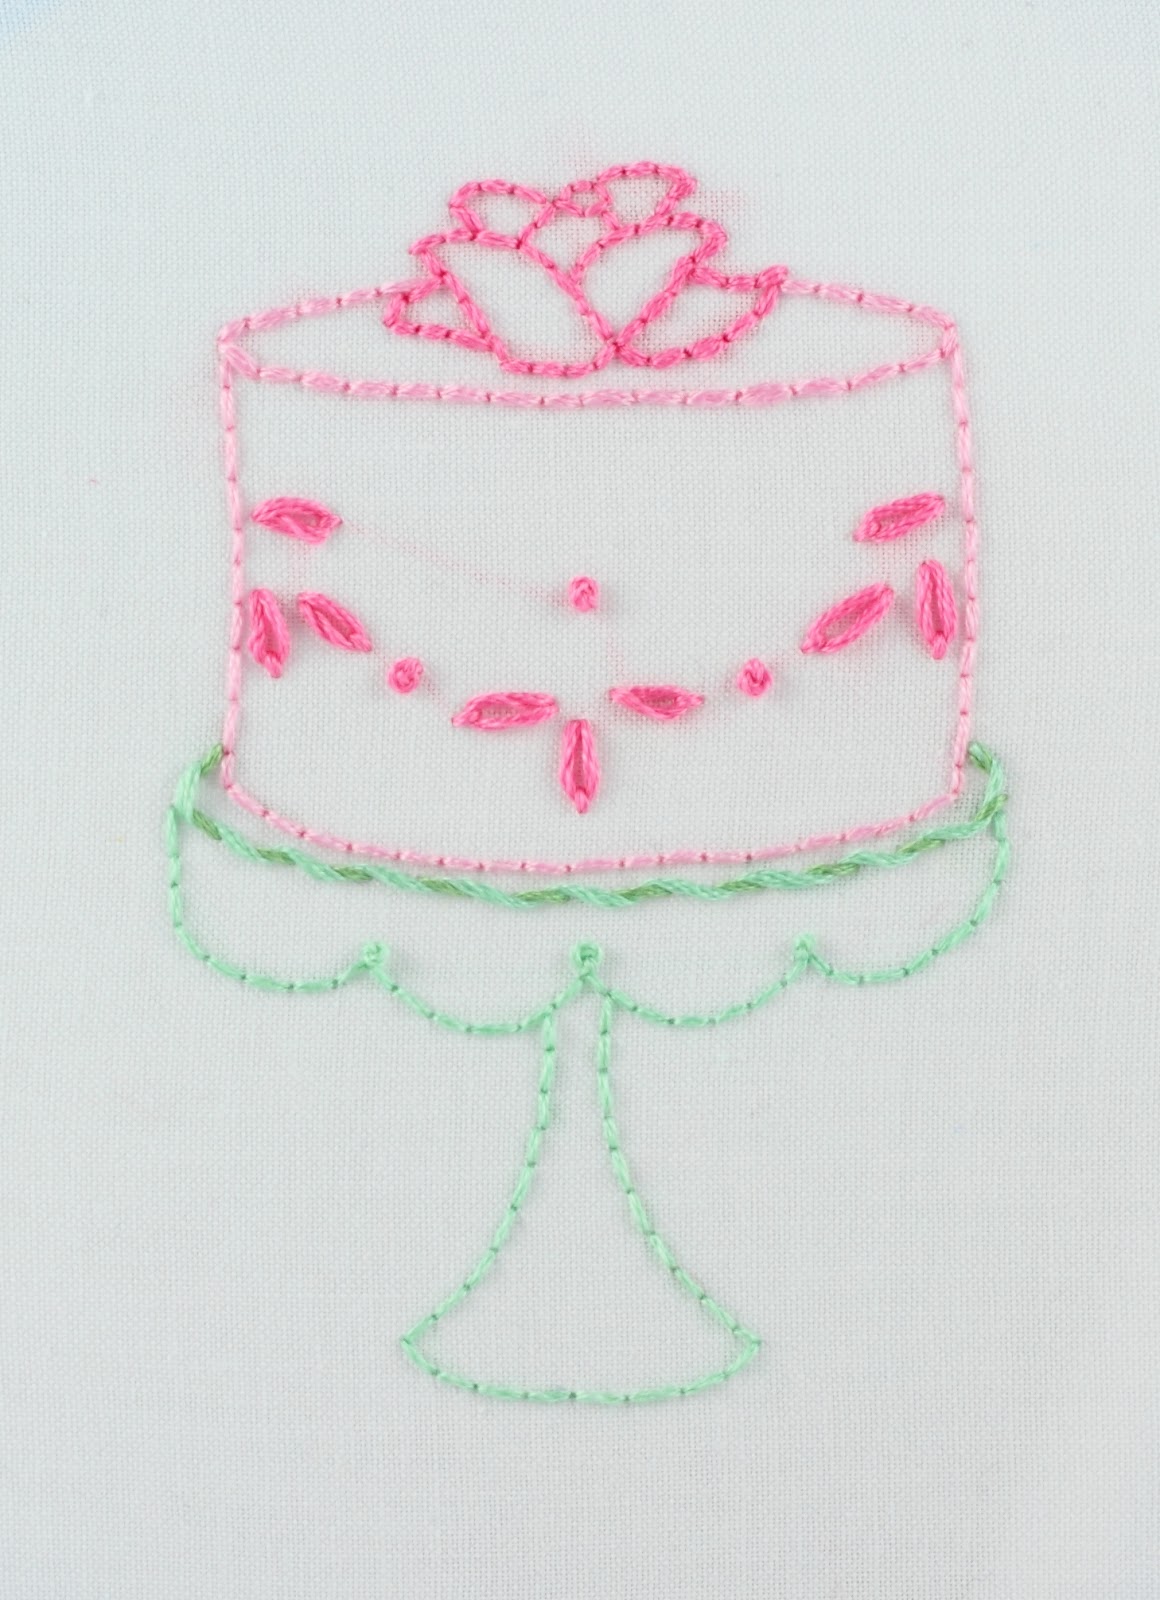
Patisserie cake wip - finished

Remember my La Patisserie cake wip? I finished the next cake.


I am really pleased with the result:


For the cake plate, I used a combination of these two greens.  I used the whipped running stitch to give the cake plate a decorative edge.   


I used two different pinks on this project.  A light pink for the cake and a darker pink for the cake decorations:


You can really see the color difference here:


I used three strands of floss for the cake body, and six strands for the top of the cake:


I stitched all the decorations using six strands of the dark pink, then I switched back to only three strands to do the very top of the rose.


You can see here the smaller line of stitching that using just three strands gives:


All the stitching is done and I washed out the blue transfer lines:


Now I am going to start on another one! 


Here are the floss colors and numbers I used for this project:


Monday, January 28, 2013

The first of several Valentine wips...

Here is a quick peek of a stitching project I am currently working on.  You can see by the colors and shapes, it is going to be for Valentine's Day :)


This red polka dot fabric is a really nice cotton fabric I have - you may remember it from the mushroom applique I did awhile back.  I love the red and it matches perfectly with this red floss - DMC # 321.  I am going to cut a heart shape from the red polka dot fabric and stitch the heart onto the white fabric with some white perle cotton floss - DMC Blanc.


I first selected a heart pattern, these are some of the hearts from the Be Mine Valentine Embroidery Pattern Packet.  I decided on the medium sized one with the swirly lines:


I cut out the heart shape and I am currently stitching it to the white fabric.  I am not even half way around the heart, I still have time to slip in some fiber fill to give the heart a little puffy, raised appearance. 


I am stitching this using the blanket stitch:


After that, I am going to add some lettering to stitch with the red floss:


I will post a picture when I complete this!

Thursday, January 17, 2013

100 Stitches - Twisted Insertion Stitch

Time to show you the latest stitch I have learned from 100 Stitches.  This is the twisted insertion stitch:


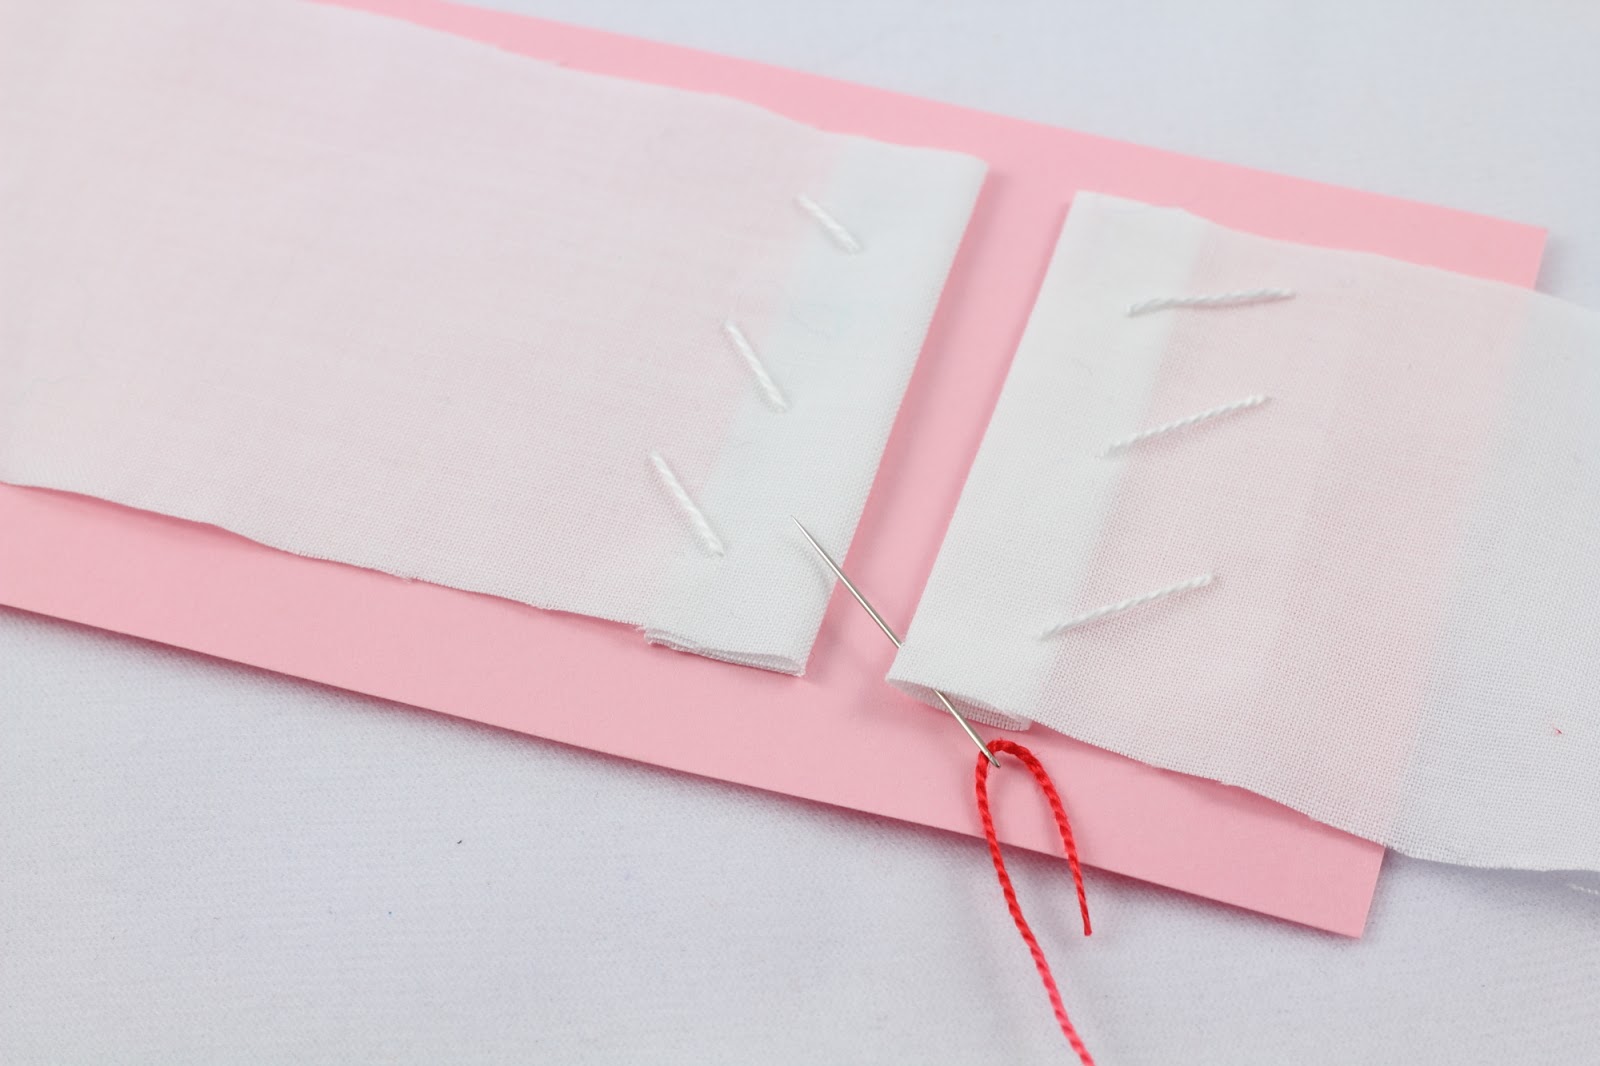
This is a stitch used to join two pieces of fabric together:


I used the recommended technique of first stitching the fabric pieces to heavy paper.  Remember when I did this for the Buttonhole Insertion Stitch? This is the same set up but for the Twisted Insertion Stitch, I spaced the fabric edges about 3/8" apart.  I folded under the fabric edge to act as a hem and then stitched the two pieces of fabric to the paper.


To demonstrate my stitch, I am using some perle cotton floss - DMC color variations #4210 - radiant ruby :)


The first step is come up through the fabric inside the hem.  This will hide your knot.


Pull the thread all the way through and go into the opposite piece of fabric.  Go into the fabric from the underside and emerge on the top side of the fabric.  Pull the thread all the way through.  For this stitch, you will always be entering the fabric from beneath:


Now these next steps I found a bit confusing...according to the picture in 100 Stitches, I am doing this correctly, it just seems sort of awkward the way the needle wraps around the thread.  I think it will be difficult to explain in words but hopefully my pictures will make sense!  The needle passes under the thread that just went into and out of the fabric:
 

Then straighten the needle and bring the tip of the needle over that same thread...?!  Better just look at the picture!


Once the needle is in this position, go into the opposite fabric from underneath:


and pull the thread all the way through.  This creates a little twist on the opposite fabric:


Now bring the needle around and once again bring the needle tip under the thread and then over the thread:


Bring the needle into the opposite fabric from the underside and pull all the way through:


Just keep doing that side to side


until you have joined the two pieces of fabric together:


Cut the stitches holding the fabric to the paper and admire the result!


I think this is really a beautiful stitch:


This is #99 on the list and is found in the Insertion Stitches category of 100 Stitches.

Tuesday, January 15, 2013

Fabric

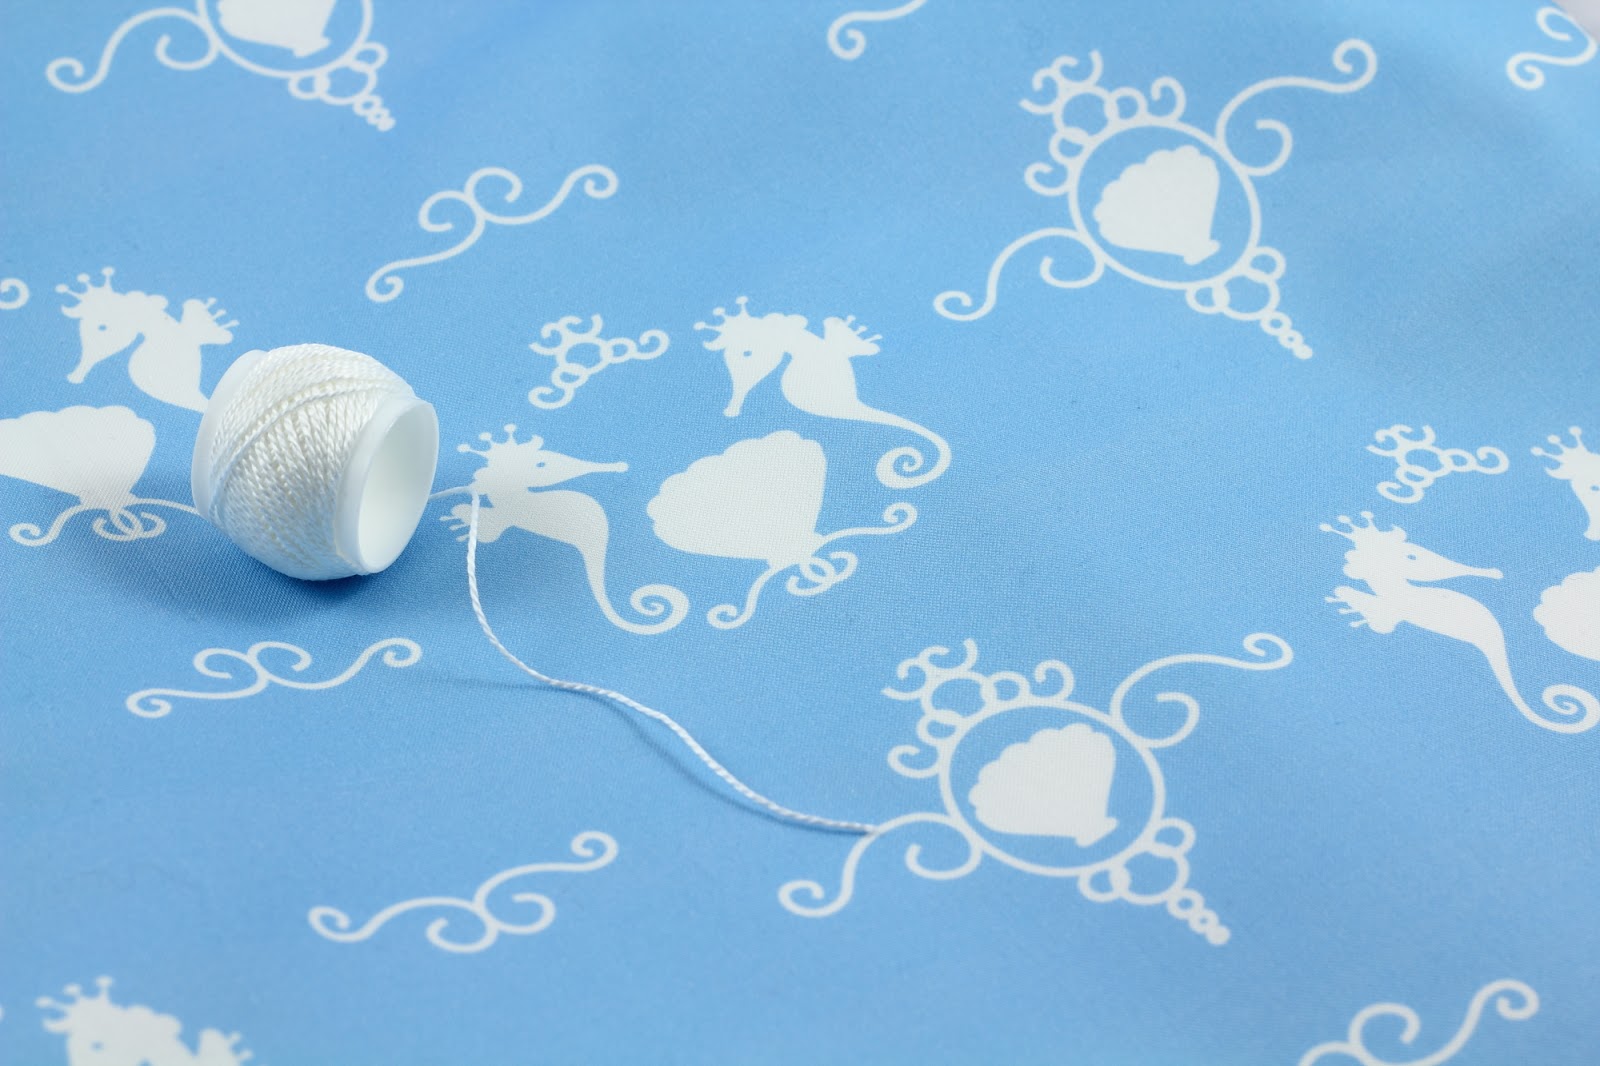
 Do these seashell and seahorse images look familiar?  Yes, they are from my pattern Seashells and Seahorses


I adapted them to print on fabric, designed this layout and then had it printed through Spoonflower.  The concept of Spoonflower is such a wonderful one, to be able to design your own layout and then have it printed on the fabric and size of your choice.


I ordered mine in 100% Kona Cotton but Spoonflower has so many fabric choices, you can purchase this in cotton poplin or twill or even silk crepe de chine.


I am trying out some different trims, this white pom pom {pom pom trim is my favorite} looks really good:


It also might be fun to embroider over a few of the images.  It will depend on what I am going to make with this fabric. 


This was really a fun experience and I can't wait to try some more!