
 Yes, you guessed it, the open fishbone stitch is the latest stitch on my 100 Stitches list. On this border, you may also recognize the running stitch and french knots:
 This is an extremely easy to learn stitch. It is a lot like the fishbone stitch but even a bit simpler! To demonstrate this stitch, I am using quilter's weight cotton and pearl cotton floss, dmc #798:
 100 Stitches suggests that this stitch may be used to fill any open shape. I drew a shape and added a dotted reference line down the middle:
 Start the stitch by coming up through the fabric on the left hand side of the dotted reference line:
 Now go back into the fabric at a slant from where your floss first emerged:
  Pull all the way through:
 Come back up through the fabric on the opposite side of your shape:
 and go back into the fabric on the right hand side of the guideline, and a bit below the point where your floss first emerged:
 Pull through to form the stitch:
 Then just like the very first step, come up through the fabric on the left hand side of the guide line:
 and then back into the fabric:
 forming another slanting stitch:
 back up through the fabric:
 pull all the way through and go back into the fabric on the right hand side of the guideline:
 and pull all the way through:
 continue in the same way:
 Until the shape is filled:
 This is an easy stitch and it gives a beautiful result:
 especially with my washable marking pen lines erased:
 Looks pretty good on the underside of the fabric too!
This stitch is stitch #12 and is listed in the flat stitches section of 100 Stitches.


 in eight different colors. Half of the cards have a whimsical food related image:
  And half are plain:
 The colors range from pale blues and pinks:
 to acid greens and yellows:

 And I know they will be fun to use!
  I just listed these in the big B


 Next, go back down through the fabric a little to the right of where your floss first emerged:
 Pull through and this makes a small stitch:
 Come up through the fabric below where your floss first emerged:

 This creates another diagonal line of floss under the fabric, forming an "x". Pull through and go back into the fabric right where your floss first emerged - sort of like a back stitch:
 Go back into the fabric, next to the first stitch on the bottom row:
  Come back out of the fabric on the top row, to the left of the stitches:
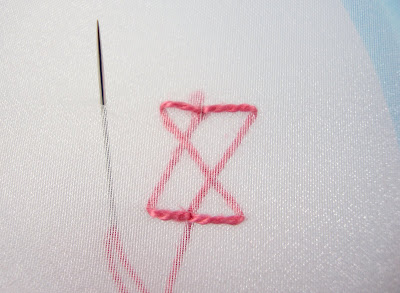 and back in:
 and to the bottom row:
 until you have a whole row of stitching.
 Easy and fun to do!
 This stitch is in the flat stitches section of 100 Stitches.
 There are carrots, radishes, greens, green onions and of course a big ripe tomato. I think this would be so perfect stitched on a fabric grocery bag:
 I love all these fresh spring colors! I especially like the colors at the bottom of the green onions:


 I finished stitching the last two snowmen - one in red:
  and one in mostly blue:


 Red and white striped and checkered:
 Some bright blues:
 Faded stripes:
 And a nice amount of this 1970's big print:
 I really love all the different styles and colors of these fabrics. I need to think of some interesting projects to use these on!


 Posts
Posts


