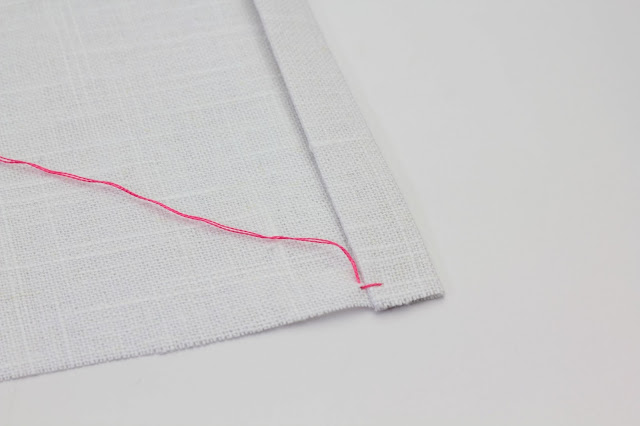
For my learning demonstration, I folded under a hem edge on this medium weave linen.
For my floss, I am using two strands of a contrasting color, this is the beautiful pink #956 from DMC.
My first step is to come up through the fabric right through the folded over hem.
Pull all the way through, this will hide the knot:
Next, take a small stitch right next to the folded edge. Go into the fabric (hole a) and come back out of the fabric (hole b):
Pull all the way through:
Next, bring the needle back around and go into and out of the exact same holes (a and b) :
Pull through:
Bring the needle back around and do it again:
and once more go into the first hole (hole a), but this time exit back into the folded over hem edge:
Pull all the way through. **To start the next stitch, go back into the fabric in the same hole - this is hole b from the first stitch and is now the new hole a. That starts the next stitch:
Going through the same two holes more than once really widens the holes and creates the effect of the pin stitch. I found I really needed to pull the thread tight to draw the fabric threads together. This is the front of the hem - can you see the holes created by the stitching?
This is an easy to do stitch, very relaxing and you don't need to use an embroidery hoop!
This is stitch # 95 and is in the Drawn Fabric Embroidery section of 100 Stitches.
**Edited - I updated my original posting of learning the pin stitch after receiving some extremely helpful information and tips from Martha at Southern Matriarch blog. She has an excellent tutorial you should definitely check out - here is the link.


7 comments:
I've always wanted to know how to make those little holes! Thanks!
You are off to a good start. I have a couple of suggestions if you don't mind. In order to get the open look to your stitches, your "back stitches" that run parallel to the hem, need to connect. When you go to make your second stitch, it would share a hole with the first parallel stitch. If working on a straight hem, you can withdraw a couple of threads next to where your hem will be and that will really open up the look of your hemstitching/pinstitching. I have a few posts on my blog.
http://southernmatriarch.blogspot.com/2009/05/sweet-bonnet.html
The pinstitch is the foundation for doing applique cord which I have a tutorial on. It does show the action of the pin stitch.
http://southernmatriarch.blogspot.com/2011/02/applique-cord-tutorial.html
You are doing great. Keep up the good work.
I shy away from anything which is not a freestyle stitch!:) This is very interesting and effective - and I very much enjoy seeing the process. As ever you have such clear instructions which are so easy to understand. You do an excellent job with your stitch tutorials Kim!x
Thanks, it's very useful! :)
Fiona - :) I always wondered about these too!
Martha - Thank you! I so appreciate your taking the time to explain this and to provide a link to your excellent tutorial!!! I am really pleased - after reading your comment and tutorial, I examined the diagrams in my 100 Stitches book and I see you are correct, the next stitch IS starting in the second hole of the stitch before it. I am thrilled to try this the correct way :) Thank you!
Jules - Thank you! I love learning these new stitches - some are so much harder than others!
Hi Silvia - Thank you!
Kim, adoro suas explicações sempre tão didáticas!!!
Obrigada!!
beijinhos,
Lígia e =^^=
Kim, j'adore tes explications toujours aussi éducatif!
Je vous remercie!
baisers,
Ligia e = ^ ^ =
Olá Ligia
Obrigado! Fico feliz que tenha gostado deste. Eu adoro aprender esta costura :)
Post a Comment