The singalese chain stitch is the latest stitch I have learned from
100 Stitches .

It is a beautiful stitch, but a bit confusing at first glance - so much going on!

It looks difficult doesn't it? After re-reading the instructions quite a few times, I found this to be a fairly easy stitch to do. I would recommend using guide lines! The stitch is worked from top to bottom and it can be hard to keep the spacing consistent. I drew two parallel guide lines. I drew them at 3/8" apart:

This stitch requires three separate pieces of floss! One piece of "working" floss, and two other pieces of floss that will be used as "laid threads". 100 Stitches suggests that the laid threads and the working floss be in contrasting colors.

I used blue (dmc pearl cotton #798) for the laid threads and pink (dmc pearl cotton color variations #4810) for the working thead. My first step was to bring the two laid threads up through the fabric - first the left side:

then the right side:

and let them lay there:

Next, I took the working thread:

and came up through the fabric, between the guide lines, alongside the left guide line:

Pull all the way through - notice the working thread is pulled through and is now over the left laid thread:

The working thread now goes from left to right under both the laid threads, not catching any fabric, just sliding under the laid threads over to the right guide line:

and then into the fabric at the right guide line, and at a bit of a diagonal slant. The needle comes out of the fabric at the left guide line. Notice the needle is going over the top of the laid thread and the working thread:

it is a little easier to see here:

pull all the way through - but don't pull too tightly, you need some slack for the next steps:

then the needle goes back under the laid threads - left to right with out picking up any fabric:

and over to the right guideline:

Back into the fabric above the working thread on the right guide line:

and making the same slanting stitch to come out on the left guide line:

pull all the way through:

and then the needle goes back left to right under the laid threads:

pull through and insert the needle above the working thread, alongside the right guide line:

and make a slanting stitch coming out at the left guideline:

pull through over the left guideline and then the needle goes under the guide lines left to right:

and on and on until this:

100 Stitches suggests that the laid thread can be pulled taut and then taken back down through the fabric to finish:

Here is what the underside looks like:

There is a lot to keep track of when doing this stitch! I found that it takes a little bit of pulling and adjusting of all the threads to make them lay flat and even. This is stitch #49 and is in the linked stitches section of 100 Stitches.

 This stitch requires three separate pieces of floss! One piece of "working" floss, and two other pieces of floss that will be used as "laid threads". 100 Stitches suggests that the laid threads and the working floss be in contrasting colors.
 then the right side:
 and let them lay there:
 Next, I took the working thread:
 and came up through the fabric, between the guide lines, alongside the left guide line:
 Pull all the way through - notice the working thread is pulled through and is now over the left laid thread:
 The working thread now goes from left to right under both the laid threads, not catching any fabric, just sliding under the laid threads over to the right guide line:
 and then into the fabric at the right guide line, and at a bit of a diagonal slant. The needle comes out of the fabric at the left guide line. Notice the needle is going over the top of the laid thread and the working thread:
 it is a little easier to see here:
 pull all the way through - but don't pull too tightly, you need some slack for the next steps:
 then the needle goes back under the laid threads - left to right with out picking up any fabric:
 and over to the right guideline:
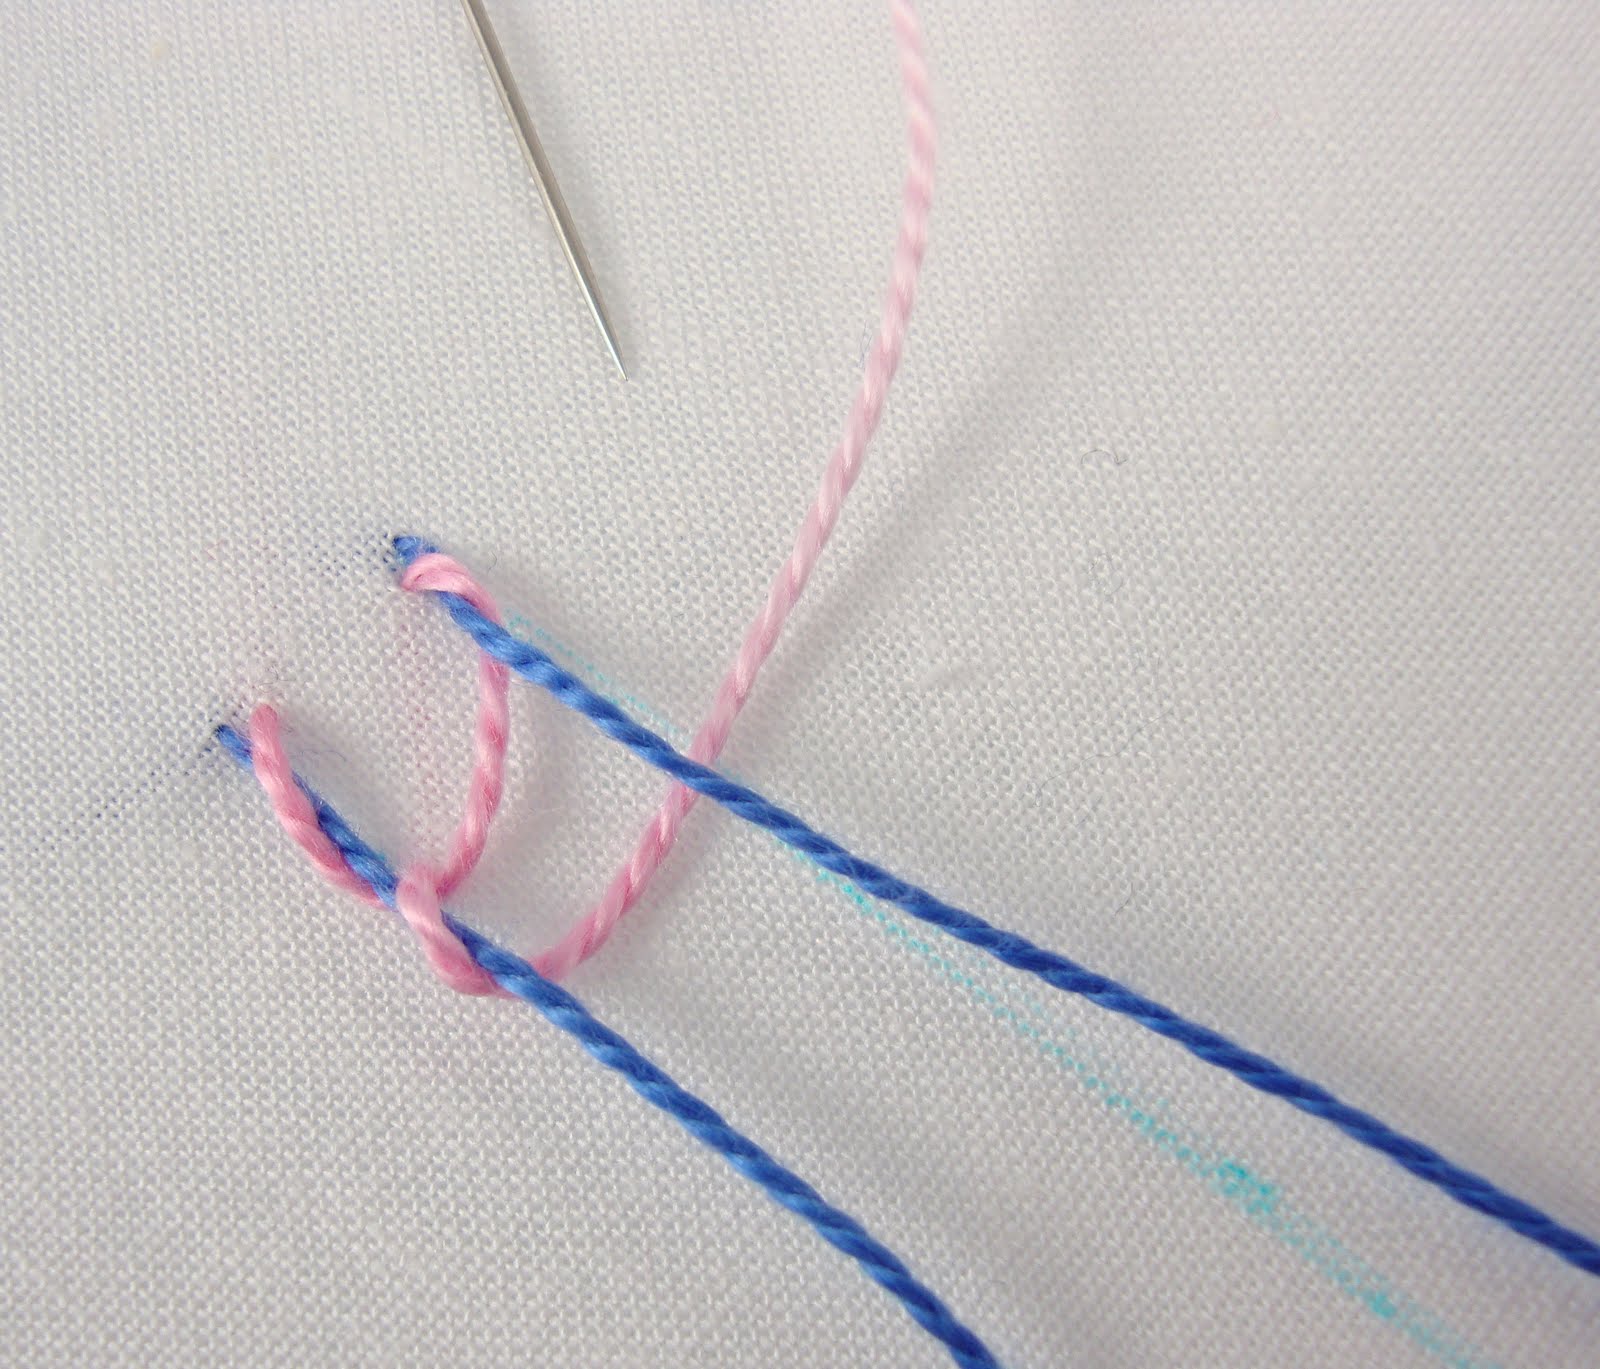 Back into the fabric above the working thread on the right guide line:
 and making the same slanting stitch to come out on the left guide line:
 pull all the way through:
 and then the needle goes back left to right under the laid threads:
 pull through and insert the needle above the working thread, alongside the right guide line:
 and make a slanting stitch coming out at the left guideline:
 pull through over the left guideline and then the needle goes under the guide lines left to right:
 and on and on until this:
 Here is what the underside looks like:
 There is a lot to keep track of when doing this stitch! I found that it takes a little bit of pulling and adjusting of all the threads to make them lay flat and even. This is stitch #49 and is in the linked stitches section of 100 Stitches.


Okay, that stitch is just way too cool! I've got to try it now~ thanks for the tutorial!
ReplyDeleteHugs,
Jill
Just WOW! I've never tried to do this one. It´s beautiful! Congrats!
ReplyDeleteThanks ladies! I think you will enjoy this stitch :)
ReplyDeleteDitto...it is just WOW. Great explanation. You lay it out so well even a beginner can see the steps.
ReplyDeleteThank you Teresa!
ReplyDeleteits beautiful Kim... love the colour combination also...
ReplyDeleteHope you would like to pay a visit to me at
http://craftaworld.blogspot.com/
Love
Farah
Thank you Farah!
ReplyDeleteYour blog is gorgeous - I came here from Rachel at Contented, and I'm so glad I did!
ReplyDeleteHi dottycookie - Thank you! I am so glad you found the big B blog!
ReplyDelete