skip to main |
skip to sidebar
You may remember from the last part of this post that I have several Easter projects in the works.
I have three Easter motifs that I am stitching. The motifs are a little spring chick, a basket full of Easter eggs, and some Easter eggs surrounded by grass and flowers. I am using these blue, yellow and green fabrics. I have already transferred my patterns:
First up is the little spring chick. As you can see, I am using the blue fabric for him. I love blue and yellow together so I think this will look really good. Now I need to select which shade of yellow! Also for the little flowers, I am deciding between these pinks...
or these lavender / purples. So far, I think I am leaning towards the lavenders?
I will post my progress as I go along.
I recently purchased some cards from Blueberry Suite on Etsy. The shop has greeting cards, thank you cards and notecards. This shop sells both physical card sets and digital cards that you download and print.
The picture shown above is a notecard set. I love the beautiful design, especially the scalloped edge. Below you can see the two different designs and envelope liner styles.
Next, I bought this thank you card. This is a digital download.
It includes a printable thank you card, envelope, and an envelope liner. I printed the card and the envelope liner out on white paper:
I cut the card out along the guidelines and folded it in half. It is so pretty with the flowers extending onto the back of the card too.
Next, I cut out the envelope. I wanted to try this in a few different color combinations, so I printed the envelope pattern page in white, pink and raspberry. As you can see, they all look beautiful with the liner:
There are easy to follow instructions and guidelines for folding and gluing the envelopes together and inserting the liners. Now I have a beautiful thank you card ready to go. I am not sure which color envelope I am going to go with yet...the great thing is that since these are an instant download, I can print them as many times as I want! This next picture shows the card going into the pink envelope. The white envelope and raspberry envelope are in the background. They all look beautiful with the liners!
Blueberry Suite is becoming my favorite Etsy shop. You can see why if you check out all the other beautiful cards and printables.
It is my favorite because of these, but also because it is my sister's shop! I plan to order the dog silhouette stationary set next - or maybe the tartan scottie!
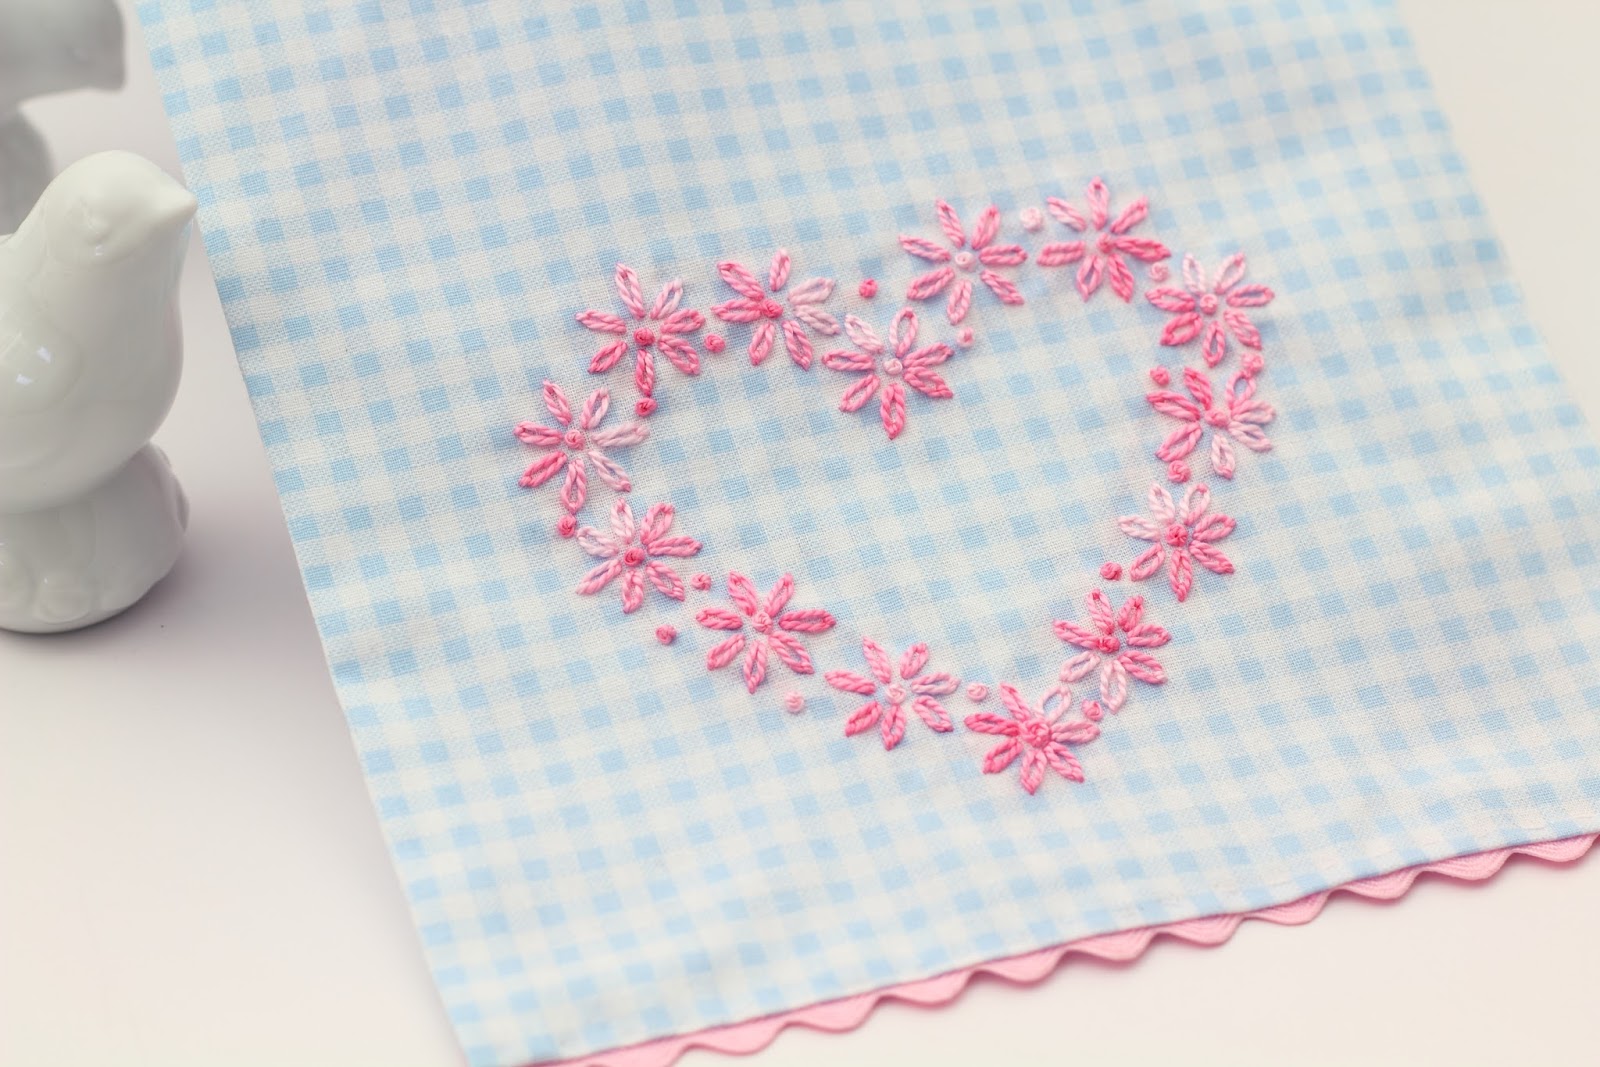
I just finished a Valentine's Day mini-tea towel. I had a small amount of this pretty fabric on hand, some pale pink rickrack and some pink color variations floss. I transferred this lazy daisy heart to the fabric and started stitching!
I am really pleased with the result! This little towel is only 7-1/2" wide - I think it will look really nice layered on a pink or white towel.
This turned out to be a really quick and easy project. I love to stitch lazy daisies. Here is a closer view, I also hand stitched the hem and rickrack:
The perle cotton floss I used is DMC #4810. I really love the color variation in this floss.
It is so many beautiful shades of pink and I think it goes well with this powder blue fabric.
Valentine's is still a few days away, which for me always marks the beginning of the end of winter and winter weather - however, we had a little bit of a surprise snowfall over this last weekend
It has been really cold - we didn't get too much, it was so pretty
and Rego really enjoyed it!
My Valentine's day card is finished. I am really happy with the result. I wouldn't hesitate to stitch fabric onto paper in the future. If you want to see my progress posts on this project - they are here { Part One - Part Two }
Since my last post on this project, I cut two pieces of black paper, one for each side of the inside of the card. I wanted to make sure to cover up the underside of my stitching.
Then I glued these to the inside of the card. I used Elmer's Craft Bond rubber cement. It worked super and it didn't pucker the paper!
Next, I cut two pieces of white paper to layer onto the black paper. I am sure seeing those scallop edge scissors, you know what is coming next!
I scallop cut the edges of the white papers and glued them to the black pieces:
Here is what they look like all glued in place. Ready for me to write my message:
I like the strong contrast of the black and white both on the inside and the cover:
Now it is all finished and ready to go!
If you have been following along {part 1} {part 2} with the leprechaun embroidery project I am stitching, I have an update to share.
The mushroom stem is completed. The whole stem is stitched in split stitch in DMC Blanc. I did this in lines using all six strands of the floss and it really fills in the space quickly. The accent lines are DMC #738.
The green grass is finished. I stitched this in back stitch, the floss is DMC #906.
The main part of the pot of gold is filled in, I still need to finish the rim. I stitched this all in back stitch. The blanket stitch is working really well for attaching the mushroom top. I will finish the pot rim and the coins before I continue along the mushroom top with the blanket stitch.
Next up are the gold coins. I have been experimenting to get just the right gold look. So far I have tried using gold colored cotton floss mixed with blending filament, gold braid mixed with blending filament and just blending filament by itself.
These are the three threads I have tried so far. The gold braid is the standing up spool on the right - Kreinik Fine Braid #002. The blending filament is the other spool with the shiny gold thread - Kreinik Blending Filament #002HL. The cotton floss is DMC #3820.
Now I am going to try a few more colors of the cotton floss. From left to right are DMC #744, DMC #444, DMC #3821 and DMC #3820.
I am sure I will be able to come up with a good combination.
I will be back with part four!
I have a new stitching project I am working on. This is for Easter but I wanted to share my progress as I go along so I am starting a bit early! This pattern is from the Easter embroidery pattern packet.
I first transferred the image and started thinking about a general color scheme...
Then I started stitching the E - and now looking at this I am not sure if the floss color for the text will be bright enough.
I did this first set of leaves in the fishbone stitch . The bright pink flower is the lazy daisy stitch, there are quite a few of them in this design so I may do them all in one color or different colors. The pink flower also has a french knot and the yellow dots are french knots too.
For the dark purple tulip-like flower, I am using the roumanian stitch. I love this stitch and it is proving to be so versatile, it fills in really well even on a curve. The bright green stem is done in rows of back stitch and the little bright green leaves are fishbone stitch. The center flower is in long and short stitch. I think I will fill the center with yellow French knots. Yellow and purple are such a pretty color combination don't you think?
I have several other Easter projects in the works but I will do these in separate blog posts. I am looking forward to using these colored fabrics - that yellow is so nice - you may remember the pillow I made out of this fabric.
I will be sure to keep posting my progress.