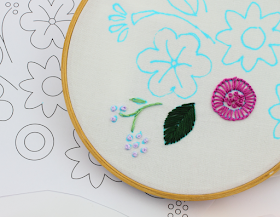
I finished the stitching on this project.
I used quite a few different stitches - you can see them in the following close up pictures. The tiny lavender flowers are French Knots with a Stem Stitch stem and a Lazy Daisy Stitch flower. The same goes for the dark orange flower sprays. The bright pink sprays are all Straight Stitch. The dark green leaves are Fishbone Stitch. The raspberry and pink two toned flower at the top is done with Long and Short Stitch with French Knots for the center:
The yellow and butterscotch colored flower is Whipped Back Stitch. The bright pink flower is outlined with Stem Stitch and the center is filled with the Pistil Stitch:
The two colored green and two colored blue flowers are both done with Long and Short Stitch and the centers are Back Stitch. The three colored peach circle flower is done with the Rose Stitch. The dark raspberry colored circle flower is done with Buttonhole Stitch and French Knots:
Here are the color numbers for the floss I used:
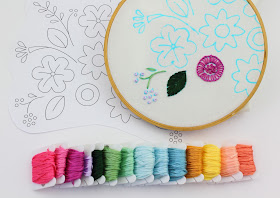
This pretty floral paper is the inspiration for a color palette for my current embroidery project.
I have just started stitching this large motif of flowers from my Flower Fancy embroidery pattern set.
Flower Fancy is 12 pages of beautiful flowers. If you follow me on Instagram, you may have seen a few in-progress pictures while I was designing this set:
Here is a picture of the pattern set - available in my Etsy shop.
I hope I can incorporate all of the colors from this palette!
I am just about finished with the stitching on my Washington State embroidery project.
This big motif is an outline of the state with some recognizable features.
Rhododendron blossoms, cherries, apples, wheat, a Chinook salmon, raindrops, fir trees, mountain ranges a tugboat, the Capitol building and an orca.
I think my next project from this pattern set will be the Sasquatch...
Time to share a new stitch I have learned from my 100 Stitches Plus list.
This one is the Pistil Stitch - you can see from the above picture that it is the ideal stitch to use when forming part of the pistil of a flower!
This stitch is very simple, it is basically a French Knot with a tail.
For my demonstration, I am using a color variations pearl cotton floss, this is DMC number 4200 :
The first step is to come up through the fabric:
Pull the floss all the way through:
Now form the French Knot by winding the floss twice around your needle:
Carefully insert the needle back into the fabric a distance away from where the needle first emerged. The distance away will determine the length of the tail :
Pull all the way through and the French Knot will snug up next to the fabric with the tail straight behind:
That is it! If you want to make only one Pistil Stitch, you would now secure your floss on the underside of the fabric. If you want to make several stitches, you just repeat the steps:
and then secure your floss underneath:
I learned this stitch from the book Elegant Stitches by Judith Baker Montano.
I have been embroidering this Mr. & Mrs. motif from my Wedding embroidery pattern set.
I added the hearts motif and transferred them together onto my fabric:
You can see the hearts are surrounded by small circles. These circles indicate using French Knots but I thought some pearl beads would look beautiful!
These come in such pretty colors:
I used the white ones. On this close up, it is easy to see my stitching - the lettering is all done with Stem Stitch in light gray - this is DMC no. 415. Then I laced the Stem Stitch with silver blending filament. This is by Kreinik Threads and is silver no. 001. I love using this filament. It rarely tangles and adds so much sparkle. I also used it on the hearts. One is outlined in Stem Stitch and filled with Cross Stitches, the other is outlined in Back Stitch and filled with lines of Back Stitch.
I think this is beautiful. I really love the dimension the pearl beads give and the sparkle of silver:


