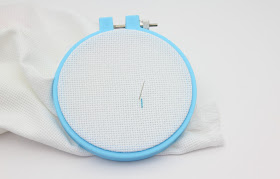
Time for another installment of my 100 Stitches progress. This beautiful stitch is called Mosaic Filling. I should say this is my version of Mosaic Filling. The written instructions for this stitch seemed pretty straightforward, however one of the in-progress pictures from the book completely confused me. I will explain why when I get to that step. I ended up finishing this stitch as I thought was the correct way and mine does look just like the finished picture in 100 Stitches so that is what I will demonstrate.
This is a drawn fabric embroidery stitch and is worked over an area of 12 vertical and 12 horizontal threads. I am using this medium to loose weave linen fabric. For my floss, I am using perle cotton - DMC Color Variations #4025.
The first step is to come up through the fabric. I don't think it matters where you start, the first step is to take four straight stitches in a row - I worked from right to left:
Here is the first straight stitch. I counted down four threads from where my needle first emerged and went back into the fabric:
Next, I made another straight stitch, one thread to the left from the first stitch. Notice the needle comes up through the fabric at the top of the straight stitch and goes into the fabric at the bottom of the straight stitch:
I did that four times. On the fourth stitch, I then came back up through the fabric through the same hole as the needle went into the fabric at the top of the stitch:
I pulled all the way through and then went back into the fabric four vertical threads to the left:
That starts a second set of four straight stitches. On the fourth stitch, as with the first set, come back up through the same hole and start on a new set of four straight stitches:
Do those same steps until you have four sets of four straight stitches around a center square. When the needle emerges from the last straight stitch, pull all the way through:
and go back into the fabric in the same hole of the first straight stitch for that set and come back out at the opposite corner. When you pull through, this will make a straight stitch at one edge of the center square.
Do the same thing at the next corner:
and the next:
and the final corner:
Pull all the way through and now the center square is all outlined. Now go back into the fabric at the opposite edge diagonally:
Pull through to make a cross stitch and then do the same on the opposite side:
And done! Did this seem confusing? The confusion I had came from looking at the picture in 100 Stitches. It shows starting the first straight stitch {that edges the center square} by going into the fabric at the furthest right-hand end of the top right side horizontal straight stitch set and emerging at the bottom left edge of that same set. When I tried that, it just made a second straight stitch on top of the first one. What am I not understanding?
Well this is what my Mosaic Filling looks like:
and the underside of this stitch:
It is a beautiful stitch, if anyone is familiar with this stitch and has some tips or insight, I would love to hear from you!
This stitch is #94 on the 100 Stitches list and is from the Drawn Fabric Embroidery category.


this is such a pretty stitch, I will have to look at the drawn fabric stitches. Always a little afraid of them but this one looks manageable. As always your stitching is exquisite
ReplyDeleteKate x
Thank you Kate! The drawn fabric stitches are really fun to do. I would like to add more of them to my regular stitching.
ReplyDeletereally cool, love it! AND I have also translated your stitches into doodles in my journaling. thank you much for sharing and inspiring me ;D
ReplyDeletedonnalee- Thank you! That is so great!! :)
ReplyDelete