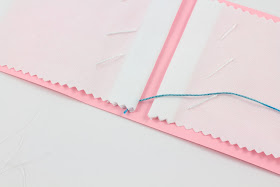
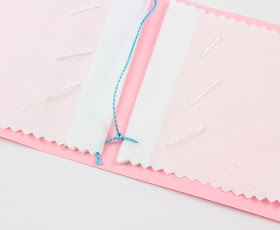
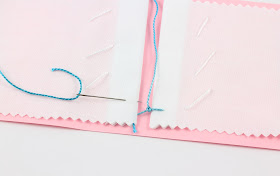
Time to show the latest stitch I have learned on my 100 Stitches journey. This lovely stitch is the Knotted Insertion Stitch:
the purpose of the stitch is to hold two pieces of fabric together:
To set up this stitch, I took two pieces of fabric, and folded an edge under on each piece. This is just for my demonstration, if I were doing this on a project, I would have hemmed each edge! I lined the two pieces of fabric up on a piece of stiff paper:
I spaced them about 1/4" apart and then stitched the fabric to the stiff paper with some white pearl cotton floss:
To stitch the stitch, I used some different pearl cotton floss, this pretty blue - this is color variations #4025 by DMC.
I knotted the end of the floss and came through the fabric in the folded over edge. This will hide the knot:
Then I pulled the floss all the way through:
Now according to 100 Stitches, this is just making Buttonhole Stitches on the edge of the fabric, alternating side to side and adding a second stitch over the loops. So I set up my needle just like a Buttonhole Stitch. I went into the fabric and came back out right on the folded edge. I didn't go through both layers of fabric just the top layer. I pulled the needle all the way through and passed over the working thread:
This left me with two threads - one on the top and one emerging from the fold:
Next, I brought the needle around and under the two threads:

I went under those two threads but over the working thread - this makes a sort of loop:
I kept pulling and a knot began to form:
Done!
Now I went to the opposite side and do the same steps: set up like a Buttonhole Stitch:
Pull through:
Bring the needle around and go under the two threads:
but over the working thread:
and pull through to form the knot:
Then back to the opposite side and start again:
I just kept stitching on alternate sides:

until I was at the end of the fabric. 100 Stitches didn't explain how to finish this, so I just went back into the fold of the fabric at the end and tied a small knot to secure my floss.
Then I cut away the stitches that were holding the fabric to the paper and admired the finished stitching!
I really enjoyed learning how to do this stitch. I think it is so beautiful.
This stitch is in the Insertion Stitches category and is #100 on the 100 Stitches list. I didn't do these stitches in any sort of order, so I am not finished with the list yet - I still have 22 more stitches to learn!


That really is a pretty one! I like the little knots, they accent the stitch very nicely. :)
ReplyDeleteBeautiful stitching, as always Kim, another excellent tutorial!
ReplyDeleteKim, that is such a pretty stitch! I could see this used in heirloom sewing!
ReplyDelete