Tuesday, September 29, 2009
100 stitches - lazy daisy stitch
The latest stitch in my 100 stitches project is stitch #40, the lazy daisy stitch. I have had so much trouble learning this stitch! It isn't that the stitch itself is hard to do, it's that it is so hard to make the stitches even and the same size when making a flower! Here is the least embarrassing example of my first attempts
I thought it might not look so bad if I added some french knots in the centers :)
Still noticing the uneven, poorly spaced and loopy stitches :( After much stitching, removing of stitching and re-stitching...I think I am happy with the result:sort of.This really is a pretty stitch. I think I will love stitching lazy daisies when I have a pattern to work from. This stitch is from the "linked stitches" section of the 100 stitches book
***update*** When I first started posting about my journey through the 100 Stitches book, I mostly just took a picture of my completed stitch or line of stitching. The more comfortable I got learning these new stitches, the more I started to document the steps of the stitches as I went along. Now my 100 Stitches posts always have a step by step demonstration of my stitching. I am currently going back through my early 100 Stitches posts and adding demonstration pictures. Here is my demonstration of the lazy daisy stitch. I am using a beautiful orange dmc color variations pearl cotton floss. I started with a daisy from the Daisy embroidery pattern packet and transferred it onto my fabric:
The first step is to bring your needle up through the fabric at the base of one of the daisy petals:
pull the thread all the way through:
Now take your needle back down through the fabric right where it first emerged:
and bring your needle back out at the end of the daisy petal. As your needle emerges, make sure it is going to over the working floss. Start pulling:
and keep pulling...you can see a loop forming:
when you have pulled all the way, you will have a nice petal formedYou now can secure the petal in place by taking a single stitch: that is all there is to this stitch, just do the same steps on the next petal:
until you have completed all the petals. I added a french knot in the center of mine:
and here is what the underside of my stitching looks like:
Wednesday, September 16, 2009
100 stitches - blanket stitch and feather stitch
I have two new stitches to show. Both of these stitches are from the "looped stitches" section of the embroidery book I am working my way through. This first one is the blanket stitch (stitch #23).
This is a very easy stitch to learn but to for a good looking result, it does require a certain consistency with spacing!
My first step was to draw two parallel lines with a ruler and a water soluble marking pen.
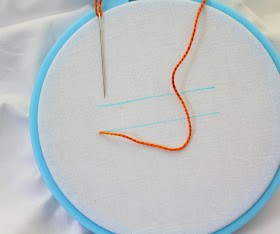
This stitch is worked from left to right so first come up through the fabric on the left edge of the bottom line:
Pull the thread all the way through and bring the needle around to the top line. A little to the right of where your thread first emerged:
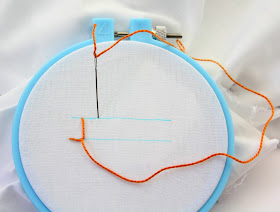
Go into the fabric on the top line and come back up through the fabric on the bottom line:
Pull all the way through making sure your needle is passing over the top of the working thread:
Keep pulling:
all the way through:
Now, just as when you started, bring the needle around to the top line:
and go into the fabric on the top line and come out of the fabric on the bottom line with your needle sliding over the top of the working thread:
Pull all the way through:
Just continue stitching this same way all along the stitching lines:
To finish this stitch, I just went back into the fabric at the base of my last stitch:
and then secured my floss on the underside:
Then I washed out my marker lines:
This is a beautiful stitch, I think it makes a nice edging stitch.
The floss I used for this is DMC perle cotton color variations number 3840.
The next stitch is the feather stitch (stitch #28). This is such a beautiful stitch and really easy to do. I can't wait to incorporate this stitch into some of my projects.
Thursday, September 3, 2009
Acorn Embroidery Pattern Packet
I have finished a new embroidery pattern packet. This one is called "acorn" and features beautiful acorns and oak leaves. The packet has seven pages and includes tons of embellishment patterns and even two pages of border patterns.
I could hardly wait to start stitching up these patterns. My first project was a tea towel. I had some beautiful white cotton in my fabric stash but I wanted a fabric with a little more "fall" color so I dyed the white cotton in tea! To get the right color, I put the fabric in a bowl of water. I used about five tea bags and let the fabric sit in this overnight. Then I rinsed it, let it dry and transferred my pattern:
I started out with the colors you see in the above picture but didn't really like the look. I eventually took out the gold colored floss on the acorn tops and the sage green on the acorn bottoms. Instead, I used a combination of floss in green/sage green/mustard color for the acorn tops and two rows of two different browns for the acorn bottoms. I like the new look much better:
Then I hemmed the bottom with a running stitch and now have a fall-themed tea towel!
Tuesday, September 1, 2009
100 Stitches - chain stitch
The next stitch in the 100 Stitches book is the chain stitch (stitch #39).
This is such a beautiful stitch and really fun to do. This is just the basic chain stitch - I notice that the 100 Stitches book has nine variations on this simple stitch!
The pictures for "checkered chain stitch" and "rosette chain stitch" in particular look pretty complicated!
Here are the steps I used when learning the chain stitch. For my floss, I used
this pretty perle cotton. This is DMC color variations number 4210.
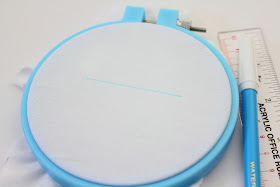
First, I used a ruler and water soluble marking pen to mark a stitching line to follow:
I started this stitch on the left edge of the marked line, with my needle coming up through the fabric.
Pull the floss all the way through:
I brought the needle back around and went back into the fabric right in the same hole that the floss first emerged from:
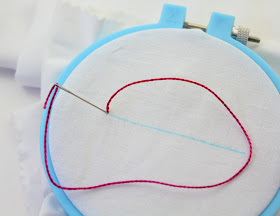
I brought my needle back out of the fabric along the stitching line, a small ways to the right of where the needle first went in. Start pulling the needle and notice the needle is passing over the top of the working floss:
As I pulled, it starts to form a loop:
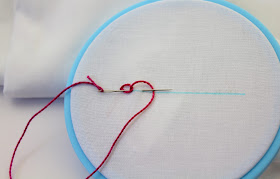
Once pulled all the way through, a sort of tear-drop shape is formed:
I brought my needle back around and went back into the fabric right in the same hole or even just alongside but a little below the hole that the floss just emerged from:
I then brought the needle back out of the fabric, just like before a bit to the right along the stitching line, making sure the needle passes over the working floss:
Pull the floss all the way through and form the second chain stitch:
I continued stitching all along the marked line and at the end I finished by going back into the fabric on the right side of the last tear drop shape:
I pulled my floss through:
and secured it on the underside:
This is such a beautiful stitch and really fun to do. This is just the basic chain stitch - I notice that the 100 Stitches book has nine variations on this simple stitch!
The pictures for "checkered chain stitch" and "rosette chain stitch" in particular look pretty complicated!
Here are the steps I used when learning the chain stitch. For my floss, I used
this pretty perle cotton. This is DMC color variations number 4210.
First, I used a ruler and water soluble marking pen to mark a stitching line to follow:
I started this stitch on the left edge of the marked line, with my needle coming up through the fabric.
Pull the floss all the way through:
I brought the needle back around and went back into the fabric right in the same hole that the floss first emerged from:
I brought my needle back out of the fabric along the stitching line, a small ways to the right of where the needle first went in. Start pulling the needle and notice the needle is passing over the top of the working floss:
As I pulled, it starts to form a loop:
Once pulled all the way through, a sort of tear-drop shape is formed:
I brought my needle back around and went back into the fabric right in the same hole or even just alongside but a little below the hole that the floss just emerged from:
I then brought the needle back out of the fabric, just like before a bit to the right along the stitching line, making sure the needle passes over the working floss:
Pull the floss all the way through and form the second chain stitch:
I continued stitching all along the marked line and at the end I finished by going back into the fabric on the right side of the last tear drop shape:
I pulled my floss through:
and secured it on the underside: