Tuesday, February 28, 2012

100 Stitches - Knotted Cable Chain Stitch

This beauty is the Knotted Cable Chain Stitch.  It is the latest stitch I have learned on my 100 Stitches list.


Happily, I didn't have any trouble learning this stitch, it is very straightforward.  For my demonstration, I am going to draw a straight line and stitch along it but I think this stitch would work beautifully for a curvy line too!


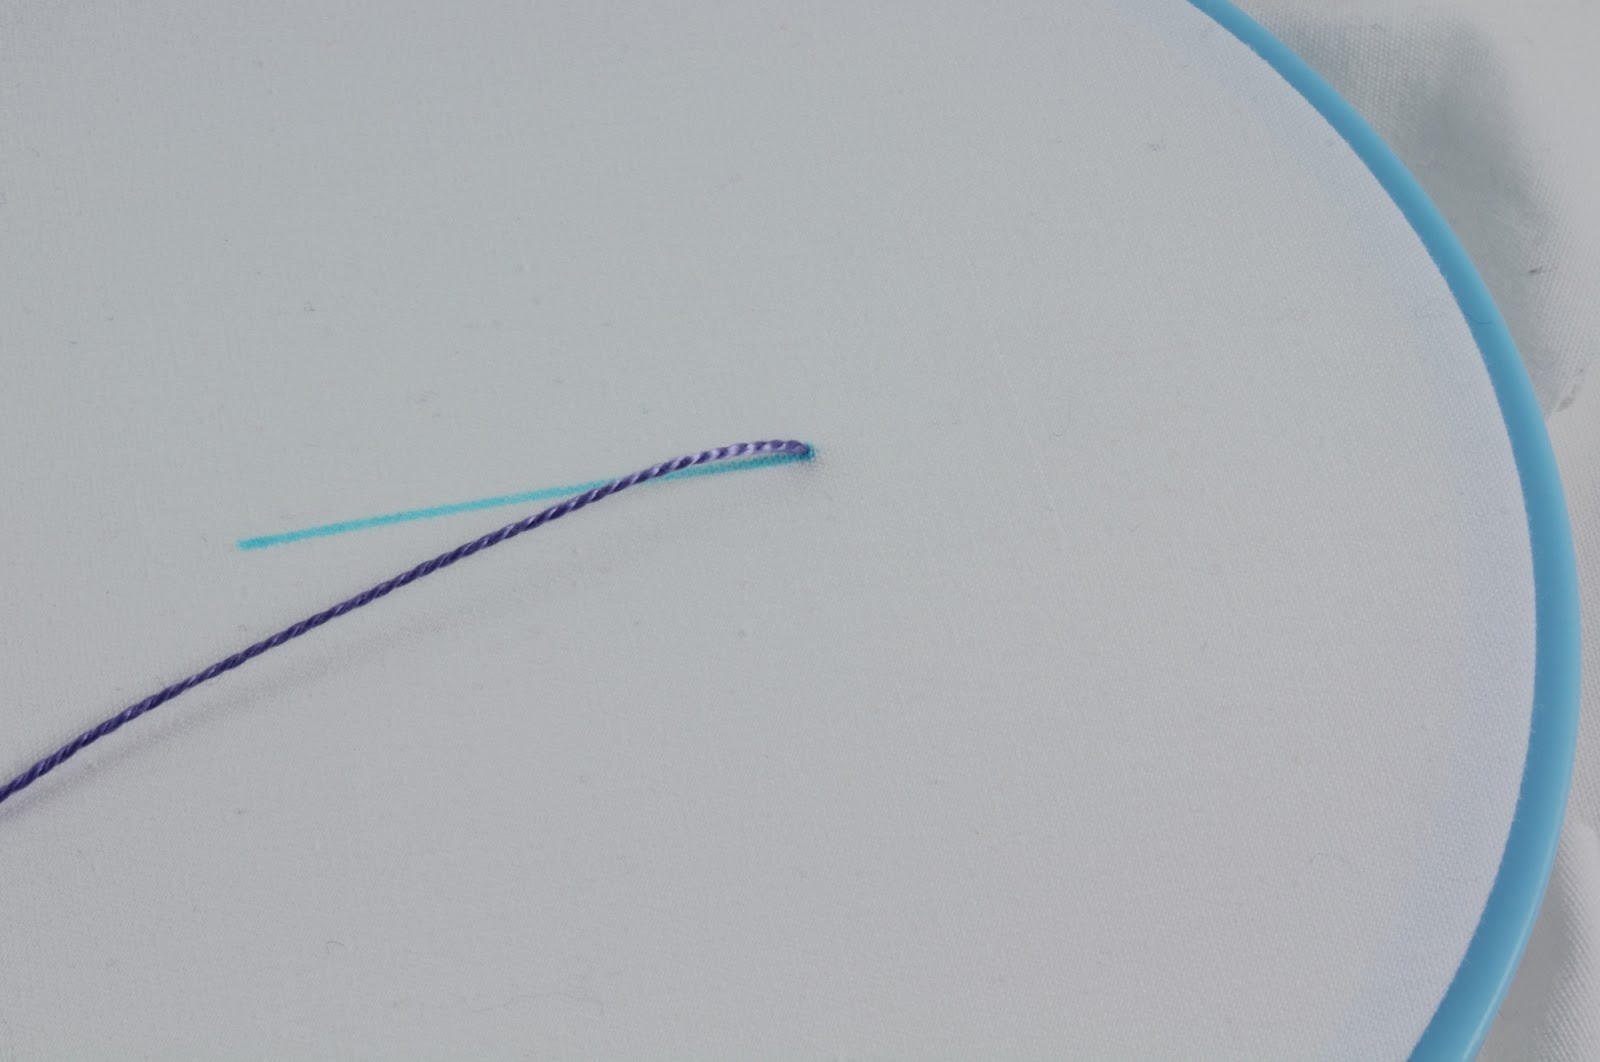
The stitch is worked from right to left.  The first step is to come up through the fabric at the right end of the stitching line:


Pull the floss all the way through and lay it against the stitching or pattern line:


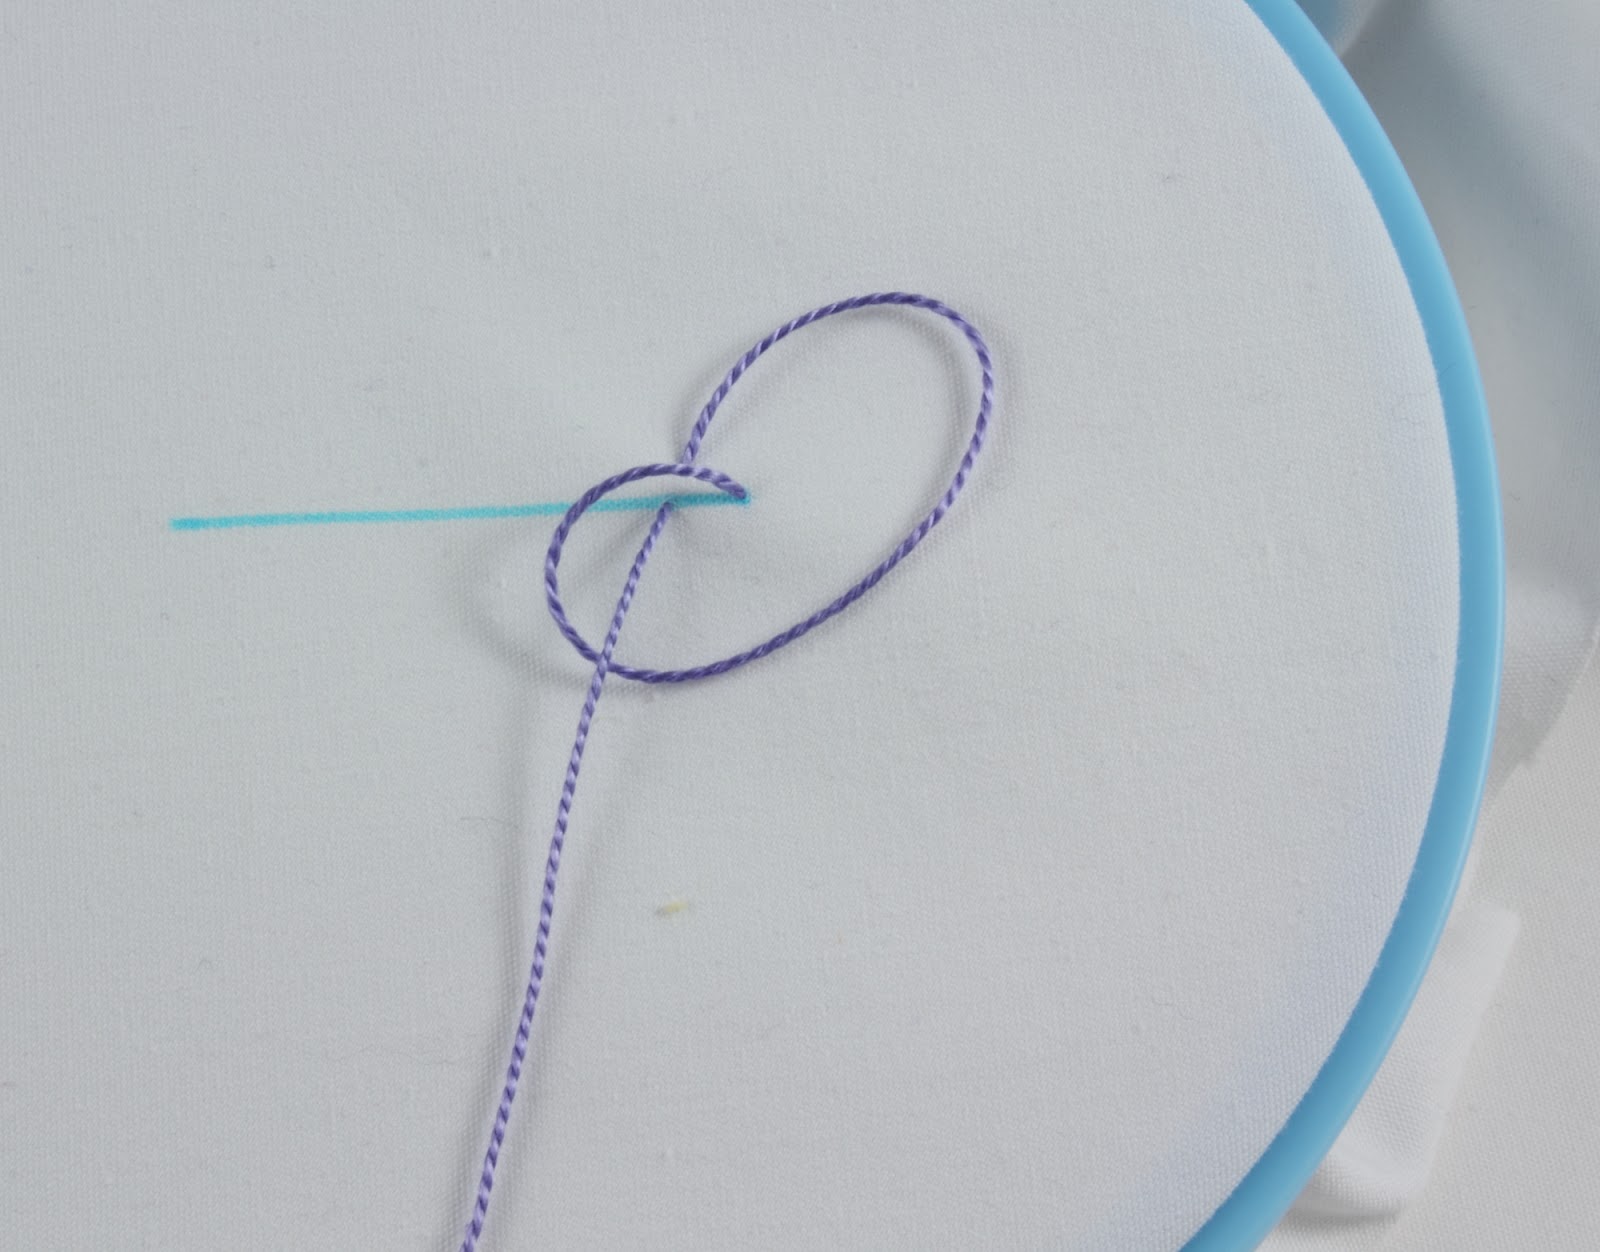
Now bring your needle all the way around to the right and above the stitching line.  This is making a sort of loop:


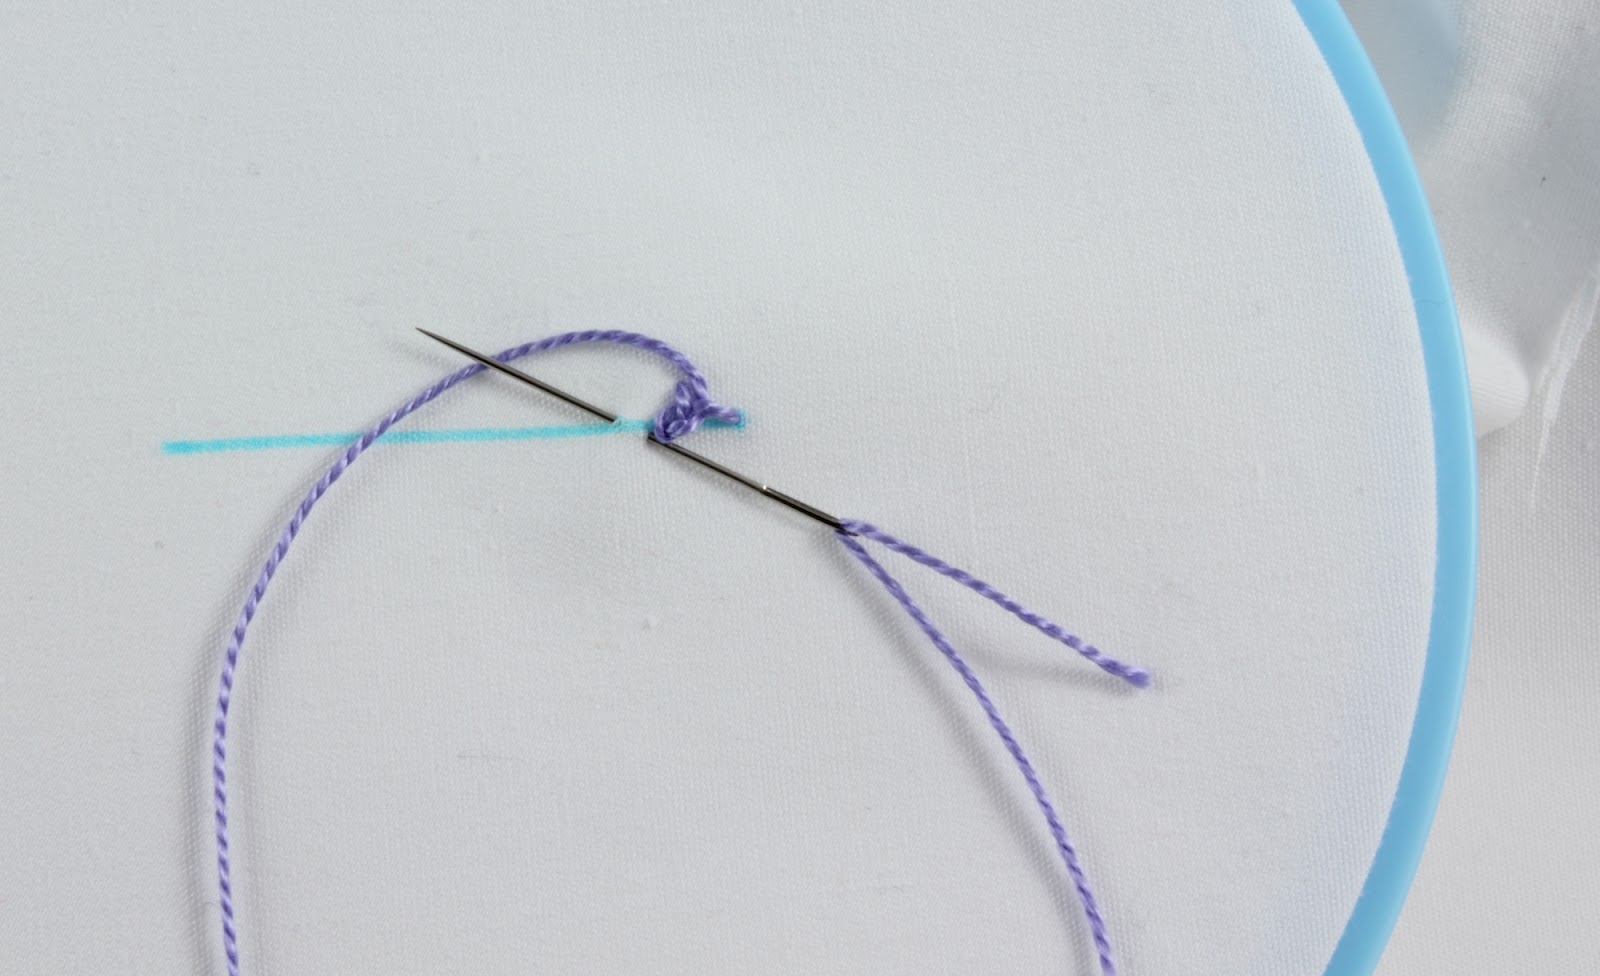
The needle goes into the fabric a little above the stitching line and emerges on the stitching line - notice it is emerging under the working floss that is laying on the stitching line:


Start pulling the needle through but now the needle is going to pass over the top of the bottom edge of the loop:


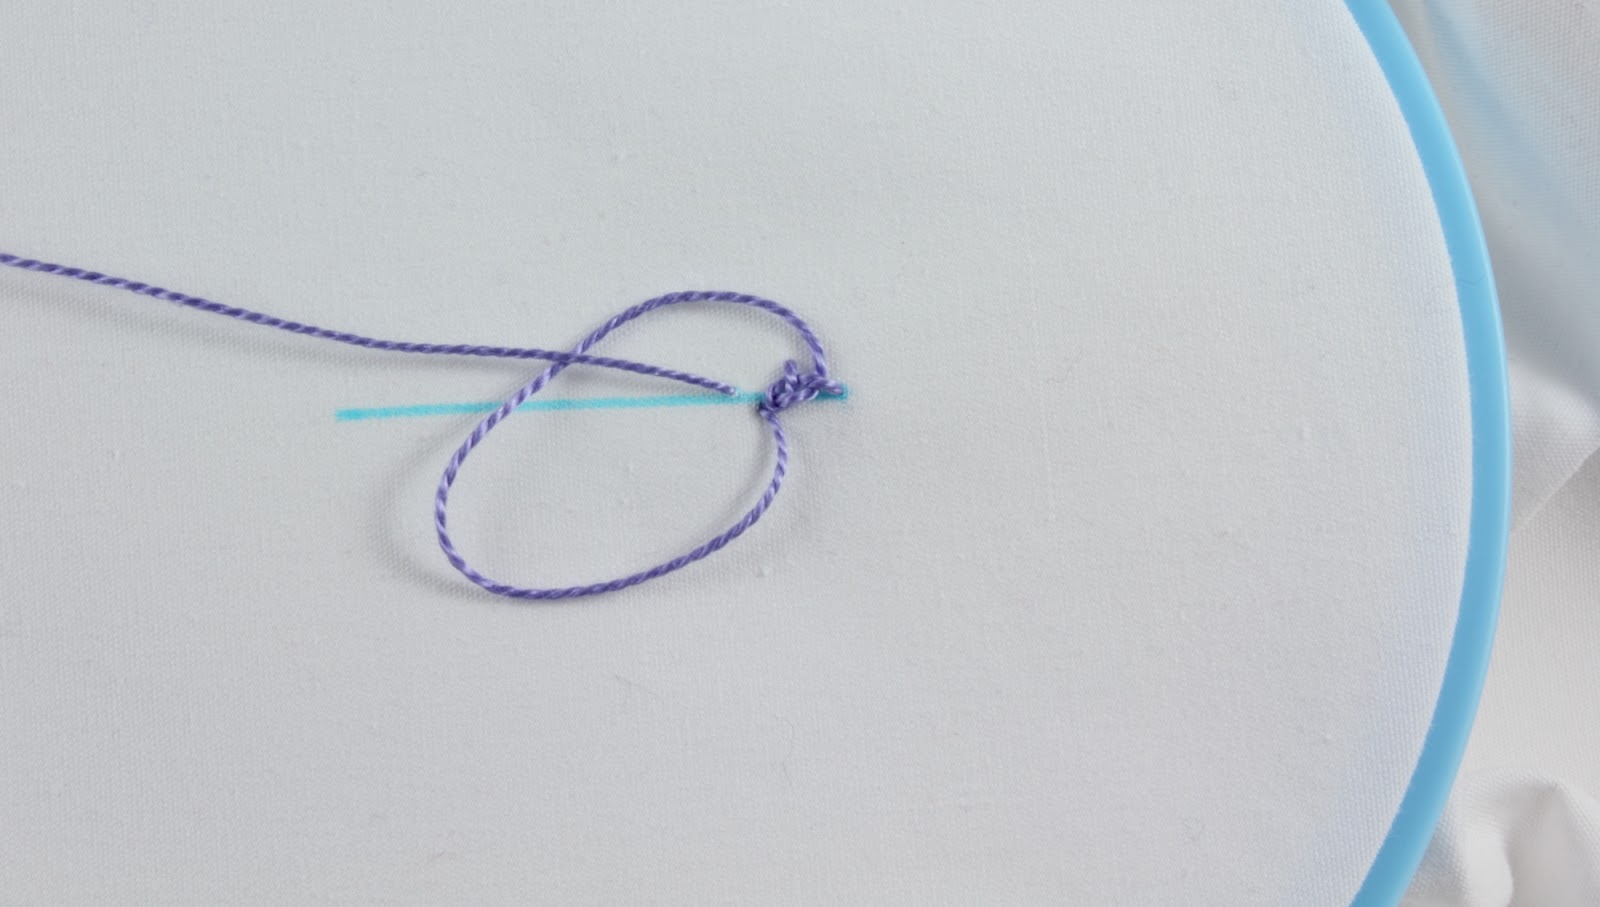
Keep pulling and see the loop tightening:


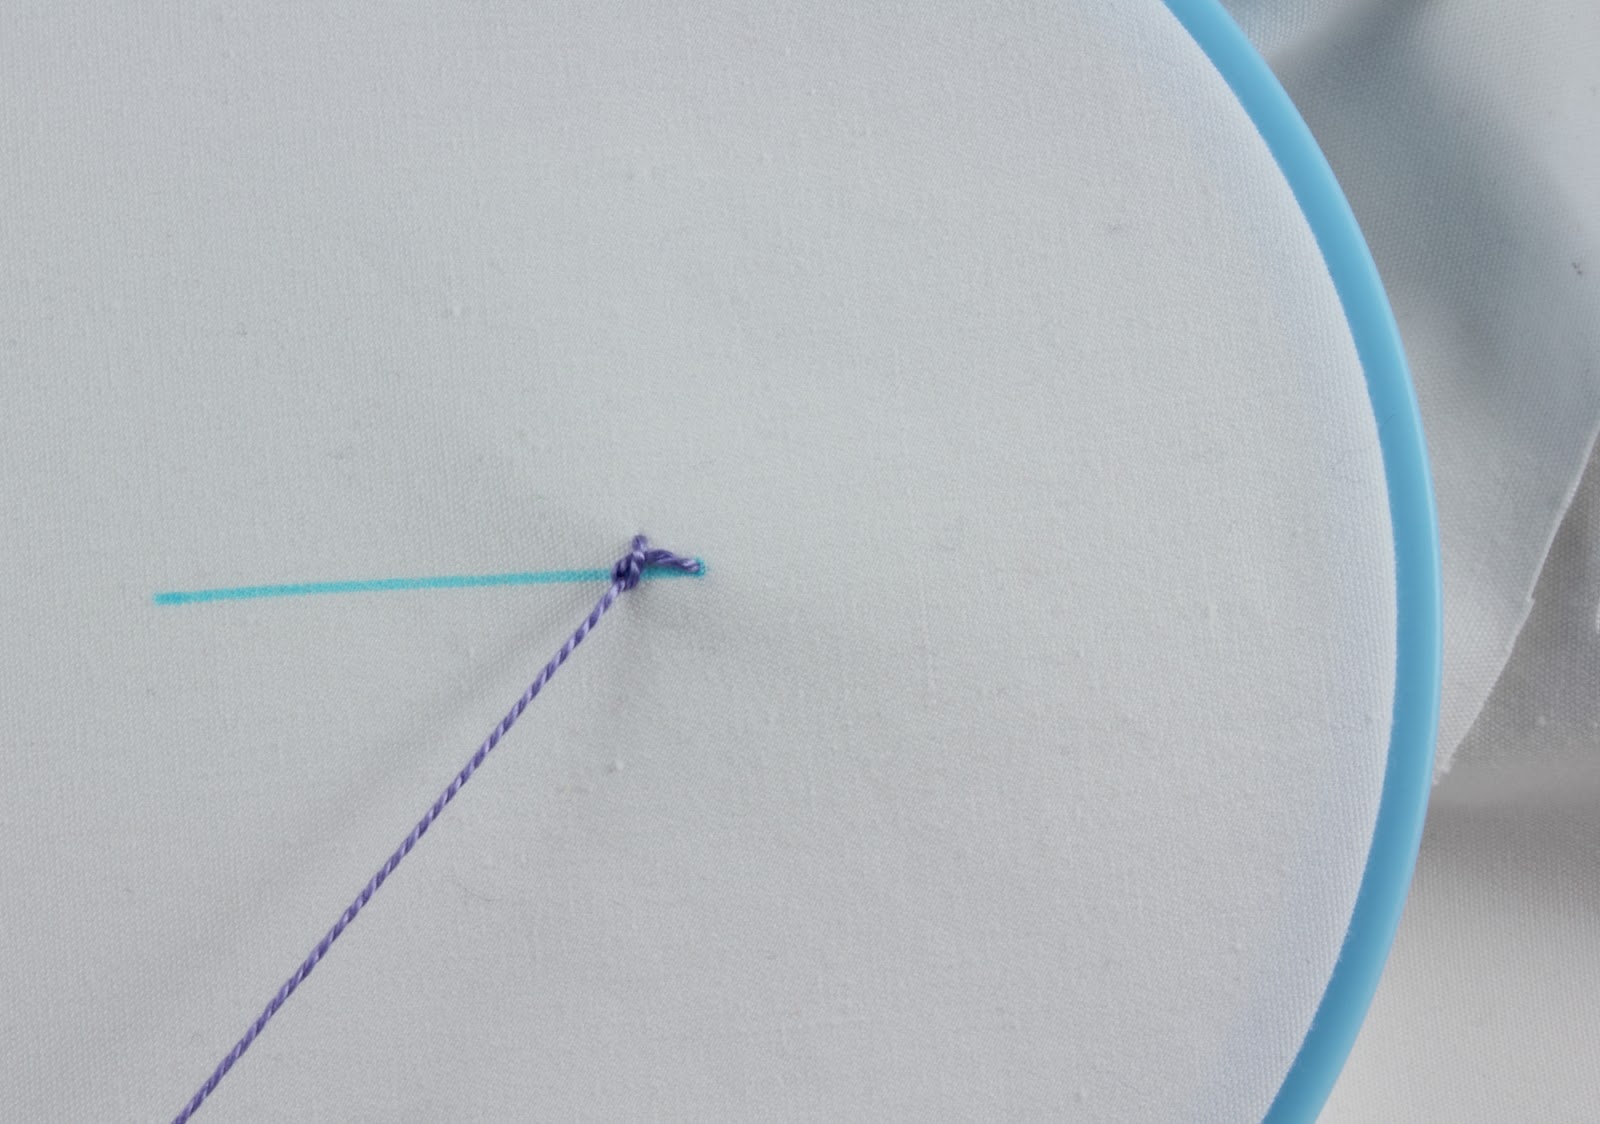
Pull all the way through and a bit to the left until a knot forms.  The knot will form to the left of where your floss fist emerged:


Bring the needle around to the right and slide the needle under the floss that first emerged.  The needle tip is going between the point where you very first came up through the fabric and the knot - don't pierce the fabric, just slide under the floss:


Here is another view:


Slide all the way under and around to the left:


Pull tight and bring your needle around to the right, below the stitching line:


Now the needle is going to go into the fabric a bit below the stitching line and emerge on the stitching line.  You are taking a slanting stitch to the left.  Notice that the needle tip is going over the top of the working floss:


Pull through as a loop forms:


Pull all the way and the stitch is completed!


To start the next stitch, just like at the beginning, your needle comes all the way around to the right.  It will go into the fabric a little to the left of your first stitch.  The needle goes into the fabric a bit above the stitching line and emerges on the stitching line. 


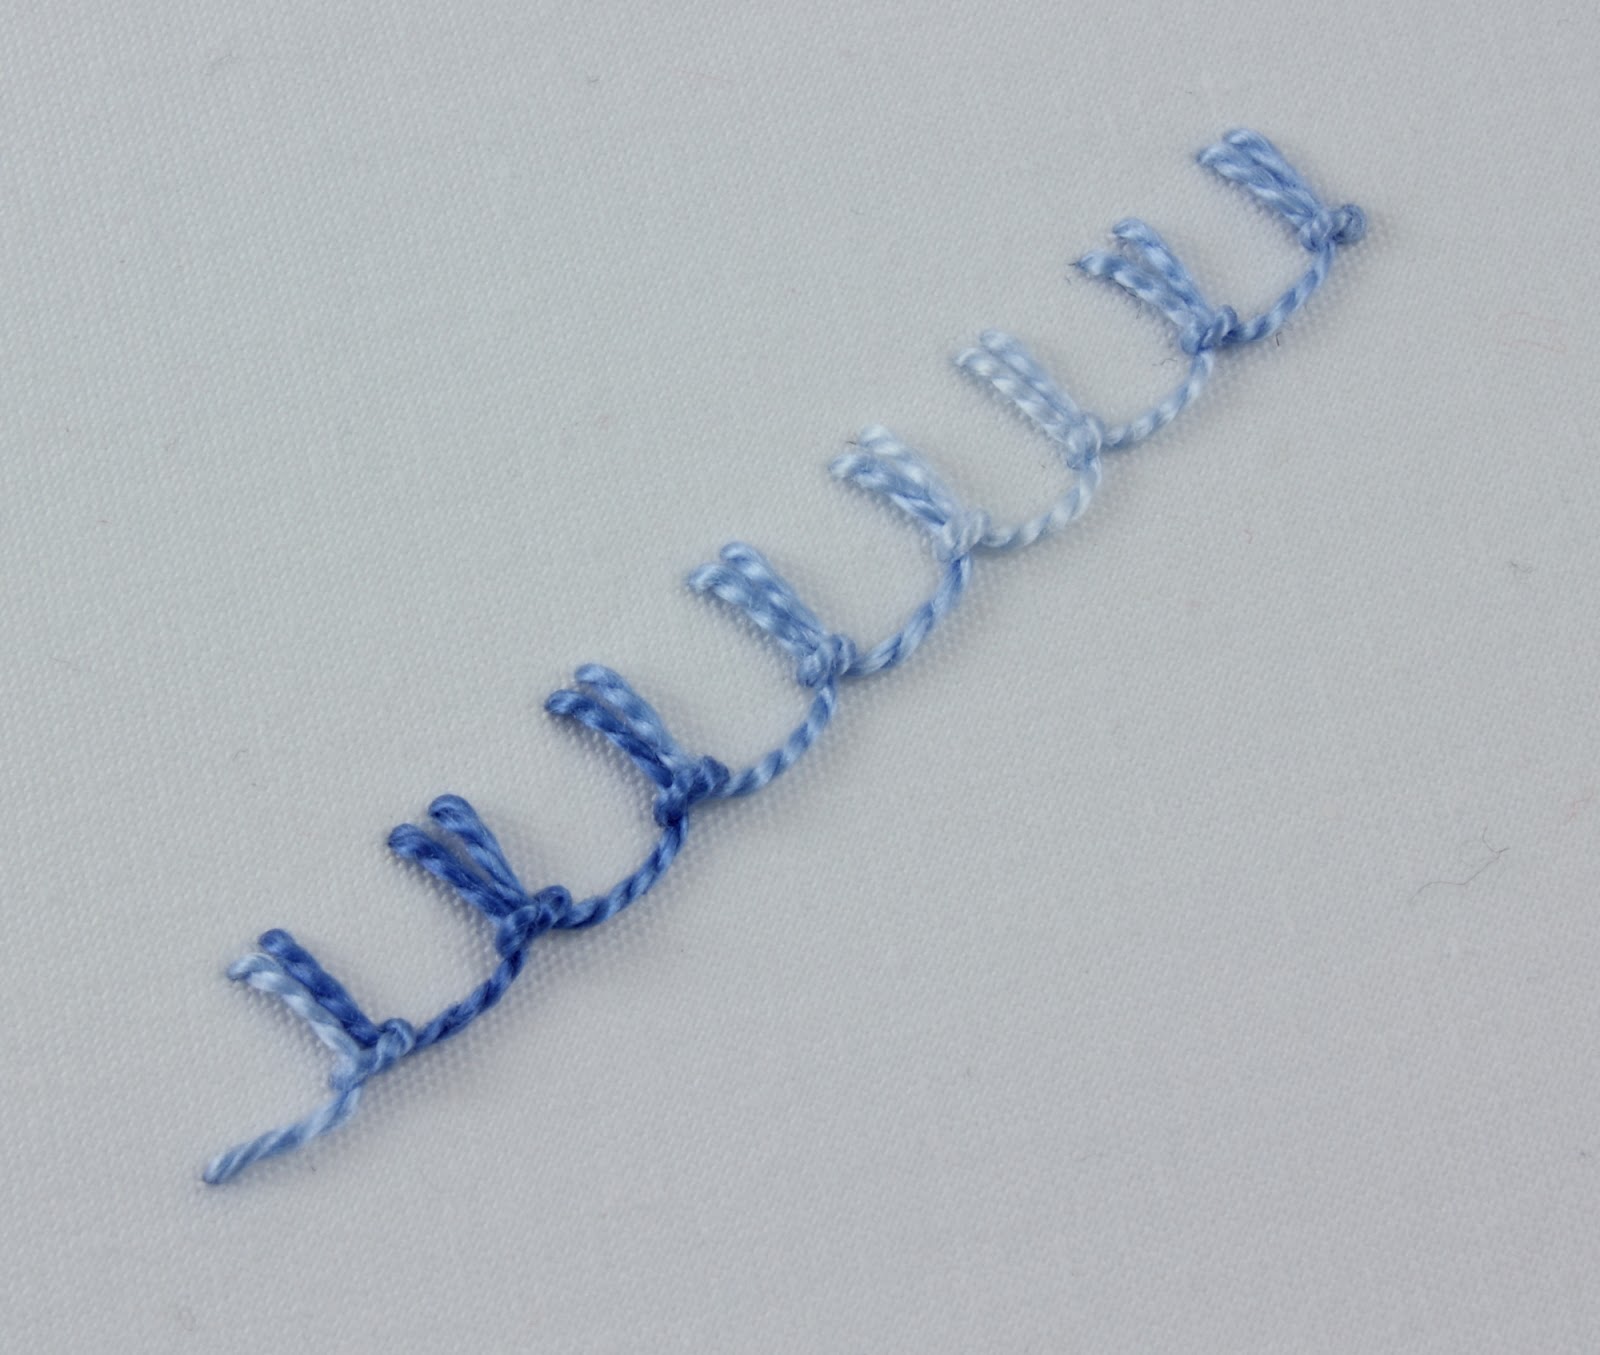
A whole line of these stitches looks really nice:


Here is a look at the underside of this stitch:


Easy and fun!


This is stitch #57 and is in the Knotted Stitches section of 100 Stitches.


Saturday, February 18, 2012

Transferring a new project

I am transferring a pattern from La Patisserie to this fabric. I am really looking forward to stitching this little patisserie! The fabric I am transferring to is a nice 100% cotton.


When I can easily see the pattern through the fabric, I like to tape the pattern to a firm, smooth surface like my cutting mat.  This is one of those "self-healing" mats that you can cut right on.  I love it!


Then I put my fabric over the pattern and tape the fabric in place too.  Now I can use my water soluble marking pen:


I usually keep a copy of the pattern I am transferring so I can refer to it while tracing:


Now I have the pattern ready to go!  This is my big 10" embroidery hoop.  I really like the way it holds the fabric so snug:


My next step is going to be color choices!  So far, I love these:


I will keep posting progress reports on this one!

Wednesday, February 15, 2012

100 Stitches - Up and down buttonhole stitch

100 Stitches time again! This elegant stitch is the Up and Down Buttonhole Stitch:


I love the floss I used for this stitch. It is pearl cotton, color variations DMC #4230


This stitch is easy to do but I suspect I am going to have a hard time explaining my demonstration, even with pictures!  This is one of those stitches that requires guidelines if you want neat, evenly spaced stitches.   I made two horizontal parallel lines, 1/4" apart.


You begin this stitch just like you would the blanket stitch.  Come up through the fabric on the left side edge of the bottom guideline and pull all the way through:


The needle now goes back into the fabric on the top guideline, and back out on the bottom guideline, a little to the right of where the thread first emerged.  Notice that the needle tip is going to go over the working thread:


Pull all the way through - easy blanket stitch:


The needle now goes back into the fabric on the bottom guideline just to the right of the edge of the blanket stitch:


The needle will emerge on the top guideline but...here come the tricky, hard to explain parts:


the needle needs to go over the working thread, so position your thread like this:


As soon as you pull the needle through the fabric, point the needle downward and pull the rest of the way through, and notice the needle tip is going over the working thread:


this forms a loop as you pull down:


pull all the way through and the loop slides into place holding the two stitches together:


Tighten the loop by pulling down and to the right:


and now set up for the next stitch, just like setting up a blanket stitch:


pulling all the way through:


back into the fabric alongside your blanket stitch:


don't forget to make sure your working thread is under the needle like this:


pull up and then


pull downward, again the needle is over the working floss:


pull the loop tight and you have completed two up and down buttonhole stitches!


Just continue with the same steps:


until you have a line of stitching:


This is the underside of the stitching.  I love the clean look:


Lovely!


This is stitch #26 and is listed in the Looped Stitches section of 100 Stitches.